

100 Most Popular Questions when Farming with Chickens
Welcome to ‘100 Most Popular Questions when Farming with Chickens’! Whether you’re a seasoned poultry farmer or just starting out with a backyard flock, this comprehensive guide aims to address the most common inquiries surrounding chicken husbandry. From basic care and housing to nutrition, health, and beyond, we’ve compiled expert answers to help you raise happy, healthy chickens.
Let’s dive into the world of poultry farming and discover solutions to your most pressing questions
How many chickens should I start with?
Answer:
It depends on various factors such as available space, local regulations, and your capacity to care for them. Generally, a small flock of 3-6 chickens is a good starting point for beginners. This size allows you to gain experience without overwhelming yourself with too many birds. Additionally, starting small enables you to focus on providing proper care and attention to each chicken individually. As you become more comfortable and proficient in chicken care, you can consider expanding your flock if desired.
What breed of chicken is best for beginners?
Answer:
For beginners, breeds known for their docile temperament, hardiness, and ease of care are often recommended. Some popular beginner-friendly breeds include:
- Rhode Island Red: Known for their excellent egg production and hardiness in various climates.
- Plymouth Rock (Barred Rock): Dual-purpose breed with good egg production and calm disposition.
- Buff Orpington: Gentle and friendly birds that are excellent layers of brown eggs.
- Australorp: Known for their exceptional egg-laying ability and calm temperament.
- Wyandotte: Dual-purpose breed with a docile nature and beautiful plumage.
- Sussex: Hardy, dual-purpose birds known for their friendly demeanor and good egg production.
These breeds are generally easy to handle, adaptable to different environments, and suitable for beginners looking to raise chickens for eggs, meat, or both.
How do I set up a chicken coop?
Answer:
Setting up a chicken coop involves several essential steps to ensure a safe and comfortable environment for your chickens. Here’s a basic guide:
- Choose a Suitable Location: Select a level area with good drainage and protection from prevailing winds. Ensure the coop is located away from potential predators and has access to sunlight.
- Design the Coop: Decide on the size and design of your coop based on the number of chickens you plan to keep. The coop should provide at least 2-3 square feet of space per chicken, with additional space for nesting boxes and roosts.
- Construct the Coop: Build or purchase a sturdy coop that provides protection from weather, predators, and drafts. Use durable materials such as wood or metal, and ensure the coop is well-ventilated with windows or vents.
- Install Nesting Boxes: Provide nesting boxes lined with clean bedding material for your hens to lay eggs. Each nesting box should be approximately 12×12 inches and placed in a quiet, secluded area of the coop.
- Add Roosting Perches: Install roosting perches inside the coop to give your chickens a place to sleep at night. Perches should be placed higher than the nesting boxes and spaced approximately 8-12 inches apart.
- Provide Food and Water: Set up feeders and waterers inside the coop to provide access to fresh food and water at all times. Choose spill-proof and easy-to-clean options to maintain cleanliness.
- Add Bedding Material: Line the floor of the coop with bedding material such as straw, wood shavings, or shredded paper to absorb moisture and provide insulation. Replace bedding regularly to maintain cleanliness.
- Secure the Coop: Ensure the coop is predator-proof by adding locks or latches to doors and windows, burying wire mesh around the perimeter to prevent digging, and covering openings with sturdy hardware cloth.
- Provide Access to Outdoor Run: If possible, attach an outdoor run to the coop to give your chickens access to fresh air, sunlight, and foraging opportunities. Make sure the run is securely fenced to prevent escapes and protect against predators.
- Maintain Regular Cleaning and Maintenance: Clean the coop regularly to remove waste, replace bedding, and sanitize surfaces to prevent the buildup of harmful bacteria. Perform routine inspections for signs of damage or wear and make repairs as needed.
What should I feed my chickens?
Answer:
Chickens require a balanced diet to maintain good health and productivity. Here’s what you should feed your chickens:
- Chicken Feed: A commercial chicken feed formulated specifically for the life stage of your chickens (starter, grower, layer, or broiler) is the foundation of their diet. These feeds contain the necessary nutrients, vitamins, and minerals to support growth, egg production, or meat development.
- Protein: Chickens require protein for muscle development, feather growth, and egg production. Ensure their feed contains adequate protein levels, or supplement with protein-rich foods such as soybean meal, fish meal, or mealworms.
- Grains: Grains such as corn, wheat, barley, and oats can be included in their diet as a source of energy. These can be offered whole or cracked, depending on the age and size of your chickens.
- Calcium: Calcium is essential for eggshell formation in laying hens. Provide a source of calcium, such as crushed oyster shells or limestone, free-choice in a separate feeder.
- Grit: Chickens lack teeth and rely on grit to grind their food in their gizzard. Offer insoluble granite or flint grit to help with digestion, especially if your chickens do not have access to soil where they can naturally pick up grit.
- Fresh Greens: Leafy greens and vegetable scraps are nutritious additions to your chickens’ diet. Offer a variety of greens such as lettuce, kale, spinach, and cabbage. Avoid feeding them toxic plants such as nightshade or rhubarb.
- Fruits: Fruits like apples, berries, melons, and citrus can be given as treats in moderation. Remove any seeds or pits before feeding.
- Insects and Worms: Chickens are natural foragers and enjoy hunting for insects, worms, and other small creatures. They can be given treats such as mealworms, crickets, or earthworms as a protein-rich snack.
- Kitchen Scraps: Leftover fruits, vegetables, bread, pasta, and cooked grains can be fed to chickens as long as they are fresh and not spoiled. Avoid feeding them foods high in salt, sugar, or fat.
- Clean Water: Provide fresh, clean water to your chickens at all times. Water is essential for hydration, digestion, and overall health.
How often do chickens need to be fed?
Answer:
Chickens should have access to food throughout the day to maintain optimal health and productivity. Here’s a general guideline for feeding chickens:
- Ad Libitum Feeding: Provide a constant supply of feed for your chickens to access whenever they need it. This is known as ad libitum feeding and allows chickens to regulate their own intake according to their nutritional needs.
- Daily Feeding: Check feeders once or twice a day to ensure they are adequately filled. Depending on the type of feeder you use and the size of your flock, you may need to refill them more or less frequently.
- Monitor Feed Consumption: Pay attention to how much feed your chickens are consuming each day. Adjust the amount of feed offered based on their appetite and condition. Chickens may eat more during periods of high activity, such as laying or growing.
- Supplemental Feeding: In addition to their regular feed, you can offer supplemental treats such as fresh greens, fruits, grains, or protein-rich snacks like mealworms. These treats should be given in moderation and not exceed more than 10% of their total diet to prevent nutritional imbalances.
- Water: Always ensure your chickens have access to fresh, clean water. Water is essential for digestion, temperature regulation, and overall health. Check waterers daily and refill as needed, especially during hot weather when chickens may drink more.
How much water do chickens need?
Answer:
Chickens need access to an adequate supply of clean, fresh water at all times to maintain hydration, support digestion, regulate body temperature, and ensure overall health.
On average, a laying hen will drink between 0.25 to 0.5 liters (approximately 0.06 to 0.13 gallons) of water per day, depending on factors such as environmental temperature, activity level, and diet. During hot weather or periods of high egg production, water consumption may increase.
To ensure that your chickens have enough water:
- Provide multiple water sources: Place waterers in various locations within the coop and run to ensure all chickens have easy access to water, especially in larger flocks.
- Clean and refill waterers regularly: Check waterers daily to ensure they are clean, free of debris, and filled with fresh water. In hot weather, water may need to be replenished more frequently to prevent overheating.
- Monitor water consumption: Pay attention to how much water your chickens are drinking each day. Sudden changes in water consumption could indicate health issues or environmental stressors.
- Consider waterer design: Choose waterers that are appropriate for your flock size and age. For example, smaller chicks may require shallow water dishes, while adult chickens may prefer nipple drinkers or automatic waterers.
- Protect waterers from contamination: Keep waterers elevated off the ground to prevent dirt, bedding, and droppings from contaminating the water. Consider using covers or lids to protect water from rain or debris.
How do I keep my chickens safe from predators?
Answer:
Keeping chickens safe from predators is essential for their well-being. Here are some strategies to protect your flock:
- Secure Coop and Run: Ensure that your chicken coop and outdoor run are securely built with sturdy materials such as hardware cloth or welded wire mesh to prevent predators from digging under or chewing through. Cover openings with predator-proof fencing or netting, and reinforce doors and windows with locks or latches.
- Install Predator-Proof Fencing: Surround your coop and run with a perimeter fence that is buried several inches underground and extends above ground to deter climbing predators like raccoons or foxes. Use electric fencing for added security, especially in areas with larger predators like coyotes or bears.
- Close Coop at Night: Predators are most active at night, so make sure to securely close and lock your coop doors and windows before dusk. Install automatic coop door openers that can be set to close at a specific time each evening and open again in the morning.
- Use Motion-Activated Lights or Alarms: Install motion-activated lights or alarms around your coop and run to startle nocturnal predators and deter them from approaching. Bright lights or loud noises can be effective in scaring away potential threats.
- Keep Surroundings Clear: Trim back vegetation and remove debris from around the coop and run to eliminate hiding spots for predators. Keep feed and water containers clean and stored securely to avoid attracting unwanted visitors.
- Use Guard Animals: Consider keeping guard animals such as dogs, llamas, or geese to protect your chickens from predators. These animals can alert you to potential threats and deter predators with their presence and vocalizations.
- Set Traps: Use live traps or humane traps to capture and relocate smaller predators such as raccoons, opossums, or rats that may pose a threat to your chickens. Check local regulations and follow humane trapping guidelines.
- Monitor Surroundings: Keep an eye on your chickens and their surroundings during the day to look for signs of predator activity, such as tracks, scat, or damage to fencing. Address any vulnerabilities promptly to prevent future attacks.
Do I need a rooster for my hens to lay eggs?
Answer:
No, you do not need a rooster for your hens to lay eggs. Hens will lay eggs regardless of whether there is a rooster present.
Hens have ovaries that produce eggs regularly, typically one egg per day, regardless of whether the eggs are fertilized or not. If a rooster is present and mates with the hens, the eggs may become fertilized, but this is not necessary for egg production.
However, if you want fertilized eggs for hatching chicks, then you will need a rooster to mate with the hens. Otherwise, if you’re only interested in collecting eggs for consumption or sale, hens will lay unfertilized eggs without the need for a rooster.
How do I tell if a chicken is sick?
Answer:
Recognizing signs of illness in chickens is important for maintaining the health of your flock. Here are some common signs that indicate a chicken may be sick:
- Change in Appetite: A decrease or increase in food consumption can be a sign of illness. Pay attention to changes in eating habits or refusal to eat.
- Change in Thirst: An increase or decrease in water consumption may indicate health issues. Monitor water consumption and check for signs of dehydration.
- Lethargy: Sick chickens may appear lethargic, weak, or reluctant to move. They may spend more time sitting or lying down than usual.
- Ruffled Feathers: Healthy chickens have smooth, shiny feathers. Sick chickens may appear unkempt with ruffled or puffed-up feathers.
- Weight Loss: Significant weight loss or a decrease in body condition can indicate illness. Feel the chicken’s breastbone and abdomen for signs of emaciation.
- Respiratory Symptoms: Wheezing, coughing, sneezing, or difficulty breathing are signs of respiratory infections or other respiratory issues.
- Discharge: Any discharge from the eyes, nose, or vent (the opening near the tail) may indicate illness, especially if it is thick, discolored, or foul-smelling.
- Swelling or Lumps: Swollen joints, abnormal lumps or bumps, or fluid accumulation under the skin may indicate infection, injury, or tumor growth.
- Diarrhea or Abnormal Droppings: Changes in the color, consistency, or frequency of droppings can indicate digestive issues, parasites, or other health problems.
- Behavioral Changes: Aggression, isolation, or abnormal behavior such as head shaking, head tilting, or circling may indicate neurological issues or pain.
- Egg Production: A decrease in egg production, soft-shelled eggs, or abnormal eggs may indicate underlying health problems in laying hens.
What vaccinations do chickens need?
Answer:
Vaccinations play a crucial role in preventing common diseases in poultry flocks. The specific vaccinations required for chickens may vary depending on factors such as geographic location, farm management practices, and the presence of certain diseases in the area. However, some common vaccinations for chickens include:
- Marek’s Disease Vaccine: Marek’s disease is a highly contagious viral disease that affects chickens and causes tumors, paralysis, and death. Vaccination against Marek’s disease is typically administered to day-old chicks through subcutaneous or intramuscular injection.
- Newcastle Disease Vaccine: Newcastle disease is a highly contagious viral disease that affects chickens, causing respiratory, neurological, and gastrointestinal symptoms. Vaccination against Newcastle disease is commonly administered to day-old chicks via drinking water or spray vaccination.
- Infectious Bronchitis Vaccine: Infectious bronchitis is a highly contagious viral respiratory disease that affects chickens and causes respiratory distress, decreased egg production, and poor egg quality. Vaccination against infectious bronchitis is typically administered to day-old chicks through drinking water or spray vaccination.
- Avian Influenza Vaccine: Avian influenza, or bird flu, is a highly contagious viral disease that affects chickens and can cause respiratory, gastrointestinal, and neurological symptoms. Vaccination against avian influenza may be recommended in areas where the disease is prevalent, particularly in commercial poultry operations.
- Fowl Pox Vaccine: Fowl pox is a viral disease that affects chickens and causes wart-like lesions on the skin, mouth, and respiratory tract. Vaccination against fowl pox is typically administered to day-old chicks via wing web or wing web stab vaccination.
- Coccidiosis Vaccine: Coccidiosis is a common parasitic disease in chickens caused by protozoa of the genus Eimeria. Vaccination against coccidiosis may be administered in the hatchery or via feed or drinking water to provide early protection against the disease.
- Salmonella Vaccine: Salmonella is a bacterial pathogen that can cause foodborne illness in humans and is commonly found in poultry. Vaccination against Salmonella may be recommended as part of a comprehensive food safety program in commercial poultry operations.
How do I prevent my chickens from pecking each other?
Answer:
Preventing feather pecking and cannibalism in chickens requires a combination of management strategies and environmental enrichment to promote good behavior and reduce stress. Here are some effective ways to prevent chickens from pecking each other:
- Provide Adequate Space: Overcrowding can lead to stress and aggression among chickens. Ensure that your coop and outdoor run provide enough space for each bird to move around comfortably and engage in natural behaviors.
- Provide Environmental Enrichment: Boredom and lack of stimulation can contribute to feather pecking. Provide a variety of enrichment activities such as perches, dust baths, hanging treats, and access to fresh vegetation for pecking and scratching.
- Ensure Proper Nutrition: Ensure that your chickens are receiving a balanced diet with adequate protein, vitamins, and minerals. Poor nutrition can lead to feather pecking as chickens may engage in cannibalism to fulfill nutrient deficiencies.
- Monitor Social Dynamics: Pay attention to the social hierarchy within your flock and intervene if bullying behavior is observed. Separate aggressive birds or provide additional hiding spots to allow weaker birds to escape aggression.
- Maintain Good Hygiene: Dirty, crowded, or poorly ventilated living conditions can increase stress and susceptibility to pecking behavior. Keep the coop clean, provide fresh bedding regularly, and ensure proper ventilation to maintain a healthy environment.
- Manage Light Levels: Bright lighting or sudden changes in lighting can trigger aggressive behavior in chickens. Provide a gradual transition between light and dark periods and avoid excessive lighting intensity.
- Address Underlying Health Issues: Health problems such as parasites, respiratory infections, or injuries can increase stress and trigger pecking behavior. Monitor your flock for signs of illness and provide prompt veterinary care as needed.
- Use Anti-Pecking Products: Products such as anti-pecking sprays, bitter-tasting solutions, or anti-pecking devices like pinless peepers or blinders can help deter pecking behavior in aggressive birds.
- Introduce New Birds Carefully: Gradually introduce new birds to an existing flock to minimize aggression and territorial behavior. Use temporary barriers to allow birds to see and smell each other before direct contact.
- Be Consistent and Patient: Addressing feather pecking behavior may require time and patience. Implementing consistent management practices and observing changes in behavior over time can help identify effective strategies for preventing pecking in your flock.
How do I keep my coop clean?
Answer:
Keeping your chicken coop clean is essential for maintaining a healthy environment for your birds and reducing the risk of disease. Here are some steps to help you keep your coop clean:
- Regularly Remove Droppings: Remove droppings from the coop floor and nesting boxes daily to prevent buildup and minimize odor. Use a rake, shovel, or scraper to scoop up droppings, and dispose of them in a compost bin or designated waste area.
- Replace Bedding Regularly: Replace bedding material such as straw, wood shavings, or shredded paper in the coop and nesting boxes regularly to absorb moisture and control odor. Aim to replace bedding at least once a week or more frequently if it becomes soiled.
- Scrub Surfaces: Clean and disinfect coop surfaces periodically to remove dirt, bacteria, and parasites. Use a mild detergent or poultry-safe disinfectant diluted in water, and scrub surfaces with a stiff brush or scrubbing pad. Rinse thoroughly with clean water and allow surfaces to dry completely before reintroducing chickens.
- Ventilate the Coop: Proper ventilation is crucial for reducing moisture buildup and preventing respiratory issues in chickens. Ensure that your coop has adequate ventilation openings such as windows, vents, or roof vents to allow fresh air to circulate and remove stale air and moisture.
- Check for Mold and Mildew: Regularly inspect the coop for signs of mold, mildew, or fungal growth, especially in damp areas or where bedding is frequently soiled. Remove any affected bedding or surfaces and disinfect with a poultry-safe fungicide if necessary.
- Manage Moisture: Minimize moisture buildup in the coop by providing proper drainage, fixing leaks or gaps in the roof or walls, and using absorbent bedding material. Avoid overwatering plants or using waterers that leak or spill excessively.
- Control Pests: Implement measures to control pests such as flies, mites, and rodents, which can contribute to coop dirtiness and spread disease. Use pest-proof feeders and waterers, regularly clean up spilled feed, and consider using natural or chemical pest control methods as needed.
- Inspect Regularly: Conduct regular inspections of the coop for signs of wear, damage, or areas that need repair. Repair any broken or damaged surfaces, replace worn-out hardware or fencing, and address any potential safety hazards.
- Practice Biosecurity: Minimize the introduction and spread of disease by practicing good biosecurity measures, such as limiting visitor access to the coop, quarantining new birds before introducing them to the flock, and disinfecting equipment and footwear.
What bedding material is best for chickens?
Answer:
There are several bedding materials suitable for use in chicken coops, each with its own benefits and considerations. Some common bedding materials for chickens include:
- Straw: Straw is a traditional and economical bedding choice for chicken coops. It provides good insulation, absorbs moisture well, and is comfortable for chickens to nest in. However, straw can be dusty and may need to be replaced frequently to prevent mold and mildew growth.
- Wood Shavings: Wood shavings, such as pine or cedar, are another popular bedding option for chickens. They are absorbent, reduce odors, and provide a soft surface for chickens to walk on. Make sure to use kiln-dried shavings to prevent respiratory issues, and avoid using cedar shavings if you have sensitive chickens as the scent may irritate their respiratory system.
- Shredded Paper: Shredded paper can be used as bedding material for chickens, especially if you have access to a large quantity of paper waste. It is absorbent, easy to compost, and can be a cost-effective option. However, shredded paper may not provide as much insulation as other bedding materials and may need to be replaced more frequently.
- Hemp Bedding: Hemp bedding is a relatively new bedding option for chickens that is becoming increasingly popular. It is highly absorbent, reduces odors, and is biodegradable. Hemp bedding is also dust-free and non-toxic, making it suitable for chickens with respiratory sensitivities.
- Sand: Sand is a low-maintenance bedding option that provides good drainage and is easy to clean. It is also effective at controlling odors and reducing the risk of pests such as mites and lice. However, sand can be heavy and may require more frequent cleaning to prevent the buildup of waste.
- Dried Leaves or Grass Clippings: Dried leaves or grass clippings can be used as bedding material for chickens, especially if you have access to a large quantity of organic material. They provide good insulation, absorb moisture, and are compostable. However, make sure to use only pesticide-free leaves or grass clippings.
Also see:
How do I protect my chickens from extreme weather?
Answer:
Protecting chickens from extreme weather is essential for maintaining their health and well-being. Here are some strategies to help keep your chickens safe during hot and cold weather:
Hot Weather:
- Provide Shade: Ensure that your chicken coop and outdoor run have adequate shade to protect chickens from direct sunlight. Use natural shade from trees or install shade cloth or tarps to create shaded areas.
- Ventilation: Ensure proper ventilation in the coop to allow fresh air to circulate and prevent heat buildup. Install windows, vents, or fans to promote airflow and reduce humidity.
- Fresh Water: Provide plenty of fresh, cool water for your chickens to drink throughout the day. Consider adding electrolytes or vitamins to the water during periods of extreme heat to help chickens stay hydrated.
- Misting Systems: Install misting systems or sprinklers in the chicken run to provide relief from the heat. Misting chickens with water can help lower their body temperature and reduce heat stress.
- Cool Treats: Offer frozen treats such as fruits, vegetables, or ice cubes for chickens to peck at during hot weather. Frozen treats can help lower body temperature and provide additional hydration.
- Limit Activity: Encourage chickens to rest and stay cool during the hottest parts of the day by providing shaded areas and minimizing stressful activities such as handling or moving.
Cold Weather:
- Insulation: Ensure that the chicken coop is well-insulated to retain heat and provide a comfortable environment for chickens during cold weather. Add extra bedding material such as straw or wood shavings to help trap heat and provide insulation.
- Draft Protection: Seal any drafts or gaps in the coop to prevent cold air from entering and warm air from escaping. Use weather stripping, caulking, or insulation to seal cracks around doors, windows, and vents.
- Heat Source: Provide supplemental heat sources such as heat lamps, ceramic heaters, or heated perches to keep chickens warm during cold weather. Place heat sources away from bedding material and ensure they are installed safely to prevent fire hazards.
- Dry Bedding: Keep bedding material dry and clean to prevent moisture buildup and frostbite. Replace wet bedding regularly and add extra bedding as needed to provide warmth and insulation.
- Roosting Bars: Install roosting bars or platforms at different heights in the coop to allow chickens to perch and keep their feet off the cold ground. Chickens naturally fluff up their feathers to trap warm air close to their bodies while roosting.
- Protect Combs and Wattles: Apply petroleum jelly or a commercial poultry balm to chickens’ combs and wattles to prevent frostbite during cold weather. Keep chickens’ combs and wattles dry to minimize the risk of frostbite.
How often do chickens lay eggs?
Answer:
The frequency of egg laying in chickens depends on various factors such as breed, age, daylight hours, diet, and environmental conditions. However, on average, most laying hens will lay eggs consistently throughout the year, with peak production occurring during the spring and summer months when daylight hours are longer.
In general, chickens will lay eggs approximately every 24 to 26 hours, with some variation depending on individual factors and breed characteristics. Most laying breeds are capable of producing around 200 to 300 eggs per year under optimal conditions.
During the first year of laying, pullets (young hens) may lay eggs less frequently as their reproductive systems mature. Egg production typically increases as pullets reach maturity, usually around 5 to 6 months of age, and then gradually declines as they age.
Factors such as stress, disease, poor nutrition, molting, and extreme weather conditions can also impact egg production and cause fluctuations in laying frequency. It’s important to provide a balanced diet, proper housing, and good management practices to support consistent egg production in your flock.
Additionally, some breeds are known for their exceptional egg-laying ability and may produce eggs more frequently than others. Breeds such as Leghorn, Rhode Island Red, Sussex, and Australorp are popular choices for egg production due to their high productivity and reliability.

How do I collect and store eggs?
Answer:
Collecting and storing eggs properly is important to maintain their freshness and quality. Here’s how to collect and store eggs from your chickens:
- Collect Eggs Regularly: Collect eggs from the nesting boxes at least once or twice a day to prevent them from getting dirty or broken. Collecting eggs frequently also reduces the risk of broody hens attempting to hatch them.
- Handle Eggs Carefully: Handle eggs gently to avoid cracking or damaging the shells. Use both hands to support the egg and avoid dropping or jostling it. Dirty eggs can be gently wiped clean with a dry cloth or brush, but avoid washing eggs as this can remove the protective bloom and increase the risk of contamination.
- Inspect Eggs: Inspect each egg for cracks, abnormalities, or signs of spoilage before storing them. Discard any eggs that are cracked, dirty, or damaged, as they may harbor bacteria or pathogens.
- Store Eggs in a Cool Place: Store eggs in a cool, dry place away from direct sunlight and temperature extremes. Ideally, eggs should be stored at temperatures between 45°F and 55°F (7°C to 13°C) with a relative humidity of around 70%.
- Use Clean Egg Cartons or Trays: Place eggs in clean egg cartons or trays with the small end facing down to help maintain their freshness and prevent the yolk from moving away from the center. Avoid overcrowding eggs in the carton to allow for proper air circulation.
- Rotate Eggs: Rotate eggs regularly to ensure even distribution of air and prevent them from sitting in one position for too long. This helps maintain the integrity of the egg contents and prolongs freshness.
- Label Eggs: If you have multiple batches of eggs from different dates, label each carton with the date of collection to track their freshness. Use older eggs first to ensure they are consumed before they expire.
- Use Refrigeration if Necessary: While eggs can be stored at room temperature for short periods, refrigeration can help extend their shelf life and maintain freshness. If you live in a warm climate or during hot weather, consider storing eggs in the refrigerator to prevent spoilage.
Can I keep chickens in my backyard?
Answer:
Yes, you can keep chickens in your backyard, as long as you adhere to local regulations, zoning ordinances, and any homeowner association rules that may apply. Many urban and suburban areas allow backyard chicken keeping, but it’s important to check with your local authorities to determine the specific regulations in your area.
Here are some considerations to keep in mind when keeping chickens in your backyard:
- Check Local Regulations: Research the laws and regulations governing backyard chicken keeping in your area. Look for restrictions on the number of chickens allowed, setback requirements, coop size and design specifications, and any permits or licenses required.
- Consider Neighbor Relations: Talk to your neighbors about your plans to keep chickens and address any concerns they may have regarding noise, odor, or other potential issues. Being a considerate and responsible chicken keeper can help maintain positive relationships with your neighbors.
- Choose Suitable Breeds: Select chicken breeds that are well-suited to backyard environments and neighborhood settings. Consider factors such as noise level, egg production, temperament, and suitability for confinement.
- Provide Adequate Housing: Provide a secure and predator-proof coop and outdoor run for your chickens to roost, nest, and forage. Ensure that the coop is properly ventilated, insulated, and equipped with nesting boxes, perches, and bedding material for comfort.
- Manage Waste Properly: Properly manage chicken waste by regularly cleaning the coop and run to prevent odor, pests, and potential health hazards. Composting chicken manure can be a sustainable way to recycle waste and create nutrient-rich fertilizer for your garden.
- Practice Good Biosecurity: Implement biosecurity measures to prevent the spread of disease between your flock and other poultry or wildlife. Quarantine new birds before introducing them to the flock, practice strict hygiene when handling chickens, and limit access to visitors and other animals.
- Educate Yourself: Take the time to educate yourself about proper chicken care, nutrition, health, and behavior. Join online forums or local poultry clubs to connect with other backyard chicken keepers and gain valuable knowledge and support.
Keeping chickens in your backyard can be a rewarding and enjoyable experience, providing fresh eggs, natural pest control, and a connection to food production. By following local regulations and implementing responsible management practices, you can successfully raise chickens in your backyard while being a good neighbor and steward of the environment.
How much space do chickens need?
Answer:
The amount of space chickens need depends on several factors, including the breed of chickens, their housing setup, and whether they have access to an outdoor run. Here are some general guidelines for space requirements:
- Indoor Space: Chickens housed indoors, such as in a coop or barn, should have enough space to move around comfortably, roost, nest, and engage in natural behaviors. The recommended minimum space allowance per chicken inside the coop is about 2 to 4 square feet. However, providing more space is always better for the birds’ well-being.
- Outdoor Space: If chickens have access to an outdoor run or free-range area, they will require less indoor space. The recommended minimum space allowance per chicken in an outdoor run is about 8 to 10 square feet. Again, providing more space allows chickens to forage, exercise, and exhibit natural behaviors more freely.
- Total Space: When calculating the total space needed for your flock, consider both indoor and outdoor areas. For example, if you have a small backyard flock of 6 chickens and provide a coop with 4 square feet per chicken (24 square feet total) and an outdoor run with 10 square feet per chicken (60 square feet total), the total space required would be 84 square feet.
- Consider Flock Dynamics: Keep in mind that overcrowding can lead to stress, aggression, and health problems in chickens. Providing ample space helps prevent behavioral issues such as feather pecking and cannibalism and promotes a harmonious flock dynamic.
- Adjust for Breed and Size: Some chicken breeds are more active or larger than others and may require additional space. Bantam breeds, for example, generally require less space than standard-sized breeds. Consider the specific needs and characteristics of your chosen chicken breeds when planning housing and space requirements.
- Local Regulations: Be sure to check local regulations and zoning ordinances governing backyard chicken keeping in your area, as they may specify minimum space requirements for chickens and other livestock.
Providing adequate space is essential for the health, well-being, and happiness of your chickens. By ensuring that your chickens have enough room to move, forage, and exhibit natural behaviors, you can create a comfortable and enriching environment for your flock.
How do I introduce new chickens to my existing flock?
Answer:
Introducing new chickens to an existing flock can be a delicate process to minimize stress and prevent aggression. Here are steps to help facilitate a smooth introduction:
- Quarantine New Birds: Before introducing new chickens to your existing flock, quarantine them in a separate area for at least 2-4 weeks. This allows you to monitor their health for signs of illness and ensure they are free from parasites or diseases that could spread to your existing flock.
- Visual Introduction: After the quarantine period, allow the new birds and existing flock to see each other without direct contact. Place the new chickens in a separate pen or enclosure within sight of the existing flock for a few days to allow them to become familiar with each other’s presence.
- Provide Separate Space: When introducing new chickens to the existing flock, provide separate space within the coop and outdoor run for the first few days. This allows the birds to establish a pecking order and become accustomed to each other’s presence without direct confrontation.
- Supervise Interactions: Monitor the interactions between the new and existing chickens closely during the introduction process. Keep an eye out for aggressive behavior such as pecking, chasing, or fighting, and intervene if necessary to prevent injuries.
- Introduce New Chickens at Night: Introduce new chickens to the existing flock at night when they are roosting and less likely to be aggressive. Place the new birds on the roost next to the existing flock to minimize disruption and reduce the likelihood of conflict.
- Provide Distractions: Offer distractions such as treats, scratch grains, or fresh vegetables to redirect the chickens’ focus and reduce tension during the introduction process. Providing multiple food and water sources can also help prevent competition and reduce stress.
- Be Patient: Introducing new chickens to an existing flock can take time, and it’s normal for there to be some initial tension and adjustment period. Be patient and allow the chickens to establish their own pecking order and social hierarchy over time.
- Separate Aggressive Birds: If certain birds in the existing flock display excessive aggression toward the new chickens, consider temporarily separating them until they can be reintroduced gradually.
- Provide Adequate Space and Resources: Ensure that your coop and outdoor run provide enough space, perches, nesting boxes, and feeding and watering stations for all chickens to avoid competition and reduce stress.
How do I sex chickens?
Answer:
Sexing chickens, especially when they are young, can be challenging but there are several methods you can use:
- Feather Sexing: Some chicken breeds, such as certain varieties of sex-linked hybrids, exhibit feather sexing traits where male and female chicks have different feather patterns. In these breeds, males typically have lighter-colored feathers on their wingtips compared to females. However, this method is only reliable in specific breeds and may not be applicable to all chickens.
- Vent Sexing: Vent sexing is a method commonly used by experienced poultry professionals to determine the sex of day-old chicks. It involves gently squeezing the chick to expose the cloaca (vent) and examining its shape and size. Males typically have a more prominent and elongated cloaca, while females have a smaller and rounder cloaca. Vent sexing requires expertise and is best performed by trained professionals.
- Wing Sexing: Wing sexing involves examining the wing feathers of day-old chicks to determine their sex. In certain breeds, such as some varieties of sex-linked hybrids, males and females may have differences in the length and shape of their wing feathers. However, wing sexing requires experience and may not be accurate in all breeds.
- Color Sexing: Some chicken breeds, particularly sex-linked hybrids, are bred for specific color patterns that allow for easy sex identification. In these breeds, male and female chicks may have distinct color variations or patterns that make sexing straightforward. However, this method is breed-specific and may not apply to all chickens.
- Secondary Sexual Characteristics: As chickens mature, they develop secondary sexual characteristics that can help differentiate between males and females. These characteristics include comb size, wattle size, and overall size and shape. Roosters typically have larger and more prominent combs and wattles compared to hens. Additionally, roosters may develop pointed saddle feathers and spurs on their legs as they mature.
Keep in mind that sexing chickens accurately can be challenging, especially in younger birds or certain breeds where visual differences are subtle. If you’re unsure about the sex of your chickens, consider consulting with a poultry expert or veterinarian for assistance. Additionally, purchasing sexed chicks from reputable hatcheries can help ensure that you receive the desired gender for your flock.
How do I clip a chicken’s wings?
Answer:
Clipping a chicken’s wings, also known as wing clipping or trimming, is a common practice to prevent chickens from flying over fences or escaping from enclosures. Here’s how to clip a chicken’s wings safely:
- Gather Supplies: You’ll need a pair of sharp scissors or poultry shears for cutting the feathers, as well as styptic powder or cornstarch to stop bleeding in case of accidental cuts.
- Restrain the Chicken: Gently catch the chicken and hold it securely to prevent it from flapping its wings or struggling. Some people find it helpful to wrap the chicken in a towel or blanket to calm it down and restrict its movement.
- Identify Primary Wing Feathers: Spread out one of the chicken’s wings and locate the primary flight feathers, which are the longest feathers at the end of the wing. These are the feathers that you will trim to prevent flight.
- Trim Primary Flight Feathers: Using the scissors or poultry shears, carefully trim the primary flight feathers on one wing. Cut only the primary feathers, leaving the shorter secondary feathers intact. Trim each feather to about halfway between the tip and the base of the wing.
- Balance Both Wings: Repeat the trimming process on the other wing to ensure balance and symmetry. Trim the same number of primary flight feathers on each wing to prevent the chicken from becoming lopsided or imbalanced.
- Inspect for Bleeding: After trimming the feathers, inspect the wing for any signs of bleeding. If you accidentally cut a blood feather (feather with a visible blood supply), apply styptic powder or cornstarch to the cut end to stop bleeding.
- Release the Chicken: Once you’ve finished trimming the wings and ensured there is no bleeding, release the chicken back into its enclosure. Monitor the chicken closely for any signs of distress or discomfort.
- Repeat as Needed: Wing feathers will regrow over time, so you may need to repeat the wing clipping process periodically to maintain the desired level of flight restriction.
How do I prevent egg-eating behavior in chickens?
Answer:
Preventing egg-eating behavior in chickens requires a combination of management strategies and environmental modifications to discourage this undesirable behavior. Here are some effective ways to prevent egg-eating in chickens:
- Collect Eggs Promptly: Collect eggs from the nesting boxes as soon as possible after they are laid to prevent chickens from pecking and breaking them. Make egg collection a routine part of your daily chores to minimize the risk of eggs being left in the nest for extended periods.
- Provide Adequate Nesting Boxes: Ensure that your chicken coop has enough nesting boxes for all hens to lay eggs comfortably. Provide clean, well-bedded nesting boxes in a quiet and secluded area to encourage hens to lay eggs without disturbance.
- Use Fake Eggs or Golf Balls: Place fake eggs or golf balls in the nesting boxes to simulate real eggs and discourage pecking behavior. Chickens may peck at these objects initially but will quickly learn that they are not edible.
- Improve Nesting Box Design: Modify nesting boxes to make it more difficult for chickens to access and break eggs. Use roll-away nesting boxes or add slanted or sloped surfaces to the nesting boxes to prevent eggs from accumulating and being pecked.
- Provide Proper Nutrition: Ensure that your chickens are receiving a balanced diet with adequate protein and calcium to support egg production and prevent nutritional deficiencies that may contribute to egg-eating behavior.
- Minimize Stress: Reduce stressors in the chicken’s environment that may contribute to egg-eating behavior. Provide ample space, enrichment activities, and a clean and comfortable living environment to promote overall well-being and reduce stress.
- Correct Aggressive Behavior: Address aggressive behavior within the flock, as aggressive behavior can lead to egg-eating. Remove aggressive or dominant birds from the flock if necessary and provide opportunities for subordinate birds to access nesting boxes without fear of aggression.
- Monitor Flock Dynamics: Keep an eye on the behavior of your chickens and intervene if you notice any signs of egg-eating behavior. Separate birds that exhibit egg-eating tendencies and provide individual attention and training as needed.
- Remove Egg-Eaters: If you identify specific birds that are consistently eating eggs, consider removing them from the flock to prevent the behavior from spreading to other birds.
- Seek Veterinary Advice: If egg-eating behavior persists despite your efforts to prevent it, consult with a veterinarian or poultry expert for additional guidance and support.
How do I train my chickens to come when called?
Answer:
Training chickens to come when called can be a fun and rewarding experience, although it requires patience and consistency. Here are steps to help you train your chickens to respond to a call:
- Establish a Routine: Choose a specific time of day when you will call your chickens, such as during feeding time or when giving treats. Consistency is key to reinforcing the behavior and helping chickens learn to associate the call with a positive reward.
- Use a Distinct Call: Use a consistent and distinct call or sound to signal to your chickens that it’s time to come. You can use your voice, whistle, or shake a container of treats to get their attention.
- Start with Treats: Begin by rewarding your chickens with treats whenever they come to you in response to the call. Use high-value treats such as mealworms, sunflower seeds, or small pieces of fruit to motivate them to come.
- Repeat and Reinforce: Repeat the call consistently each time you feed your chickens or offer treats, and reward them immediately when they come to you. Reinforce the behavior by providing treats or praise every time they respond to the call.
- Use Positive Reinforcement: Use positive reinforcement techniques such as praise, petting, or offering treats to reinforce the desired behavior. Avoid using negative reinforcement or punishment, as this can stress or scare the chickens and undermine the training process.
- Gradually Increase Distance: As your chickens become more responsive to the call, gradually increase the distance between you and the chickens before calling them. Start by calling them from a short distance away and gradually increase the distance over time.
- Practice Regularly: Practice calling your chickens regularly, even if you don’t have treats to offer every time. Consistent practice helps reinforce the behavior and strengthens the bond between you and your chickens.
- Be Patient and Persistent: Training chickens to come when called takes time and patience, so be patient and persistent in your efforts. Some chickens may learn more quickly than others, so adjust your expectations accordingly and celebrate small successes along the way.
- Use Visual Cues: You can also use visual cues such as shaking a container of treats or holding up a treat to attract your chickens’ attention and encourage them to come to you.
- Be Respectful of Individual Chickens: Keep in mind that not all chickens may be as responsive to training, and some may be more timid or independent than others. Respect each chicken’s personality and temperament, and adjust your training approach accordingly.
How do I know if a chicken is broody?
Answer:
Broodiness is a natural behavior in chickens where a hen develops a strong instinct to sit on and hatch eggs. Here are some signs that indicate a chicken may be broody:
- Nesting Behavior: Broody hens will spend an increased amount of time in the nesting box, often sitting on the eggs continuously or refusing to leave the nest.
- Puffed Feathers: Broody hens will puff up their feathers and flatten themselves over the eggs to keep them warm and protected.
- Clucking or Cooing Sounds: Broody hens may emit soft clucking or cooing sounds while sitting on the eggs, communicating with their unhatched chicks.
- Aggressive Behavior: Broody hens may exhibit protective behavior and become aggressive or defensive when approached or disturbed near the nesting box.
- Loss of Feathers: Broody hens may lose feathers on their breast and belly area from frequent contact with the eggs and nesting material.
- Refusal to Leave the Nest: Broody hens may refuse to leave the nesting box, even to eat, drink, or forage. They may appear lethargic or disinterested in other activities.
- Raised Body Temperature: Broody hens will elevate their body temperature to provide warmth to the eggs, resulting in a warmer nest area compared to non-broody hens.
- Prolonged Nesting: Broody behavior typically lasts for several weeks or until the eggs hatch or are removed from the nest. Broody hens will continue to exhibit nesting behavior even after the eggs are removed, indicating that the behavior is driven by instinct rather than the presence of eggs.
It’s important to note that not all hens will exhibit broody behavior, and the intensity and duration of broodiness can vary between individuals and breeds. Some chicken breeds are more prone to broodiness than others, so familiarize yourself with the characteristics of your specific breed.
If you suspect that a hen is broody, you can confirm by observing her behavior over time and checking for the signs mentioned above. If you do not want the hen to hatch eggs, you can gently break her broody behavior by removing her from the nesting box several times a day, providing distractions or environmental changes, or temporarily isolating her from the nesting area.
How do I hatch chicken eggs?
Answer:
Hatching chicken eggs can be an exciting and rewarding experience, but it requires careful planning, proper equipment, and attention to detail. Here’s a general overview of the steps involved in hatching chicken eggs using an incubator:
- Select Fertile Eggs: Choose fertile eggs from healthy, disease-free breeding stock for hatching. Avoid eggs that are cracked, misshapen, or excessively dirty, as they may not hatch successfully.
- Set Up the Incubator: Set up the incubator according to the manufacturer’s instructions, ensuring that the temperature, humidity, and ventilation settings are properly adjusted. Use a reliable thermometer and hygrometer to monitor temperature and humidity levels throughout the incubation process.
- Pre-Incubation Period: Allow fertile eggs to rest at room temperature (around 70-75°F or 21-24°C) for 24 hours before placing them in the incubator. This helps stabilize the temperature of the eggs and promotes uniform development.
- Place Eggs in the Incubator: Carefully place the fertile eggs in the incubator, positioning them with the pointed end down and the larger end up. Arrange the eggs in a single layer with enough space between them to allow for proper airflow and heat distribution.
- Maintain Temperature and Humidity: Monitor and maintain the temperature and humidity levels in the incubator according to the recommended guidelines for chicken eggs. The optimal temperature for chicken egg incubation is around 99.5°F (37.5°C), with a relative humidity of 40-50% during the first 18 days and increasing to 65-75% during the final 3 days before hatching.
- Turn Eggs: Turn the eggs regularly, at least three times a day, to prevent the embryos from sticking to the inner membrane and ensure uniform development. Use an automatic egg turner or turn the eggs manually by gently rotating them 180 degrees each time.
- Candle Eggs: Candle the eggs after 7-10 days of incubation to check for signs of fertility and embryo development. Use a bright light source to illuminate the eggs and observe the presence of veins and a developing embryo inside the egg.
- Stop Turning Eggs: Stop turning the eggs and increase humidity levels to 65-75% during the final 3 days before the expected hatch date. This helps prevent the membranes from drying out and facilitates the hatching process.
- Monitor Hatching Progress: Keep a close eye on the incubator during the final days of incubation for signs of pipping (cracking) and hatching. Avoid opening the incubator unnecessarily to prevent temperature and humidity fluctuations that can disrupt the hatching process.
- Assist Hatchlings if Necessary: If a chick struggles to hatch on its own after pipping, you may need to assist by carefully removing bits of shell to help the chick emerge. Be gentle and patient, and avoid pulling on the chick or disrupting the membrane.
- Provide Brooder: Once the chicks have hatched, transfer them to a brooder equipped with a heat source, bedding material, food, and water. Allow the chicks to dry off completely before moving them to the brooder.
- Monitor Chicks: Keep a close eye on the newly hatched chicks for signs of health and vigor. Provide proper care, nutrition, and environmental conditions to support their growth and development.
How do I care for chicks after they hatch?
Answer:
Caring for chicks after they hatch is essential to ensure their health, well-being, and proper development. Here’s how to care for newly hatched chicks:
- Transfer to Brooder: After hatching, transfer the chicks to a brooder—a warm, safe, and controlled environment where they can grow and develop. Use a brooder box or container large enough to accommodate the number of chicks you have.
- Provide Heat: Chicks require supplemental heat to maintain their body temperature during the first few weeks of life. Use a heat lamp or brooder heater to provide a consistent temperature of around 95°F (35°C) for the first week, gradually decreasing by 5°F (2-3°C) each week until the chicks are fully feathered and can regulate their own body temperature.
- Use Bedding: Line the bottom of the brooder with clean bedding material such as pine shavings, straw, or paper towels to provide traction, absorb moisture, and maintain cleanliness. Avoid using newspaper or smooth surfaces that may cause leg problems in chicks.
- Provide Food and Water: Offer chicks a balanced chick starter feed formulated specifically for their nutritional needs. Provide clean, fresh water in shallow containers or chick waterers that are easily accessible to the chicks. Dip the chicks’ beaks in the water to encourage them to drink.
- Monitor Temperature and Humidity: Use a thermometer to monitor the temperature inside the brooder and adjust the heat source as needed to maintain the recommended temperature range. Keep the brooder dry and well-ventilated to prevent moisture buildup and maintain proper humidity levels.
- Observe Behavior: Keep a close eye on the behavior of the chicks, observing for signs of health problems or distress. Healthy chicks should be active, alert, and vocal, with bright eyes and smooth feathers. Address any issues promptly to prevent further complications.
- Handle Chicks Gently: Handle chicks with care, using slow and gentle movements to avoid causing stress or injury. Avoid squeezing or dropping chicks, and wash your hands before and after handling to prevent the spread of disease.
- Socialize Chicks: Spend time interacting with the chicks to help socialize them and build trust. Offer treats, talk to them softly, and allow them to explore their surroundings under supervision.
- Provide Enrichment: Offer chick-friendly toys, perches, and hiding spots to provide enrichment and stimulate natural behaviors. Simple items such as mirrors, pecking toys, or branches can help keep chicks entertained and engaged.
- Maintain Cleanliness: Keep the brooder clean and dry by regularly removing soiled bedding and replenishing with fresh bedding material. Clean food and water containers daily to prevent contamination and ensure hygiene.
- Monitor Growth and Development: Monitor the growth and development of the chicks closely, tracking their weight gain, feather development, and overall health. Make adjustments to their care and diet as needed to support their growth and well-being.
How do I prevent diseases in my flock?
Answer:
Preventing diseases in your flock is essential to maintaining the health and well-being of your chickens. Here are some important steps you can take to prevent diseases in your flock:
- Practice Biosecurity: Implement biosecurity measures to prevent the introduction and spread of diseases in your flock. This includes restricting access to your property, limiting contact with other poultry and wild birds, and practicing good hygiene and sanitation practices.
- Quarantine New Birds: Quarantine new birds before introducing them to your existing flock to prevent the spread of diseases. Keep new birds isolated from your main flock for at least 30 days and monitor them for signs of illness before allowing them to mingle with other chickens.
- Maintain Cleanliness: Keep the chicken coop, nesting boxes, and outdoor run clean and free of debris, droppings, and spilled feed. Regularly remove soiled bedding, replace it with fresh bedding, and disinfect the coop and equipment periodically to prevent the buildup of harmful pathogens.
- Provide Clean Water and Feed: Ensure that chickens have access to clean, fresh water and high-quality feed at all times. Regularly clean and sanitize waterers and feeders to prevent contamination and the spread of disease.
- Monitor Flock Health: Keep a close eye on the health of your chickens by regularly observing their behavior, appearance, and egg production. Look for signs of illness such as lethargy, decreased appetite, abnormal droppings, respiratory symptoms, or changes in behavior.
- Vaccinate Birds: Follow a vaccination schedule recommended by your veterinarian or poultry health expert to protect your flock against common poultry diseases such as Marek’s disease, Newcastle disease, infectious bronchitis, and infectious laryngotracheitis. Vaccinate chicks at the appropriate age and administer booster shots as needed.
- Control Pests: Implement pest control measures to prevent the infestation of pests such as mites, lice, flies, and rodents, which can spread diseases and compromise the health of your flock. Use safe and effective methods such as environmental management, sanitation, and the use of poultry-safe pesticides if necessary.
- Practice Proper Nutrition: Provide a balanced diet and nutritional supplements as needed to support the overall health and immune function of your chickens. Ensure that chickens receive adequate protein, vitamins, minerals, and access to fresh greens and forage to promote optimal health and resistance to disease.
- Isolate Sick Birds: If you suspect that a chicken is sick, isolate it from the rest of the flock immediately to prevent the spread of disease. Provide supportive care, such as warmth, fluids, and appropriate treatment, and consult with a veterinarian if necessary for diagnosis and treatment.
- Educate Yourself: Stay informed about common poultry diseases, their symptoms, and preventive measures by attending workshops, reading books, and consulting with poultry health experts. Take proactive steps to protect your flock against diseases and respond quickly to any health issues that arise.
How do I prevent my chickens from escaping their enclosure?
Answer:
Preventing chickens from escaping their enclosure requires careful planning, proper construction, and regular maintenance to ensure that the enclosure is secure and free from potential escape routes. Here are some effective ways to prevent chickens from escaping:
- Secure Fencing: Use sturdy fencing materials such as welded wire, hardware cloth, or poultry netting to create a secure perimeter around the chicken enclosure. Ensure that the fencing is tall enough (at least 4-6 feet high) and buried or secured at the bottom to prevent chickens from digging underneath or squeezing through gaps.
- Install Predator-Proofing: Install predator-proofing measures such as predator aprons, hardware cloth skirts, or electric fencing along the perimeter of the enclosure to deter predators and prevent them from digging or climbing into the enclosure.
- Cover the Top: Consider covering the top of the chicken enclosure with poultry netting, wire mesh, or aviary netting to prevent chickens from flying over the fence or escaping via aerial routes. Make sure the covering is securely attached and extends over the entire enclosure to provide complete protection.
- Regular Inspections: Regularly inspect the fencing and enclosure for signs of damage, wear, or weakness that could compromise its integrity and allow chickens to escape. Repair any holes, gaps, or damage promptly to prevent potential escape routes.
- Provide Enrichment and Distractions: Keep chickens entertained and occupied within the enclosure by providing enrichment activities such as perches, roosts, dust baths, and toys. This helps reduce boredom and the likelihood of chickens attempting to escape in search of stimulation.
- Trim Wing Feathers: Consider trimming the flight feathers of chickens’ wings to prevent them from flying over the fence. This should be done carefully and sparingly to avoid impairing the chickens’ ability to fly short distances or escape from predators.
- Supervise Free-Range Time: If allowing chickens to free-range outside of their enclosure, supervise them closely to prevent them from wandering too far or escaping from the property. Use temporary fencing or poultry netting to create a designated free-range area with boundaries.
- Provide Adequate Space: Ensure that the chicken enclosure provides enough space for the number of chickens in your flock to prevent overcrowding and reduce the likelihood of escape attempts due to stress or competition.
- Train Chickens to Return: Train chickens to return to the enclosure on command by using positive reinforcement techniques such as treats or food rewards. Call the chickens back to the enclosure at regular intervals and reward them for returning voluntarily.
Can chickens live with other animals like ducks or geese?
Answer:
Yes, chickens can coexist peacefully with other animals such as ducks or geese, but successful integration depends on several factors including the personalities of the individual animals, the size and layout of the living space, and proper management practices. Here are some considerations for keeping chickens with ducks or geese:
- Introduce Them Gradually: When introducing new animals to an existing flock, do so gradually and under supervised conditions. Allow the chickens, ducks, and geese to become familiar with each other through visual contact before allowing direct interaction.
- Provide Adequate Space: Ensure that the living space, whether it’s a coop, barn, or outdoor run, is large enough to accommodate all the animals comfortably. Provide separate nesting areas and feeding stations to minimize competition and reduce the risk of aggression.
- Consider Temperament: Consider the temperament and behavior of the individual animals when determining compatibility. Some chicken breeds may be more docile and tolerant of other species, while others may be more territorial or aggressive.
- Monitor Interactions: Keep a close eye on the interactions between the chickens, ducks, and geese, especially during the initial introduction period. Watch for signs of aggression, bullying, or stress, and intervene if necessary to prevent injuries.
- Provide Separate Food and Water: Offer separate food and water sources for the chickens, ducks, and geese to prevent competition and ensure that all animals have access to adequate nutrition and hydration.
- Manage Waste: Ducks and geese produce more watery droppings compared to chickens, so be mindful of managing waste to prevent buildup and maintain cleanliness in the living space. Regularly clean and maintain the coop or barn to minimize odors and reduce the risk of disease transmission.
- Consider Species-Specific Needs: Be aware of the specific needs and behaviors of each species and provide appropriate accommodations. For example, ducks and geese require access to water for swimming and bathing, while chickens may prefer dry, dust-bathing areas.
- Observe Compatibility: While chickens, ducks, and geese can coexist peacefully in many cases, it’s important to recognize that individual animals may have different needs and preferences. Monitor their behavior and well-being over time to ensure that they are compatible and thriving together.
How do I keep my chickens entertained?
Answer:
Keeping chickens entertained is important for their mental stimulation, physical activity, and overall well-being. Here are some ideas to help keep your chickens entertained:
- Provide Enrichment Activities: Offer a variety of enrichment activities to keep chickens engaged and entertained. This can include hanging treats or vegetables from strings for them to peck at, scattering scratch grains or mealworms for them to forage, or providing puzzle feeders or treat balls that dispense food when pecked or rolled.
- Create Dust Bathing Areas: Chickens enjoy dust bathing as a natural behavior to keep their feathers clean and healthy. Provide designated dust bathing areas filled with fine sand, diatomaceous earth, or a mixture of sand and wood ash for chickens to dust bathe in.
- Offer Perches and Roosts: Install perches and roosts at different heights and levels inside the coop or outdoor run to provide chickens with opportunities to perch, jump, and explore. Natural branches or wooden logs make excellent perches and can help simulate the natural environment.
- Provide Greens and Forage: Offer fresh greens, herbs, and vegetables for chickens to peck at and forage. Planting a small garden or growing sprouts and grass inside the coop can provide chickens with a continuous supply of nutritious greens to munch on.
- Rotate Toys and Enrichment Items: Rotate toys, treats, and enrichment items regularly to keep chickens interested and engaged. Introduce new items periodically to prevent boredom and stimulate curiosity.
- Allow Free-Range Time: If possible, allow chickens to free-range in a safe and supervised area where they can explore, scratch, and forage for insects and vegetation. Free-ranging provides chickens with mental and physical stimulation and allows them to exhibit natural behaviors.
- Provide Safe Outdoor Space: Create a safe and secure outdoor space where chickens can roam, peck, and explore. Provide shade, shelter, and protection from predators to encourage chickens to spend time outdoors.
- Hang Mirror or Reflective Objects: Hang a mirror or reflective objects inside the coop or outdoor run to provide visual stimulation for chickens. Chickens may be curious and intrigued by their reflection, which can provide entertainment and enrichment.
- Offer Novel Items: Introduce novel items such as straw bales, hay tunnels, or cardboard boxes for chickens to explore and investigate. Changing up the environment and providing new experiences can help keep chickens mentally stimulated and engaged.
- Encourage Natural Behaviors: Allow chickens to engage in natural behaviors such as scratching, pecking, dust bathing, and perching. Providing opportunities for chickens to express their natural instincts helps promote their overall well-being and mental health.
What should I do with chicken manure?
Answer:
Chicken manure is a valuable resource that can be utilized in several ways to benefit your garden, soil, and plants. Here are some options for what you can do with chicken manure:
- Compost: Chicken manure is an excellent addition to compost piles or bins. It is rich in nitrogen, phosphorus, and potassium, which are essential nutrients for plant growth. Mix chicken manure with other organic materials such as straw, leaves, grass clippings, or kitchen scraps to create nutrient-rich compost for improving soil fertility and structure.
- Fertilizer: Use aged or composted chicken manure as a natural fertilizer for garden beds, vegetable plots, or ornamental plants. Spread a thin layer of composted manure over the soil surface and work it into the top few inches of soil to provide essential nutrients and improve soil health.
- Mulch: Apply composted chicken manure as a mulch around plants to help retain moisture, suppress weeds, and provide a slow-release source of nutrients. Spread a layer of composted manure around the base of plants, leaving a few inches of space between the mulch and plant stems to prevent rot or fungal diseases.
- Liquid Fertilizer: Create a nutrient-rich liquid fertilizer by steeping composted chicken manure in water to make a manure tea. Dilute the manure tea with water and use it to water plants or as a foliar spray to provide a quick boost of nutrients and encourage healthy growth.
- Soil Amendment: Mix composted chicken manure into garden soil or potting mixes to improve soil fertility, structure, and drainage. Incorporating composted manure into the soil helps replenish organic matter, enhance soil microbial activity, and promote healthy root development.
- Worm Bin Feed: Use chicken manure as a feed source for vermicomposting (worm composting) systems. Red worms (Eisenia fetida) can consume and break down chicken manure into nutrient-rich vermicompost, which can be used as a soil amendment or plant fertilizer.
- Energy Production: Explore options for converting chicken manure into renewable energy sources such as biogas or biofuel through anaerobic digestion or biomass conversion technologies. This can help reduce waste and generate clean energy for heating, electricity, or other purposes.
- Livestock Bedding: Use dried chicken manure as bedding material for livestock such as horses, cattle, or pigs. Dried manure can provide comfortable bedding for animals while also serving as a source of nutrients and organic matter when eventually incorporated into the soil.
How do I compost chicken waste?
Answer:
Composting chicken waste is an effective way to transform chicken manure and bedding materials into nutrient-rich compost for improving soil fertility and enhancing plant growth. Here’s how to compost chicken waste effectively:
- Gather Materials: Collect chicken manure and bedding materials such as straw, wood shavings, or dried leaves from the chicken coop. Aim for a balanced mix of nitrogen-rich (green) materials like manure and carbon-rich (brown) materials like bedding.
- Choose a Compost Bin or Pile: Select a suitable compost bin or site for composting chicken waste. You can use a traditional compost bin, a wire mesh enclosure, or simply create a compost pile on bare ground.
- Layer Materials: Layer the chicken manure and bedding materials in the compost bin or pile, alternating between green and brown materials. Aim for a ratio of approximately 2 parts brown materials to 1 part green materials by volume.
- Add Water: Moisten the compost pile with water to achieve a damp, but not soggy, consistency. Chicken manure is high in nitrogen, so adding water helps activate the composting process and provides moisture for microbial activity.
- Turn and Aerated: Turn the compost pile regularly, at least once a week, to aerate the materials and promote decomposition. Mixing the materials helps distribute moisture and air throughout the pile, speeding up the composting process.
- Monitor Temperature and Moisture: Monitor the temperature and moisture levels of the compost pile regularly. Ideally, the compost pile should reach temperatures between 130-160°F (54-71°C) to kill pathogens and weed seeds. If the pile becomes too dry, water it lightly. If it becomes too wet, add more dry brown materials to balance the moisture.
- Compost Over Time: Allow the compost pile to decompose over time, typically several months to a year, depending on factors such as pile size, materials used, and environmental conditions. The compost is ready when it is dark, crumbly, and has a earthy smell.
- Use Compost: Once the compost is fully decomposed, use it as a soil amendment or fertilizer in the garden, flower beds, or vegetable plots. Incorporate the compost into the soil or apply it as a top dressing around plants to improve soil fertility, structure, and moisture retention.
- Safety Precautions: When handling chicken manure or working with compost, practice good hygiene and safety precautions to minimize the risk of contamination and exposure to pathogens. Wear gloves, wash hands thoroughly after handling, and avoid using fresh chicken manure directly on edible crops.

How do I prevent my chickens from getting lice or mites?
Answer:
Preventing lice and mites in chickens requires a combination of proactive measures to maintain good hygiene, minimize exposure to parasites, and regularly inspect and treat chickens and their living environment. Here are some effective ways to prevent lice and mites in your flock:
- Maintain Cleanliness: Keep the chicken coop, nesting boxes, and surrounding areas clean and free of debris, droppings, and accumulated litter. Regularly remove soiled bedding, replace it with fresh bedding, and clean and disinfect the coop and equipment to reduce the risk of parasite infestations.
- Provide Dust Bathing Areas: Offer chickens designated dust bathing areas filled with fine sand, diatomaceous earth, or wood ash. Dust bathing helps chickens naturally control external parasites by suffocating and removing lice and mites from their feathers and skin.
- Use Pest Control Measures: Implement pest control measures to prevent and manage lice and mite infestations. This may include applying poultry-safe insecticides, dusting or spraying the chickens and their housing with natural or commercial products labeled for controlling external parasites.
- Introduce Beneficial Organisms: Consider introducing beneficial organisms such as predatory mites or parasitic wasps that feed on lice and mites as a natural means of pest control. These organisms can help reduce the population of harmful parasites in the chicken coop and surrounding areas.
- Quarantine New Birds: Quarantine new birds before introducing them to your existing flock to prevent the spread of lice, mites, and other parasites. Keep new birds isolated and monitor them for signs of infestation before allowing them to mingle with other chickens.
- Inspect Birds Regularly: Regularly inspect chickens for signs of lice or mite infestations, including visible parasites, irritation, feather loss, or abnormal behavior such as excessive scratching or preening. Check beneath the feathers, around the vent area, and on the skin for signs of parasites.
- Treat Infestations Promptly: If you suspect that your chickens have lice or mites, take prompt action to treat the infestation. Use appropriate treatment methods such as dusting or spraying the chickens and their housing with poultry-safe insecticides, following the manufacturer’s instructions carefully.
- Practice Rotational Grazing: Rotate pasture or outdoor grazing areas regularly to prevent the buildup of parasites in the soil and vegetation. This helps reduce the risk of exposure to lice and mites and promotes overall flock health.
- Provide Nutritious Diet: Ensure that chickens receive a balanced diet rich in essential nutrients to support overall health and immune function. A healthy immune system can help chickens better resist and combat parasite infestations.
- Consult with a Veterinarian: If you’re unsure how to prevent or manage lice and mite infestations in your flock, consult with a veterinarian or poultry health expert for guidance and treatment recommendations. They can provide advice tailored to your specific situation and help you develop an effective parasite prevention and control plan.
Can I use chickens to control pests in my garden?
Answer:
Yes, chickens can be effective natural pest control agents in the garden. They can help reduce populations of common garden pests such as insects, slugs, snails, and even small rodents through their natural foraging behaviors. Here’s how chickens can help control pests in your garden:
- Foraging: Chickens are natural foragers and will actively seek out insects, grubs, worms, and other pests hiding in the soil, mulch, or vegetation. They scratch and peck at the ground, turning over soil and debris to uncover hidden pests.
- Insect Control: Chickens eat a wide variety of insects, including beetles, caterpillars, grasshoppers, aphids, and more. They can help reduce populations of harmful garden pests that damage crops, flowers, and ornamental plants.
- Slug and Snail Control: Chickens are particularly effective at controlling populations of slugs and snails, which can be destructive pests in the garden. They will eagerly consume slugs and snails they encounter while foraging, helping to protect plants from damage.
- Weed Control: Chickens can also help control weeds in the garden by eating weed seeds, seedlings, and young plants. They can be allowed to roam in garden beds or orchards to help keep weed growth in check.
- Fertilization: As chickens forage and scratch in the garden, they naturally fertilize the soil with their droppings. Chicken manure is rich in nitrogen, phosphorus, and potassium, which help improve soil fertility and promote plant growth.
- Natural Tilling: Chickens scratch and dig in the soil while foraging, which helps aerate and loosen compacted soil. This natural tilling action improves soil structure, enhances drainage, and promotes healthy root growth for plants.
- Compost Management: Chickens can help manage compost piles by scratching and turning organic materials, speeding up the decomposition process and reducing odors. They also eat kitchen scraps and garden waste, converting them into valuable compost for the garden.
- Integrated Pest Management (IPM): Incorporating chickens into an integrated pest management (IPM) strategy can help reduce reliance on chemical pesticides and promote a more sustainable approach to pest control in the garden.
When using chickens for pest control in the garden, it’s important to provide them with a safe and secure environment to prevent damage to crops and protect them from predators. Use temporary fencing or electric netting to create designated foraging areas within the garden, and supervise chickens closely to ensure they do not damage plants or disturb seedlings. Additionally, avoid using chickens in areas where toxic plants or chemicals are present, and monitor their health and well-being regularly. By harnessing their natural foraging instincts, chickens can be valuable allies in keeping pests at bay and promoting a healthy, thriving garden ecosystem.
How do I treat injuries in chickens?
Answer:
Treating injuries in chickens requires prompt attention, proper assessment, and appropriate care to promote healing and prevent complications. Here are some steps to follow when treating injuries in chickens:
- Isolate the Injured Chicken: Remove the injured chicken from the flock and place it in a quiet, comfortable, and secure environment where it can rest and recuperate without being disturbed by other chickens.
- Assess the Injury: Carefully examine the injured chicken to assess the extent and severity of the injury. Look for visible wounds, bleeding, swelling, bruising, lameness, or signs of distress such as panting or lethargy.
- Clean the Wound: If the injury involves an open wound or laceration, gently clean the affected area with mild antiseptic solution or saline solution to remove dirt, debris, and bacteria. Use clean gauze or cotton swabs to gently dab and clean the wound, avoiding harsh scrubbing or rubbing.
- Control Bleeding: Apply gentle pressure to the wound with clean gauze or a clean cloth to help control bleeding. If the bleeding is severe or persistent, use a styptic powder or cornstarch to help stop the bleeding and promote clotting.
- Treat Wounds: Depending on the severity of the wound, apply appropriate wound treatment such as topical antiseptic ointment, wound spray, or antibiotic cream to help prevent infection and promote healing. Cover the wound with a clean, non-adherent dressing or bandage if necessary to protect it from further injury and contamination.
- Provide Supportive Care: Offer supportive care to the injured chicken to help reduce pain, inflammation, and stress. Keep the chicken warm, quiet, and comfortable, and provide access to fresh water and nutritious food to support healing and recovery.
- Monitor Healing: Monitor the injured chicken closely for signs of improvement or complications such as infection, swelling, or worsening of symptoms. Check the wound regularly for signs of healing, and adjust treatment as needed based on the chicken’s response.
- Administer Medications: If necessary, administer medications prescribed by a veterinarian to help manage pain, prevent infection, or promote healing. Follow the veterinarian’s instructions carefully regarding dosage, frequency, and duration of treatment.
- Prevent Pecking: If other chickens in the flock show signs of pecking or aggression towards the injured bird, separate or isolate the injured chicken until it has fully healed to prevent further injury or stress.
- Seek Veterinary Care: If the injury is severe, complicated, or does not improve with home treatment, seek veterinary care for professional evaluation and treatment. A veterinarian can provide expert advice, perform necessary diagnostic tests, and recommend appropriate treatment options to address the injury effectively.
How do I euthanize a sick or injured chicken?
Answer:
Euthanizing a sick or injured chicken is a difficult decision, but it may be necessary to prevent further suffering and provide humane end-of-life care. Here are steps to euthanize a chicken in a humane and compassionate manner:
- Make the Decision: Assess the condition of the sick or injured chicken and consider the prognosis for recovery. If the chicken’s condition is severe, incurable, or causing significant suffering, euthanasia may be the most humane option.
- Choose a Method: There are several methods available for euthanizing chickens, including cervical dislocation, decapitation, and CO2 asphyxiation. Each method has its pros and cons, and it’s important to choose a method that is appropriate, effective, and performed with care and compassion.
- Prepare the Equipment: Depending on the chosen method, prepare the necessary equipment and materials. For cervical dislocation, you will need a sharp knife or scissors and a surface to apply pressure to the chicken’s neck. For decapitation, you will need a sharp axe or cleaver and a sturdy chopping block. For CO2 asphyxiation, you will need a CO2 chamber or container.
- Ensure Proper Restraint: Secure the chicken in a calm and gentle manner to prevent injury and minimize stress. Hold the chicken firmly but gently to ensure stability and control during the euthanasia process.
- Perform the Euthanasia: Follow the chosen method carefully and accurately, ensuring that the process is carried out swiftly and effectively. If performing cervical dislocation, firmly grasp the chicken’s head and neck, and apply a quick and decisive force to dislocate the neck. If performing decapitation, position the chicken securely on a chopping block and use a sharp blade to sever the head in one clean motion. If using CO2 asphyxiation, place the chicken in the chamber or container and administer the gas according to the manufacturer’s instructions.
- Monitor for Signs of Death: After performing euthanasia, monitor the chicken closely for signs of death, including absence of breathing, heartbeat, and reflexes. Ensure that the chicken has passed away peacefully and completely before proceeding with disposal.
- Dispose of the Body: Handle the chicken’s body with care and respect, and dispose of it in a manner that is safe, sanitary, and appropriate. Options for disposal may include burial, cremation, or composting, following local regulations and guidelines.
- Seek Support: Coping with the loss of a chicken can be emotionally challenging, especially if euthanasia was necessary. Seek support from friends, family, or a veterinarian if needed, and take time to grieve and process your feelings.
How do I prevent my chickens from fighting?
Answer:
Preventing chickens from fighting requires understanding the root causes of aggression and implementing strategies to promote harmony and minimize conflict within the flock. Here are some tips to help prevent chickens from fighting:
- Provide Adequate Space: Ensure that the chicken coop and outdoor run provide enough space for all chickens to move around freely without feeling crowded or confined. Overcrowding can lead to stress, competition for resources, and increased aggression among chickens.
- Establish a Pecking Order: Chickens have a natural pecking order or hierarchy within the flock, with dominant and subordinate individuals. Allow chickens to establish their pecking order through natural interactions, but intervene if bullying or excessive aggression occurs.
- Introduce New Birds Gradually: When introducing new chickens to an existing flock, do so gradually and under supervised conditions. Allow chickens to become familiar with each other through visual contact before allowing direct interaction. Monitor interactions closely and be prepared to separate birds if necessary.
- Provide Multiple Feeding and Watering Stations: Offer multiple feeding and watering stations spaced throughout the coop and outdoor run to prevent competition and reduce the risk of aggressive behavior during feeding time. Ensure that all chickens have access to food and water without having to compete with more dominant individuals.
- Offer Enrichment and Distractions: Provide enrichment activities such as perches, roosts, dust baths, and toys to keep chickens entertained and occupied. Enrichment helps reduce boredom and frustration, which can contribute to aggressive behavior.
- Minimize Stress: Minimize sources of stress in the chicken environment, such as loud noises, sudden changes, or disturbances from predators or other animals. Create a calm and stable environment for chickens to reduce the likelihood of aggression.
- Address Health Issues: Ensure that chickens are healthy and free from underlying health issues that may contribute to aggression, such as injury, illness, or parasites. Monitor chickens regularly for signs of illness or injury and provide prompt veterinary care as needed.
- Separate Aggressive Birds: If certain chickens exhibit aggressive behavior towards others, consider separating them from the flock temporarily or permanently to prevent injuries and maintain peace within the flock. Use dividers, separate enclosures, or individual pens to keep aggressive birds separated from others.
- Provide Hiding Places: Offer hiding places or retreats within the coop and outdoor run where chickens can escape from aggressive individuals if needed. Provide shelters, nesting boxes, or hiding spots to give chickens a sense of security and refuge.
- Monitor Flock Dynamics: Regularly observe and monitor the behavior of the flock to identify any signs of aggression or conflict. Intervene promptly if fighting or bullying occurs, and take steps to address the underlying causes of aggression within the flock.
How do I keep my chickens from scratching up my garden?
Answer:
Keeping chickens from scratching up your garden requires a combination of deterrents, barriers, and alternative areas for scratching. Here are some effective strategies to protect your garden from scratching chickens:
- Install Fencing: Surround your garden with a sturdy fence to keep chickens out. Use chicken wire, hardware cloth, or other types of fencing that extend underground to prevent chickens from digging underneath.
- Use Raised Beds: Plant your garden in raised beds or containers that are elevated off the ground. Raised beds provide a physical barrier that chickens cannot easily access, protecting your plants from scratching and foraging.
- Create Barriers: Place physical barriers such as garden netting, row covers, or wire mesh around individual plants or garden beds to prevent chickens from reaching them. Secure the barriers in place to prevent chickens from knocking them over or bypassing them.
- Provide Alternative Scratching Areas: Designate a specific area of your property where chickens are allowed to scratch and forage freely without damaging your garden. Create a dedicated chicken foraging area with loose soil, sand, or mulch where chickens can engage in natural scratching behavior.
- Cover Soil: Cover bare soil in your garden with mulch, straw, or wood chips to prevent chickens from scratching and disturbing the soil surface. Mulch also helps retain moisture, suppress weeds, and protect plant roots from damage.
- Use Chicken Tractors: Use portable chicken tractors or movable enclosures to confine chickens to specific areas of your property while allowing them access to fresh forage and insects. Move the chicken tractor periodically to prevent overgrazing and minimize damage to the garden.
- Supervise Free-Range Time: If you allow your chickens to free-range in your yard, supervise them closely to prevent them from accessing the garden. Use temporary fencing or garden netting to create barriers around vulnerable areas when chickens are allowed to roam freely.
- Trim Wing Feathers: Consider trimming the flight feathers of your chickens’ wings to prevent them from flying over fences or barriers and accessing your garden. Wing clipping should be done carefully and sparingly to avoid causing injury or distress to the chickens.
- Use Repellents: Apply natural or commercial repellents around the perimeter of your garden to deter chickens from approaching. Common repellents include citrus peels, garlic spray, hot pepper spray, or commercial chicken repellent products.
- Train Chickens: Train your chickens to avoid the garden by using positive reinforcement techniques such as rewards or treats for staying away from restricted areas. Consistently reinforce boundaries and discourage unwanted behavior to teach chickens to respect garden boundaries.
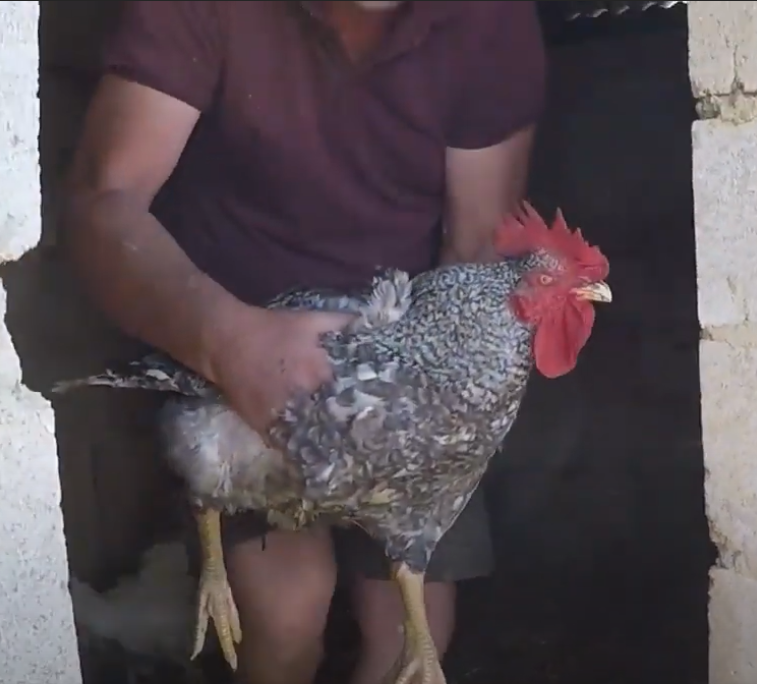
How do I keep my chickens from eating my plants?
Answer:
Keeping chickens from eating your plants requires a combination of deterrents, barriers, and management strategies to protect vulnerable vegetation. Here are some effective methods to prevent chickens from eating your plants:
- Provide Adequate Forage: Ensure that your chickens have access to a diverse and plentiful supply of forage, including grass, weeds, insects, and other natural foods. Meeting their nutritional needs through foraging can reduce their temptation to consume garden plants.
- Create Physical Barriers: Use fencing, garden netting, or wire mesh to create barriers around vulnerable plants or garden beds. Install barriers that are tall enough to prevent chickens from reaching the plants and secure them firmly to the ground to prevent chickens from bypassing them.
- Use Chicken-Friendly Plants: Choose plants that are less appealing or harmful to chickens for your garden. Consider planting herbs, ornamental grasses, or flowers with strong scents or flavors that deter chickens, such as lavender, rosemary, marigolds, or mint.
- Apply Natural Repellents: Use natural repellents to deter chickens from eating your plants. Apply repellents such as garlic spray, hot pepper spray, vinegar, or citrus peels to plant foliage or around the perimeter of garden beds to make plants less palatable to chickens.
- Offer Alternative Food Sources: Provide alternative food sources for your chickens to distract them from eating your plants. Offer nutritious treats such as fruits, vegetables, grains, or mealworms in designated feeding areas to satisfy their appetite and prevent them from foraging in the garden.
- Supervise Free-Ranging Chickens: If you allow your chickens to free-range in your yard, supervise them closely to prevent them from accessing the garden. Use temporary fencing or garden netting to create barriers around vulnerable areas when chickens are allowed to roam freely.
- Use Chicken Tractors: Confine chickens to movable enclosures or chicken tractors while allowing them access to fresh forage and insects. Move the chicken tractor periodically to provide chickens with new foraging opportunities while protecting garden plants from damage.
- Train Chickens: Train your chickens to avoid eating garden plants using positive reinforcement techniques. Reward chickens for staying away from plants or foraging in designated areas and discourage unwanted behavior using verbal cues or deterrents.
- Harvest Fruits and Vegetables Promptly: Harvest ripe fruits and vegetables promptly to prevent chickens from pecking and damaging them. Regularly remove fallen fruits, vegetables, or seeds from the ground to reduce attractants for chickens.
- Monitor and Adjust: Monitor your chickens’ behavior and adjust your management strategies as needed to prevent them from eating your plants. Inspect your garden regularly for signs of damage and reinforce barriers or apply additional deterrents as necessary.
How do I keep my chickens from eating their own eggs?
Answer:
Preventing chickens from eating their own eggs requires identifying and addressing the underlying causes of egg-eating behavior, as well as implementing management strategies to discourage this undesirable habit. Here are some effective methods to prevent chickens from eating their own eggs:
- Collect Eggs Promptly: Collect eggs from nesting boxes as soon as possible after they are laid to prevent chickens from accessing and pecking at them. Regular egg collection reduces the opportunity for chickens to develop a taste for eggs and reinforces the idea that eggs are for humans, not for chickens to consume.
- Provide Adequate Nesting Boxes: Ensure that your nesting boxes are clean, comfortable, and adequately sized to accommodate nesting hens and their eggs. Provide enough nesting boxes for the number of chickens in your flock to minimize competition and reduce the likelihood of egg damage or cannibalism.
- Use Rollaway Nesting Boxes: Consider using rollaway nesting boxes designed to collect eggs automatically and move them out of reach of hens as soon as they are laid. Rollaway nesting boxes help prevent chickens from accessing and pecking at freshly laid eggs, reducing the likelihood of egg-eating behavior.
- Adjust Diet and Nutrition: Ensure that your chickens are receiving a balanced and nutritious diet to meet their nutritional needs. Inadequate nutrition, particularly deficiencies in calcium or protein, may lead to egg-eating behavior as hens attempt to supplement their diet with eggshells or egg contents.
- Provide Calcium Supplements: Offer supplemental calcium sources such as crushed oyster shells or calcium-rich poultry feed to ensure that hens have access to sufficient calcium for eggshell formation. Adequate calcium levels help strengthen eggshells and reduce the likelihood of egg breakage or consumption.
- Reduce Stress and Boredom: Minimize sources of stress and boredom in the chicken environment, as these factors can contribute to egg-eating behavior. Provide enrichment activities, such as perches, dust bathing areas, and toys, to keep chickens mentally stimulated and physically active.
- Address Crowding and Aggression: Ensure that your chicken coop is not overcrowded and that chickens have enough space to move around comfortably. Address aggression or bullying within the flock promptly to prevent hens from pecking at each other’s eggs out of stress or frustration.
- Use Fake Eggs or Egg Substitutes: Place fake eggs or egg substitutes made of wood, ceramic, or plastic in nesting boxes to deter egg-eating behavior. Chickens may peck at these artificial eggs without receiving a rewarding yolk or egg white, discouraging further egg consumption.
- Apply Bitter-Tasting Substances: Coat eggs with a bitter-tasting substance such as hot sauce, mustard, or commercial egg-deterrent products to make them unpalatable to chickens. Be sure to test the substance on a small area of the eggshell first to ensure it does not affect egg quality or safety.
- Monitor and Manage: Regularly monitor your flock for signs of egg-eating behavior and intervene promptly to address any issues. Remove any broken or damaged eggs from nesting boxes immediately to prevent chickens from consuming them and reinforce positive egg-collecting habits.
How do I discourage wild birds from eating chicken feed?
Answer:
Discouraging wild birds from eating chicken feed requires implementing strategies to make the feed less accessible and less attractive to birds. Here are some effective methods to deter wild birds from accessing chicken feed:
- Use Covered Feeders: Place chicken feeders inside covered enclosures or shelters that allow chickens to access the feed while preventing wild birds from reaching it. Use covered feeders with small openings or weighted lids that only open when chickens step on them, discouraging wild birds from accessing the feed.
- Elevate Feeders: Raise chicken feeders off the ground or suspend them from overhead structures to make them less accessible to wild birds. Position feeders at a height that is comfortable for chickens to reach but difficult for wild birds to access, such as on a raised platform or hanging from a wire or pole.
- Install Cage or Wire Mesh: Surround chicken feeders with wire mesh or cage-like structures to create a barrier that prevents wild birds from reaching the feed. Use wire mesh with small openings or chicken wire to enclose feeders while allowing chickens to access the feed easily.
- Use Squirrel-Proof Feeders: Choose feeders designed to deter squirrels and other wildlife, as they can also help prevent wild birds from accessing chicken feed. Squirrel-proof feeders often feature mechanisms such as weighted perches or spring-loaded doors that close when larger animals or birds land on them.
- Limit Access to Feed: Offer chicken feed only during specific times of the day when chickens are most active and likely to consume it. Remove feeders or store feed in sealed containers when chickens are not feeding to reduce the opportunity for wild birds to access the feed.
- Clean Up Spills: Regularly clean up spilled or scattered feed around feeders to reduce the attraction for wild birds. Use feeders with built-in trays or platforms to catch spilled feed and prevent it from accumulating on the ground.
- Use Feed with Deterrent Additives: Consider using chicken feed formulated with additives or ingredients that deter wild birds, such as chili pepper or bitter-tasting substances. These additives make the feed less palatable to birds and can help discourage them from consuming it.
- Scare Tactics: Use scare tactics such as visual deterrents, noise makers, or motion-activated devices to deter wild birds from approaching chicken feeders. Hang reflective objects, wind chimes, or scarecrow-like figures near feeders to startle birds and discourage them from feeding.
- Provide Alternative Feeding Areas: Offer wild birds alternative feeding areas away from chicken feeders, such as bird feeders stocked with seeds, grains, or suet. Providing alternative food sources can help divert wild birds’ attention away from chicken feed and reduce competition with chickens.
- Regular Maintenance: Inspect feeders regularly for damage, wear, or signs of tampering by wild birds. Repair or replace damaged feeders promptly to maintain their effectiveness in preventing access by wild birds.
How do I prevent my chickens from getting heatstroke?
Answer:
Preventing heatstroke in chickens requires proactive management to keep them cool and hydrated during hot weather. Here are some effective strategies to prevent heatstroke in chickens:
- Provide Adequate Ventilation: Ensure that the chicken coop and outdoor run are well-ventilated to allow for good air circulation. Install windows, vents, or fans to promote airflow and prevent heat from building up inside the coop.
- Offer Shade: Provide ample shade in the chicken run or outdoor area where chickens can seek refuge from direct sunlight. Use natural shade from trees, bushes, or structures, or create artificial shade using tarps, awnings, or umbrellas.
- Provide Cool Water: Ensure that chickens have access to fresh, cool water at all times to stay hydrated and regulate their body temperature. Place multiple water sources throughout the chicken coop and run, and consider adding ice cubes or frozen water bottles to keep water cool on hot days.
- Mist or Spray: Use a fine mist or spray of water to cool down the chicken coop or outdoor area during hot weather. Install misting systems or manually spray water onto the ground, walls, or roof of the coop to create a cooling effect for chickens.
- Offer Cool Treats: Provide frozen or chilled treats for chickens to enjoy during hot weather. Offer treats such as frozen fruit, vegetables, or yogurt, or create homemade chicken popsicles using water, fruit, or herbs frozen in ice cube trays.
- Limit Activity: Encourage chickens to rest and conserve energy during the hottest parts of the day. Minimize handling, moving, or disturbing chickens during extreme heat to reduce stress and prevent overheating.
- Dust Baths: Offer chickens access to dust bathing areas filled with cool, dry dirt or sand. Dust bathing helps chickens regulate their body temperature and keep cool by removing excess oil and moisture from their feathers.
- Monitor Behavior: Regularly monitor your chickens for signs of heat stress or heatstroke, such as panting, lethargy, drooping wings, or pale combs and wattles. Take immediate action if you notice any signs of distress, such as moving chickens to a cooler area or providing additional water and shade.
- Cooling Coop Design: Design or modify the chicken coop to minimize heat retention and promote cooling. Use light-colored roofing materials to reflect sunlight, insulate walls and roof to prevent heat transfer, and install shade cloth or awnings over windows and doors to reduce solar heat gain.
- Adjust Feeding Schedule: Offer feed during the cooler parts of the day, such as early morning or late evening, to reduce metabolic heat production. Provide smaller, more frequent meals to prevent chickens from overeating and generating excess body heat.
How do I prevent my chickens from getting frostbite?
Answer:
Preventing frostbite in chickens requires proactive management to protect them from cold temperatures and moisture, which can lead to tissue damage and frostbite. Here are some effective strategies to prevent frostbite in chickens:
- Provide Adequate Shelter: Ensure that the chicken coop is well-insulated, draft-free, and weatherproof to protect chickens from cold temperatures, wind, and moisture. Seal any gaps or cracks in the coop walls, windows, and doors to prevent drafts and maintain a comfortable environment.
- Provide Heating: Install supplemental heating sources such as heat lamps, infrared bulbs, or heated pads in the chicken coop to provide warmth during cold weather. Position heating sources safely away from combustible materials and provide thermostatic controls to regulate temperature and prevent overheating.
- Ensure Ventilation: Maintain proper ventilation in the chicken coop to remove excess moisture, ammonia, and airborne pathogens while providing fresh air circulation. Use adjustable vents, windows, or exhaust fans to control airflow and prevent condensation buildup that can lead to damp bedding and frostbite.
- Use Bedding: Provide thick bedding materials such as straw, hay, or wood shavings on the coop floor to insulate against cold surfaces and provide a dry, comfortable environment for chickens to roost and nest. Replace bedding regularly to keep it clean, dry, and free from moisture buildup.
- Prevent Moisture Buildup: Minimize sources of moisture in the chicken coop, such as wet bedding, spilled water, or leaky roofs. Repair any leaks or drainage issues promptly, and use drip trays or absorbent materials under waterers to catch spills and prevent moisture buildup.
- Protect Roosts: Insulate roosts with padding or coverings to prevent chickens’ feet and legs from coming into direct contact with cold surfaces. Use materials such as rubber mats, foam pads, or burlap sacks to provide cushioning and insulation against cold and frostbite.
- Provide Frostbite Protection: Apply protective substances such as petroleum jelly or animal-safe moisturizers to exposed comb, wattles, and feet to prevent frostbite. These substances create a barrier that helps retain moisture and prevent tissue damage in cold weather.
- Adjust Diet: Increase the energy content of chickens’ diet during cold weather by offering high-energy foods such as cracked corn, sunflower seeds, or supplemental grains. Adequate nutrition helps chickens maintain body heat and energy levels to withstand cold temperatures.
- Monitor Chickens: Regularly inspect chickens for signs of cold stress or frostbite, such as pale or discolored comb and wattles, swollen or blistered feet, or lethargic behavior. Take immediate action if you notice any signs of frostbite, such as providing additional warmth, moisture protection, or veterinary care as needed.
- Prevent Freezing Water: Ensure that chickens have access to fresh, unfrozen water at all times by using heated waterers or manually thawing frozen water sources frequently. Check waterers regularly for ice buildup and provide additional insulation or heat sources as needed to prevent freezing.
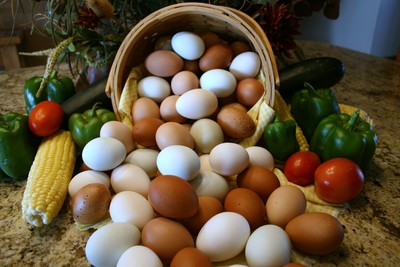
How do I keep my chickens cool in hot weather?
Answer:
Keeping chickens cool in hot weather requires proactive management to provide shade, ventilation, hydration, and other measures to prevent heat stress and maintain their well-being. Here are some effective strategies to keep chickens cool in hot weather:
- Provide Shade: Offer ample shade in the chicken run or outdoor area where chickens can seek refuge from direct sunlight. Use natural shade from trees, bushes, or structures, or create artificial shade using tarps, awnings, or umbrellas.
- Ensure Ventilation: Maintain proper ventilation in the chicken coop and outdoor run to allow for good air circulation and cooling airflow. Install windows, vents, or fans to promote airflow and prevent heat from building up inside the coop.
- Offer Cool Water: Ensure that chickens have access to fresh, cool water at all times to stay hydrated and regulate their body temperature. Place multiple water sources throughout the chicken coop and run, and consider adding ice cubes or frozen water bottles to keep water cool on hot days.
- Provide Cooling Treats: Offer frozen or chilled treats for chickens to enjoy during hot weather. Provide treats such as frozen fruit, vegetables, or yogurt, or create homemade chicken popsicles using water, fruit, or herbs frozen in ice cube trays.
- Mist or Spray: Use a fine mist or spray of water to cool down the chicken coop or outdoor area during hot weather. Install misting systems or manually spray water onto the ground, walls, or roof of the coop to create a cooling effect for chickens.
- Dust Baths: Offer chickens access to dust bathing areas filled with cool, dry dirt or sand. Dust bathing helps chickens regulate their body temperature and keep cool by removing excess oil and moisture from their feathers.
- Adjust Feeding Schedule: Offer feed during the cooler parts of the day, such as early morning or late evening, to reduce metabolic heat production. Provide smaller, more frequent meals to prevent chickens from overeating and generating excess body heat.
- Limit Activity: Encourage chickens to rest and conserve energy during the hottest parts of the day. Minimize handling, moving, or disturbing chickens during extreme heat to reduce stress and prevent overheating.
- Monitor Behavior: Regularly monitor your chickens for signs of heat stress or heatstroke, such as panting, lethargy, drooping wings, or pale combs and wattles. Take immediate action if you notice any signs of distress, such as moving chickens to a cooler area or providing additional water and shade.
- Cooling Coop Design: Design or modify the chicken coop to minimize heat retention and promote cooling. Use light-colored roofing materials to reflect sunlight, insulate walls and roof to prevent heat transfer, and install shade cloth or awnings over windows and doors to reduce solar heat gain.
How do I keep my chickens warm in cold weather?
Answer:
Keeping chickens warm in cold weather requires proactive management to provide insulation, shelter, supplemental heating, and other measures to protect them from low temperatures and adverse weather conditions. Here are some effective strategies to keep chickens warm in cold weather:
- Insulate the Coop: Ensure that the chicken coop is well-insulated to retain heat and provide a comfortable environment for chickens during cold weather. Insulate walls, ceiling, and floor with materials such as straw, hay, foam board, or recycled insulation to prevent heat loss.
- Provide Adequate Ventilation: Maintain proper ventilation in the chicken coop to remove excess moisture, ammonia, and airborne pathogens while providing fresh air circulation. Use adjustable vents, windows, or exhaust fans to control airflow and prevent condensation buildup that can lead to damp bedding and respiratory issues.
- Offer Supplemental Heating: Install supplemental heating sources such as heat lamps, infrared bulbs, or heated pads in the chicken coop to provide warmth during cold weather. Position heating sources safely away from combustible materials and provide thermostatic controls to regulate temperature and prevent overheating.
- Use Deep Bedding: Provide thick bedding materials such as straw, hay, or wood shavings on the coop floor to insulate against cold surfaces and provide a warm, dry environment for chickens to roost and nest. Deep bedding also helps absorb moisture and provides additional insulation against low temperatures.
- Seal Drafts: Seal any gaps, cracks, or openings in the chicken coop walls, windows, doors, and roof to prevent drafts and maintain a draft-free environment. Use weather stripping, caulking, or foam insulation to seal gaps and keep cold air out.
- Provide Roosting Bars: Offer chickens sturdy roosting bars or perches positioned higher off the ground to keep them away from cold floors and drafts. Use wide, flat roosting bars to allow chickens to cover their feet with their feathers and stay warm while roosting.
- Feed High-Energy Foods: Increase the energy content of chickens’ diet during cold weather by offering high-energy foods such as cracked corn, sunflower seeds, or supplemental grains. Adequate nutrition helps chickens maintain body heat and energy levels to withstand cold temperatures.
- Prevent Frostbite: Protect chickens’ combs, wattles, and feet from frostbite by applying protective substances such as petroleum jelly or animal-safe moisturizers to exposed areas. These substances create a barrier that helps retain moisture and prevent tissue damage in cold weather.
- Monitor Water Sources: Ensure that chickens have access to fresh, unfrozen water at all times by using heated waterers or manually thawing frozen water sources frequently. Check waterers regularly for ice buildup and provide additional insulation or heat sources as needed to prevent freezing.
- Adjust Coop Design: Design or modify the chicken coop to minimize heat loss and provide maximum insulation during cold weather. Use heavy-duty roofing materials, double-glazed windows, and insulated doors to create a warm, dry, and comfortable environment for chickens.
How do I encourage my chickens to lay more eggs?
Answer:
Encouraging chickens to lay more eggs involves providing optimal conditions, nutrition, and management practices to support egg production. Here are some effective strategies to encourage your chickens to lay more eggs:
- Provide High-Quality Nutrition: Ensure that chickens have access to a balanced and nutritious diet formulated specifically for laying hens. Feed them a complete layer feed with the correct balance of protein, vitamins, minerals, and calcium to support optimal egg production.
- Offer Fresh Water: Ensure that chickens have access to clean, fresh water at all times. Hydration is essential for egg production, so make sure waterers are kept clean and filled regularly.
- Provide Adequate Daylight: Chickens require a certain amount of daylight to stimulate egg production. Ensure they have access to natural or artificial light for at least 14 to 16 hours per day. Use timers to supplement natural daylight with artificial light during shorter days or in winter months.
- Provide Comfortable Nesting Areas: Create comfortable and private nesting areas where chickens can lay their eggs in peace. Use clean bedding material such as straw or shavings and ensure nests are free from drafts and disturbances.
- Collect Eggs Promptly: Collect eggs from nesting boxes frequently, preferably multiple times per day. Prompt egg collection reduces the likelihood of eggs being accidentally broken or eaten and encourages hens to continue laying in the nest boxes.
- Minimize Stress: Reduce sources of stress in the chicken environment, such as overcrowding, predator threats, loud noises, or sudden changes. Chickens are sensitive to stress, which can disrupt egg production, so create a calm and stable environment for them.
- Provide Adequate Space: Ensure that chickens have enough space to move around comfortably in the coop and outdoor run. Overcrowding can lead to stress and reduced egg production, so provide sufficient space for each bird.
- Supplement with Calcium: Offer supplemental calcium sources such as crushed oyster shells or calcium-rich feed to ensure hens have enough calcium for strong eggshells. Calcium deficiency can lead to soft or thin-shelled eggs and decreased egg production.
- Monitor Health: Regularly monitor the health of your chickens and address any signs of illness or injury promptly. Healthy chickens are more likely to lay eggs consistently, so provide proper veterinary care and nutrition to keep them in top condition.
- Rotate Flock: Consider rotating or replacing older hens with younger ones to maintain high egg production levels. Older hens may experience a decline in egg production as they age, so periodically introduce new hens to the flock to keep production levels up.
How do I know if my chickens are too fat or too thin?
Answer:
Determining if your chickens are too fat or too thin involves assessing their body condition and overall health. Here are some guidelines to help you evaluate whether your chickens are at a healthy weight:
Signs of Chickens Being Too Fat:
- Excessive Body Fat: Chickens that are overweight may have a round or bulging appearance, particularly around the abdomen or breast area. You may also notice fat deposits or rolls of fat around the vent or under the wings.
- Difficulty Moving: Overweight chickens may have difficulty moving around or may exhibit reluctance to walk, run, or fly. They may appear lethargic or have decreased activity levels compared to their flockmates.
- Breathing Problems: Chickens that are overweight may have difficulty breathing, particularly if excess fat restricts their airways or puts pressure on their respiratory system. They may exhibit labored breathing or panting, especially during exertion or hot weather.
- Reduced Egg Production: Obesity can negatively impact egg production in hens, leading to decreased egg laying or irregular egg production. Overweight hens may also have lower fertility rates or difficulty breeding successfully.
Signs of Chickens Being Too Thin:
- Visible Bone Structure: Thin chickens may have prominent bone structure visible through their skin, particularly around the breastbone (keel) or hips. You may be able to feel the keel bone easily with little flesh covering it.
- Sunken or Hollow Appearance: Thin chickens may appear sunken or hollow in their body profile, with little muscle or fat mass. They may have a gaunt or emaciated appearance, particularly around the breast and thigh area.
- Poor Feather Condition: Thin chickens may have poor feather quality or condition, with feathers that appear dull, ragged, or unkempt. Feather loss or thinning may also occur in severely underweight chickens.
- Reduced Egg Production: Underweight chickens may have decreased egg production or irregular egg laying patterns. Poor nutrition and low body condition can negatively impact egg quality and quantity.
- Lethargy or Weakness: Thin chickens may exhibit lethargy, weakness, or decreased activity levels. They may spend more time resting or sitting and may be less alert or responsive to their surroundings.
To assess your chickens’ body condition more accurately, you can use the Henneke Body Condition Scoring System, which assigns a numerical score based on palpable fat deposits and overall body profile. Consult with a poultry veterinarian or experienced poultry keeper if you have concerns about your chickens’ weight or health. Adjust their diet, feeding regimen, and management practices accordingly to maintain optimal body condition and overall well-being.
How do I trim a chicken’s nails?
Answer:
Trimming a chicken’s nails, also known as spurs, is a straightforward process, but it requires care and attention to avoid causing discomfort or injury to the chicken. Here’s a step-by-step guide to trimming a chicken’s nails:
- Prepare Your Materials: Gather the necessary materials, including a pair of sharp, clean nail clippers or a pair of pruning shears with a bypass blade, styptic powder or cornstarch to stop bleeding if necessary, and someone to assist you in holding the chicken securely.
- Restrain the Chicken: Securely restrain the chicken to prevent it from moving or struggling during the trimming process. You can wrap the chicken gently in a towel or have an assistant hold the chicken securely but gently.
- Examine the Nails: Carefully examine the chicken’s nails to identify the portion that needs to be trimmed. Look for overgrown nails that extend beyond the natural curve of the toe or nails that are curling or causing discomfort to the chicken.
- Identify the Quick: Locate the quick, which is the blood vessel and nerve inside the nail. It appears as a pinkish or reddish line running through the center of the nail. Avoid cutting into the quick, as it can cause bleeding and pain.
- Trim the Nails: Use the nail clippers or pruning shears to trim the excess length of the nails, making sure to cut below the quick. Trim small amounts of nail at a time to avoid cutting into the quick accidentally. Cut straight across the nail to prevent splintering or cracking.
- Apply Styptic Powder: If you accidentally cut into the quick and cause bleeding, immediately apply styptic powder or cornstarch to the nail to stop the bleeding. Press the powder firmly onto the bleeding nail until the bleeding stops.
- Monitor for Discomfort: After trimming the nails, monitor the chicken for signs of discomfort or bleeding. Provide a quiet and comfortable environment for the chicken to recover and observe its behavior for any signs of pain or distress.
- Repeat if Necessary: If the chicken has multiple nails that need trimming, repeat the process for each nail, taking care to trim only the excess length and avoid cutting into the quick.
- Reward the Chicken: Once the trimming process is complete, reward the chicken with treats or praise to help associate the experience with positive reinforcement.
- Regular Maintenance: Trim the chicken’s nails regularly, as needed, to prevent overgrowth and discomfort. Check the nails periodically to monitor their length and condition.
How do I deal with broody hens?
Answer:
Dealing with broody hens involves understanding their behavior and implementing strategies to either encourage or discourage broodiness, depending on your goals for your flock. Here are some tips for managing broody hens:
- Understand Broodiness: Recognize the signs of broodiness, which include a hen sitting on a nest continuously, fluffed feathers, growling or pecking when approached, and refusing to leave the nest to eat or drink. Broody hens are attempting to incubate eggs and hatch chicks.
- Assess the Situation: Determine whether you want to allow the hen to hatch chicks or if you need to break her broodiness. Consider factors such as the availability of fertile eggs, space, time, and resources required to raise chicks.
- Encourage or Discourage Broodiness: If you want to hatch chicks, provide the broody hen with fertile eggs to incubate. If you need to discourage broodiness, remove eggs from the nest frequently, disrupt the hen’s nesting behavior by gently lifting her from the nest and placing her in a separate area, or use a broody coop or wire cage to isolate her from the nest and cool her down.
- Provide Comfortable Nesting Area: Ensure that nesting boxes are clean, comfortable, and located in a quiet and secluded area to encourage broodiness. Use soft bedding material such as straw or shavings and provide privacy for broody hens to nest undisturbed.
- Use Cooling Methods: Broody hens can be discouraged by cooling them down. Place them in a wire-bottomed cage or broody coop raised off the ground to allow air circulation underneath. Provide a shallow pan of cool water for the hen to sit in or gently spray her with cool water to lower her body temperature.
- Limit Nesting Time: Encourage broody hens to leave the nest by limiting their access to nesting boxes during the day. Block off access to nesting boxes or provide limited access to the coop during daylight hours to encourage hens to forage, dust bathe, and socialize with the flock.
- Distract Broody Hens: Provide distractions or activities to keep broody hens occupied and discourage nesting behavior. Offer treats, toys, or environmental enrichment such as pecking blocks, hanging vegetables, or foraging challenges to redirect their focus and energy.
- Be Patient and Persistent: Breaking broodiness may take time and persistence. Be consistent in your efforts to discourage nesting behavior and continue to monitor the broody hen’s progress. Some hens may require repeated interventions before they abandon their broodiness.
- Consider Breeds: Some chicken breeds are more prone to broodiness than others. If broodiness is undesirable in your flock, consider selecting breeds known for their non-broody tendencies.
- Reintegrate into Flock: Once the broody hen has abandoned her nesting behavior, reintegrate her into the flock gradually. Monitor her behavior and interactions with other chickens to ensure a smooth transition.
How do I prevent my chickens from becoming aggressive?
Answer:
Preventing aggression in chickens involves proactive management to address underlying causes and promote a harmonious flock environment. Here are some strategies to prevent chickens from becoming aggressive:
- Provide Adequate Space: Ensure that chickens have enough space to move around comfortably in the coop and outdoor run. Overcrowding can lead to stress, competition for resources, and aggressive behavior. Provide at least 4 square feet of indoor space per chicken and ample outdoor space for foraging and exercise.
- Establish a Pecking Order: Allow chickens to establish a natural pecking order within the flock hierarchy. Avoid introducing new chickens or disrupting established social dynamics unnecessarily, as this can lead to conflicts and aggression. Monitor flock interactions and intervene if bullying or excessive aggression occurs.
- Provide Environmental Enrichment: Offer environmental enrichment such as perches, roosts, dust bathing areas, and foraging opportunities to keep chickens occupied and mentally stimulated. Boredom and frustration can contribute to aggressive behavior, so provide distractions and activities to prevent boredom.
- Ensure Balanced Nutrition: Provide a balanced and nutritious diet to meet the dietary needs of chickens. Ensure access to fresh water, high-quality feed, and supplemental treats in moderation. Nutritional deficiencies or imbalances can lead to irritability and aggression, so provide a varied diet to promote optimal health and well-being.
- Minimize Stress: Reduce sources of stress in the chicken environment, such as loud noises, sudden movements, predator threats, overcrowding, or changes in routine. Chickens are sensitive to stress, which can trigger aggressive behavior. Create a calm and stable environment for chickens to minimize stress and promote peaceful interactions.
- Handle Chickens Gently: Handle chickens gently and avoid rough or aggressive handling, which can cause fear or aggression in chickens. Approach chickens calmly and quietly, and avoid startling or chasing them unnecessarily. Respect their personal space and handle them with care to build trust and confidence.
- Provide Separate Feeding Areas: Offer multiple feeding and watering stations to prevent competition and aggression over food and water resources. Provide enough space for all chickens to access feed and water without crowding or jostling.
- Monitor and Manage Roosters: If you have roosters in your flock, monitor their behavior closely and intervene if they become overly aggressive towards other chickens or humans. Consider removing aggressive roosters from the flock or keeping them separate to prevent injuries and maintain a peaceful flock environment.
- Introduce New Birds Carefully: Introduce new chickens to the flock gradually and carefully to minimize stress and aggression. Quarantine new birds before introducing them to the main flock to prevent the spread of diseases and allow them to acclimate to their new environment.
- Provide Supervision and Intervention: Monitor flock interactions regularly and intervene promptly if aggressive behavior occurs. Separate aggressive chickens from the flock temporarily to prevent injuries and allow tensions to diffuse. Use distraction techniques or separate confinement to manage conflicts and restore peace within the flock.
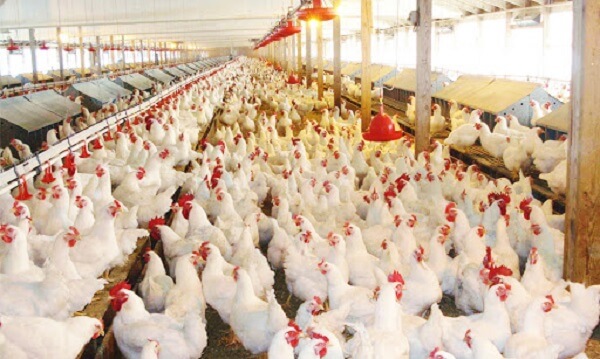
How do I stop my rooster from crowing?
Answer:
Stopping a rooster from crowing entirely is a challenging task, as crowing is a natural behavior for roosters and serves various purposes, including establishing territory, communicating with the flock, and signaling the start of the day. However, there are some strategies you can try to reduce the frequency or intensity of crowing:
- Limit Light Exposure: Roosters typically crow in response to daylight, so limiting their exposure to light during the early morning hours may reduce crowing. Consider using blackout curtains or covering windows in the coop to block out light and delay the rooster’s natural wake-up time.
- Provide Distractions: Offer environmental enrichment and distractions to keep roosters occupied and engaged, which may reduce the urge to crow. Provide toys, perches, foraging opportunities, or other activities to stimulate their natural behaviors and redirect their focus.
- Adjust Roosters’ Diet: Some chicken keepers have reported that certain dietary adjustments may affect roosters’ crowing behavior. Experiment with modifying the roosters’ diet by reducing protein or adjusting the timing of feedings to see if it has any impact on crowing frequency.
- Soundproofing: Consider soundproofing the rooster’s living area or coop to minimize the noise level and reduce the impact of crowing on neighbors or household members. Use insulation, acoustic panels, or other sound-absorbing materials to dampen noise.
- Disturbance Techniques: Some methods, such as playing loud noises or using water sprays, may startle roosters temporarily and interrupt crowing behavior. However, these techniques may not be effective in the long term and may cause stress or anxiety in the rooster.
- Provide Adequate Space: Ensure that roosters have enough space to move around comfortably in the coop and outdoor run. Overcrowding can lead to stress and aggression, which may manifest in increased crowing behavior.
- Consider Behavioral Modification: Work with a poultry behavior specialist or animal behaviorist to explore techniques for modifying roosters’ behavior through positive reinforcement training or behavioral modification. Training methods may involve rewarding desired behaviors and redirecting or ignoring unwanted behaviors.
- Evaluate the Need for a Rooster: If crowing becomes a significant issue or source of disturbance, consider whether keeping a rooster is necessary for your flock. Evaluate the benefits and drawbacks of having a rooster and whether his presence is essential for your flock’s needs, such as fertilizing eggs or protecting hens.
How do I introduce chicks to a broody hen?
Answer:
Introducing chicks to a broody hen can be a rewarding experience, but it requires careful planning and supervision to ensure a successful integration. Here’s a step-by-step guide on how to introduce chicks to a broody hen:
- Select Compatible Chicks: Choose chicks that are close in size and age to the broody hen’s own chicks or eggs. This will help minimize competition and aggression between the broody hen and the new chicks. Ideally, select chicks that are less than a few days old to ensure they are accepted by the broody hen.
- Prepare the Broody Hen: Before introducing the chicks, prepare the broody hen by moving her to a separate area, such as a broody coop or a quiet section of the chicken coop. Provide a comfortable nesting area with fresh bedding, food, water, and space for the hen and chicks to move around.
- Introduce Chicks Gradually: Once the broody hen has settled into her new nesting area, introduce the chicks gradually to allow her to become accustomed to their presence. Place the chicks in a small brooder box or cage within sight and sound of the broody hen, but separate enough to prevent direct contact initially.
- Monitor Reactions: Observe the broody hen’s behavior closely as she interacts with the chicks from a distance. Look for signs of aggression, such as pecking, chasing, or aggressive vocalizations, and intervene if necessary to prevent injury to the chicks.
- Supervised Interaction: After a few days of gradual introduction and positive interactions, allow the broody hen and chicks to interact under supervised conditions. Open the brooder box or cage to allow the chicks to explore the nesting area while keeping a close eye on the broody hen’s behavior.
- Facilitate Bonding: Encourage bonding between the broody hen and chicks by gently placing the chicks under her wings or near her body while she is resting or brooding. The broody hen will instinctively protect and care for the chicks, providing warmth, guidance, and security.
- Provide Additional Resources: Ensure that the broody hen has access to plenty of food, water, and space to accommodate the additional chicks. Offer supplemental chick starter feed or finely crushed feed for the chicks to encourage healthy growth and development.
- Monitor Progress: Continue to monitor the broody hen and chicks closely during the integration process, paying attention to their interactions and behavior. Watch for signs of distress or aggression and intervene as needed to ensure the safety and well-being of all birds.
- Allow Natural Integration: Over time, the broody hen and chicks will establish a bond and integrate naturally into the flock. Once the chicks are old enough to fend for themselves and follow the broody hen outside the nesting area, allow them to join the rest of the flock under the broody hen’s guidance.
How do I deal with egg-bound hens?
Answer:
Dealing with egg-bound hens requires prompt intervention to relieve the blockage and alleviate the hen’s discomfort. Here’s a step-by-step guide on how to handle egg-bound hens:
- Recognize the Symptoms: Learn to recognize the signs of egg binding in hens, which may include lethargy, weakness, fluffed feathers, abdominal straining, decreased appetite, and vocalization or distress when attempting to lay eggs. If you suspect a hen is egg-bound, act quickly to prevent complications.
- Isolate the Hen: Carefully isolate the egg-bound hen in a quiet, warm, and comfortable environment to reduce stress and provide privacy for her to recover. Place her in a separate area with soft bedding and access to food and water.
- Provide Warmth and Moisture: Apply warmth and moisture to the hen’s abdominal area to help relax the muscles and facilitate egg passage. Place a warm, damp towel or cloth over the hen’s lower abdomen for 15-20 minutes, several times a day, to encourage egg movement.
- Gentle Massage: Gently massage the hen’s abdomen in a downward motion to help stimulate egg movement and relieve any muscle tension. Be careful not to apply too much pressure or cause discomfort to the hen.
- Hydration and Lubrication: Offer the egg-bound hen small amounts of water mixed with electrolytes or sugar to keep her hydrated and maintain electrolyte balance. Additionally, administer a small amount of lubricant, such as mineral oil or vegetable oil, orally or via the vent to help lubricate the egg and ease its passage.
- Provide Calcium: Offer the hen calcium supplements or crushed eggshells to support muscle contractions and promote eggshell formation. Calcium deficiency can contribute to egg binding, so ensuring adequate calcium levels in the diet is essential for prevention and treatment.
- Encourage Rest and Relaxation: Minimize handling and stress for the egg-bound hen, and encourage her to rest and relax in a quiet environment. Limit disturbances and provide gentle care and support to help her recover.
- Monitor Progress: Monitor the egg-bound hen closely for signs of improvement or worsening symptoms. Keep track of her behavior, appetite, and egg-laying attempts, and seek veterinary assistance if her condition does not improve or if complications arise.
- Seek Veterinary Care: If the egg-binding persists or if the hen’s condition deteriorates despite home treatment, seek prompt veterinary care. A veterinarian can perform a physical examination, provide diagnostic tests, and administer medical treatment, such as calcium injections or oxytocin to stimulate egg expulsion, if necessary.
- Preventive Measures: Take preventive measures to reduce the risk of egg binding in hens, such as providing a balanced diet with adequate calcium, maintaining proper environmental conditions, and monitoring the health and egg-laying behavior of the flock regularly.
How do I prevent my chickens from eating toxic plants?
Answer:
Preventing chickens from eating toxic plants involves several strategies to identify, remove, and manage potentially harmful vegetation in their environment. Here’s how you can protect your chickens from consuming toxic plants:
- Know the Toxic Plants: Familiarize yourself with common toxic plants in your area that may pose a threat to chickens. Some examples of toxic plants include rhododendron, azalea, foxglove, nightshade, yew, hemlock, and certain types of lilies. Consult with local agricultural extension services or poultry experts to identify toxic plants specific to your region.
- Remove Toxic Plants: Inspect your chicken’s living area, including the coop, run, and free-range areas, for any toxic plants growing in or around their environment. Remove or eradicate any toxic plants promptly to prevent accidental ingestion by chickens. Wear gloves and take precautions when handling toxic plants to avoid exposure to toxins.
- Create a Safe Foraging Area: Designate a safe foraging area for your chickens where toxic plants have been removed or excluded. Provide ample space for chickens to roam and forage freely without encountering toxic vegetation. Consider using fencing or barriers to prevent chickens from accessing areas with known toxic plants.
- Offer Alternative Forage: Provide alternative forage options for your chickens to satisfy their natural instinct to graze and explore. Offer a variety of safe and nutritious forage materials, such as grass, clover, alfalfa, vegetables, fruits, and herbs, to encourage healthy grazing behavior.
- Supervise Free-Range Time: If you allow your chickens to free-range, supervise their outdoor activities to prevent them from consuming toxic plants. Keep an eye on your chickens and intervene if you observe them showing interest in or attempting to consume unfamiliar or potentially toxic vegetation.
- Educate Yourself and Others: Educate yourself, family members, and other caregivers about the dangers of toxic plants to chickens and the importance of vigilance in preventing access to harmful vegetation. Teach children and visitors to your property about the potential risks and the importance of keeping chickens safe from toxic plants.
- Provide Nutritious Feed: Ensure that your chickens have access to a balanced and nutritious diet that meets their dietary needs. Offer commercial poultry feed formulated specifically for their age, breed, and purpose, supplemented with fresh fruits, vegetables, and treats as appropriate.
- Monitor Chickens’ Health: Monitor your chickens’ health and behavior regularly for signs of illness or distress, which may indicate accidental ingestion of toxic plants. Watch for symptoms such as lethargy, weakness, vomiting, diarrhea, difficulty breathing, convulsions, or sudden death, and seek veterinary assistance immediately if you suspect poisoning.
How do I prevent flies and other pests around my coop?
Answer:
Preventing flies and other pests around your coop is essential for maintaining a healthy and comfortable environment for your chickens. Here are some effective strategies to prevent flies and other pests:
- Keep the Coop Clean: Regularly clean the coop, including removing soiled bedding, droppings, and spilled feed. Cleanliness helps eliminate breeding sites for flies and other pests and reduces odors that attract them.
- Manage Moisture: Keep the coop and surrounding area dry by addressing drainage issues, fixing leaks, and providing proper ventilation. Moist environments are conducive to fly breeding, so reducing moisture levels can help deter fly infestations.
- Use Fly Traps and Baits: Place fly traps or baits around the coop to attract and capture adult flies. There are various types of fly traps available, including sticky traps, bait stations, and electric fly zappers. Follow the manufacturer’s instructions for placement and use.
- Implement Biological Controls: Introduce natural predators or biological control agents, such as parasitic wasps or predatory insects, to target fly larvae and reduce fly populations. These natural enemies can help keep fly populations in check without the use of chemicals.
- Install Screens and Mesh: Install screens or mesh over windows, vents, and openings in the coop to prevent flies and other flying insects from entering. Use fine mesh screens with small openings to effectively block pests while allowing airflow.
- Practice Proper Waste Management: Dispose of poultry waste properly by composting or disposing of it in sealed containers away from the coop. Avoid leaving manure or other organic matter in piles near the coop, as these can attract flies and other pests.
- Limit Food Sources: Minimize sources of food and organic matter that attract flies and other pests by keeping feed in sealed containers, cleaning up spills promptly, and avoiding overfeeding chickens. Regularly clean feeders and waterers to prevent accumulation of debris.
- Use Natural Repellents: Incorporate natural repellents, such as herbs or essential oils with insect-repelling properties, into the coop environment. Plants like lavender, mint, basil, and rosemary can help deter flies and other pests. Alternatively, use diluted essential oils or herbal sprays to repel pests.
- Maintain Surrounding Area: Keep the area around the coop clean and free of debris, standing water, and overgrown vegetation, which can provide breeding sites and shelter for pests. Regularly mow grass, trim vegetation, and remove fallen leaves and debris.
- Monitor and Take Action: Regularly monitor the coop and surrounding area for signs of pest activity, such as fly breeding sites, pest infestations, or chicken discomfort. Take prompt action to address any pest issues to prevent them from worsening.
How do I prevent my chickens from getting bumblefoot?
Answer:
Preventing bumblefoot in chickens involves implementing measures to reduce the risk of injury, maintain good hygiene, and provide proper care for your flock. Here are some strategies to help prevent bumblefoot:
- Provide Proper Flooring: Use appropriate flooring materials in the coop and run to minimize the risk of injury to your chickens’ feet. Avoid rough or abrasive surfaces that can cause cuts or abrasions on the foot pads. Use soft bedding material such as straw, shavings, or sand to provide cushioning and comfort for your chickens.
- Maintain Cleanliness: Keep the coop and run clean and free of debris, sharp objects, and wet or soiled bedding that can harbor bacteria and contribute to infection. Regularly remove droppings, spilled feed, and other organic matter to prevent bacterial growth and reduce the risk of bumblefoot.
- Provide Proper Perches: Choose perches of appropriate size and diameter to support your chickens’ feet comfortably. Avoid using narrow or abrasive perches that can cause pressure sores or contribute to foot injuries. Provide multiple perches at varying heights to encourage natural roosting behavior and reduce crowding.
- Monitor Chicken Health: Regularly inspect your chickens’ feet for signs of injury, swelling, or infection. Check for redness, heat, swelling, or scabs on the foot pads, and look for limping or favoring of one leg, which may indicate discomfort or pain. Early detection of bumblefoot allows for prompt treatment and prevention of complications.
- Promote Exercise: Encourage your chickens to exercise and explore their environment to maintain healthy feet and leg muscles. Provide ample space for your chickens to roam and forage, and offer environmental enrichment such as toys, perches, and obstacles to encourage activity and mobility.
- Practice Proper Nutrition: Provide a balanced and nutritious diet to support your chickens’ overall health and immune function. Ensure that your chickens have access to fresh water, high-quality feed, and supplemental vitamins and minerals as needed. Proper nutrition helps maintain strong immune defenses and reduces the risk of infections, including bumblefoot.
- Trim Overgrown Claws: Regularly trim overgrown claws or nails to prevent them from becoming ingrown or causing pressure on the foot pads. Use sharp, clean clippers designed specifically for poultry to trim the claws carefully, taking care not to cut into the quick or sensitive tissue.
- Avoid Overweight Chickens: Maintain a healthy body weight in your chickens to reduce the risk of stress on their feet and joints. Avoid overfeeding or providing excessive treats, which can contribute to obesity and other health problems. Provide opportunities for exercise and encourage natural foraging behavior to help your chickens stay active and fit.
- Quarantine New Birds: Quarantine new chickens before introducing them to your existing flock to prevent the spread of infectious diseases, including those that can lead to bumblefoot. Monitor new birds closely for signs of illness or injury during quarantine and provide appropriate veterinary care as needed.
- Seek Veterinary Care: If you suspect bumblefoot or other foot problems in your chickens, seek prompt veterinary care for diagnosis and treatment. Early intervention can help prevent complications and promote healing.
How do I keep my chickens from eating their own feces?
Answer:
Chickens may engage in coprophagy, or the consumption of feces, for various reasons, including dietary deficiencies, boredom, or learned behavior. While it’s a natural behavior for some animals, it can pose health risks in chickens due to the potential spread of pathogens and parasites. Here are some strategies to help prevent chickens from eating their own feces:
- Ensure Proper Nutrition: Provide a balanced and nutritious diet to meet your chickens’ dietary needs. Ensure they have access to high-quality commercial poultry feed formulated for their age, breed, and purpose. Supplement their diet with fresh fruits, vegetables, and treats as appropriate. Address any nutritional deficiencies that may contribute to coprophagy.
- Maintain Cleanliness: Keep the coop and run clean and free of feces and other organic matter. Regularly remove soiled bedding, droppings, and spilled feed to minimize opportunities for chickens to engage in coprophagy. Provide clean water and feeders to prevent contamination.
- Prevent Boredom: Provide environmental enrichment and opportunities for mental and physical stimulation to prevent boredom in your chickens. Offer toys, perches, dust bathing areas, and other forms of enrichment to keep chickens occupied and engaged. Rotate enrichment items regularly to maintain interest.
- Monitor Flock Dynamics: Monitor your flock closely for signs of bullying, stress, or social hierarchy issues that may contribute to coprophagy. Address any aggressive behavior or overcrowding in the flock to reduce stress and promote a harmonious environment.
- Provide Adequate Space: Ensure that your chickens have enough space to move around comfortably in the coop and run. Overcrowding can lead to stress and unhealthy behaviors, including coprophagy. Provide at least 4 square feet of indoor space per chicken and ample outdoor space for foraging and exercise.
- Practice Preventive Health Care: Implement a regular health care routine for your flock, including deworming, parasite control, and vaccination as recommended by a poultry veterinarian. Preventing and treating underlying health issues can help reduce the risk of coprophagy and other unhealthy behaviors.
- Behavior Modification: If you observe chickens engaging in coprophagy, gently discourage the behavior using positive reinforcement techniques. Redirect their attention to more appropriate activities, such as foraging or dust bathing, and reward desired behaviors with treats or praise.
- Provide Alternative Sources of Fiber: Offer alternative sources of fiber, such as hay, grass clippings, or leafy greens, to satisfy your chickens’ natural foraging instincts and reduce the likelihood of coprophagy. Incorporating fibrous materials into the diet can help promote digestive health and reduce the appeal of consuming feces.
- Seek Veterinary Advice: If coprophagy persists despite preventive measures, consult with a poultry veterinarian for further evaluation and advice. Underlying health issues or behavioral problems may require professional intervention to address effectively.
How do I stop my chickens from laying eggs in random places?
Answer:
To encourage chickens to lay eggs in designated nesting boxes rather than random places, you can take several proactive steps to create an environment that meets their nesting preferences and encourages them to use the provided nesting boxes. Here’s how you can stop chickens from laying eggs in random places:
- Provide Adequate Nesting Boxes: Ensure that you have enough nesting boxes available for your flock. A general rule of thumb is to provide one nesting box for every 4-5 hens. The nesting boxes should be spacious, clean, and comfortable, with soft bedding material such as straw, shavings, or hay.
- Choose Suitable Nesting Locations: Place the nesting boxes in quiet, secluded areas of the coop that offer privacy and security for your hens. Chickens prefer dark, quiet, and sheltered nesting sites away from high-traffic areas and disturbances. Position the nesting boxes off the ground and at a comfortable height for easy access.
- Maintain Cleanliness: Keep the nesting boxes clean and free of debris, droppings, and soiled bedding. Regularly remove eggs promptly after they are laid to prevent overcrowding and discourage broodiness. Replace soiled bedding as needed to maintain a clean and hygienic nesting environment.
- Collect Eggs Promptly: Check the nesting boxes frequently throughout the day and collect eggs promptly after they are laid. Leaving eggs in the nesting boxes for extended periods can encourage hens to search for alternative laying sites and contribute to egg cannibalism or egg-eating behavior.
- Provide Nesting Box Attractions: Make the nesting boxes more attractive to your hens by adding fake eggs or golf balls to mimic the presence of eggs and encourage laying behavior. Chickens are naturally drawn to nest where they see existing eggs. You can also use herbs or nesting box herbs to add a pleasant scent and encourage nesting.
- Establish Routine and Consistency: Establish a daily routine for your flock and maintain consistency in egg collection and coop management practices. Chickens thrive on routine and predictability, so providing a stable environment with regular egg collection times can help reinforce nesting box usage.
- Address Stress and Disruptions: Minimize stressors and disturbances in the coop environment that may disrupt nesting behavior. Address factors such as overcrowding, aggression, predator threats, or changes in routine that can cause stress and anxiety in your hens. Provide a calm and stable environment that promotes natural nesting instincts.
- Monitor and Train: Monitor your flock closely for signs of egg laying behavior outside of the nesting boxes and intervene promptly to redirect them to the designated nesting areas. Gently guide hens back to the nesting boxes if you observe them attempting to lay eggs in random places. Consistently reinforce desired nesting behaviors through positive reinforcement and training.
How do I discourage my chickens from becoming overly dependent on me for food?
Answer:
To discourage chickens from becoming overly dependent on you for food, you can implement several strategies to encourage natural foraging behavior and promote independence in your flock:
- Provide Adequate Foraging Opportunities: Encourage your chickens to forage for their own food by providing access to a diverse range of forage materials, such as grass, insects, weeds, seeds, and kitchen scraps. Allow chickens to roam freely in a safe outdoor area where they can explore and find natural food sources.
- Use Feeders Sparingly: Limit the use of feeders to specific feeding times and provide only enough feed to supplement your chickens’ natural foraging efforts. Avoid leaving feeders continuously stocked or overfilling them, as this can encourage dependency and discourage foraging behavior.
- Rotate Grazing Areas: Rotate your chickens’ grazing areas regularly to provide fresh forage and prevent overgrazing of vegetation. Move portable chicken tractors or grazing pens to different locations in your yard or pasture to allow chickens to access new forage materials and explore different areas.
- Offer Environmental Enrichment: Provide environmental enrichment and stimulation to keep chickens mentally and physically active. Offer toys, perches, dust bathing areas, and other forms of enrichment to encourage natural behaviors and prevent boredom.
- Use Scatter Feeding: Scatter feed or scratch grains on the ground rather than using feeders to mimic natural foraging behavior. Scatter feeding encourages chickens to search for food and stimulates their natural instincts to scratch and peck at the ground.
- Limit Treats and Supplemental Feeding: Offer treats and supplemental feed sparingly to avoid over-reliance on human-provided food sources. Use treats as occasional rewards for positive behavior or during training sessions rather than as a primary food source.
- Establish Routine and Consistency: Establish a daily routine for feeding and stick to consistent feeding times to help regulate your chickens’ appetite and reduce dependency on you for food. Provide a reliable source of food and water to ensure your chickens feel secure and confident in their environment.
- Promote Natural Behaviors: Encourage natural behaviors such as foraging, scratching, and exploring by providing a stimulating environment that meets your chickens’ physical and behavioral needs. Allow chickens to express their natural instincts and behaviors rather than relying solely on human-provided food.
- Gradually Reduce Dependency: Gradually reduce your chickens’ dependency on supplemental feeding by gradually decreasing the amount of feed provided and increasing opportunities for foraging and natural food sources. Monitor your chickens’ behavior and adjust feeding practices accordingly to promote independence.
- Monitor Health and Well-being: Monitor your chickens’ health and well-being regularly to ensure they are getting adequate nutrition and meeting their dietary needs. Watch for signs of malnutrition, stress, or behavioral problems and make adjustments to their diet and environment as needed.
How do I protect my chickens from aerial predators?
Answer:
Protecting chickens from aerial predators, such as hawks, owls, and eagles, requires implementing various preventive measures to deter attacks and create a safe environment for your flock. Here are some effective strategies to protect your chickens from aerial predators:
- Covered Enclosures: Construct or retrofit your chicken coop and run with a secure roof or cover to prevent aerial predators from swooping down and attacking your chickens from above. Use sturdy wire mesh or netting with small openings to provide protection while still allowing adequate airflow and visibility.
- Secure Fencing: Install tall, sturdy fencing around the perimeter of your chicken coop and run to create a physical barrier that prevents aerial predators from accessing your flock. Use hardware cloth or welded wire fencing with small openings and bury the bottom of the fence underground to deter predators from digging underneath.
- Use Avian Deterrents: Employ avian deterrents such as scarecrows, reflective objects (e.g., shiny tape or CDs), predator decoys (e.g., plastic owls or hawks), or predator calls to discourage aerial predators from approaching your chickens’ area. Move deterrents periodically to maintain their effectiveness.
- Provide Covered Roosting Areas: Offer covered or enclosed roosting areas within the coop where chickens can seek shelter and protection from aerial predators at night. Ensure that roosts are positioned away from openings or windows where predators may attempt to access the coop.
- Supervise Free-Range Time: If you allow your chickens to free-range, supervise their outdoor activities during peak predator activity times, such as dawn and dusk. Keep an eye on the sky for any signs of aerial predators and intervene immediately if you see a threat approaching.
- Provide Natural Cover: Plant dense shrubs, trees, or tall grasses around the perimeter of your chicken coop and run to provide natural cover and hiding spots for your chickens. Dense vegetation can help deter aerial predators and provide additional protection for your flock.
- Implement Predator-proofing Measures: Take steps to predator-proof your chicken coop and run by reinforcing weak points, sealing gaps or openings, and using predator-resistant materials. Install predator-proof latches on doors and windows, secure vents with hardware cloth, and cover gaps or cracks in walls or fencing.
- Vary Roaming Patterns: Rotate your chickens’ free-range area periodically to prevent predators from learning predictable patterns and targeting your flock. By varying roaming patterns and access to different areas of your property, you can make it more difficult for predators to locate and attack your chickens.
- Provide Early Warning Systems: Consider installing motion-activated lights, alarms, or surveillance cameras around your chicken coop and run to provide early warning of potential predator activity. These systems can help alert you to threats and allow you to take immediate action to protect your flock.
- Monitor Predator Activity: Regularly monitor your property for signs of predator activity, such as tracks, droppings, or evidence of attacks. Stay vigilant and proactive in addressing potential threats to your flock’s safety and take steps to reinforce defenses as needed.
How do I keep my chickens from becoming stressed during transportation?
Answer:
Transporting chickens can be a stressful experience for them, but there are steps you can take to minimize stress and ensure their safety and well-being during transportation. Here are some tips to keep your chickens from becoming stressed during transportation:
- Prepare in Advance: Plan and prepare for transportation well in advance to minimize last-minute stressors. Gather necessary supplies, such as crates or carriers, bedding material, waterers, and feed, and ensure that vehicles are clean and well-ventilated.
- Use Proper Carriers: Choose appropriate carriers or crates that provide adequate ventilation, protection from the elements, and sufficient space for your chickens to stand, turn around, and lie down comfortably. Avoid overcrowding, and separate chickens by size, age, or compatibility to prevent injuries and stress.
- Handle Gently: Handle chickens gently and calmly when loading them into carriers or crates. Use calm and quiet voices, and avoid sudden movements or loud noises that may startle or frighten them. Approach chickens slowly and carefully to minimize stress during handling.
- Provide Comfort: Line carriers or crates with soft bedding material, such as straw, shavings, or towels, to provide cushioning and comfort during transportation. Ensure that bedding is clean, dry, and absorbent to help absorb moisture and prevent discomfort.
- Offer Water and Food: Provide access to clean water and food during transportation to prevent dehydration and hunger. Use spill-proof waterers and secure feeders to minimize spills and messes during transit. Offer familiar feed and treats to encourage chickens to eat and drink during the journey.
- Control Temperature: Maintain a comfortable temperature inside vehicles or trailers during transportation to prevent overheating or chilling of chickens. Avoid exposing chickens to extreme temperatures or prolonged exposure to direct sunlight or drafts. Use fans, ventilation, or insulation as needed to regulate temperature.
- Minimize Disturbances: Keep transportation as smooth and quiet as possible to minimize disturbances and reduce stress for chickens. Avoid sudden stops, sharp turns, or rough handling that can jostle or agitate chickens. Drive cautiously and observe traffic laws to ensure a safe and stress-free journey.
- Monitor Health: Monitor chickens closely during transportation for signs of stress, injury, or illness. Watch for symptoms such as panting, lethargy, drooping wings, or excessive vocalization, which may indicate distress or discomfort. Stop periodically to check on chickens and address any issues promptly.
- Provide Rest Stops: Schedule rest stops during long journeys to allow chickens to rest, stretch their legs, and access food and water. Choose safe and secure locations away from traffic and predators where chickens can be temporarily released or allowed to graze in a controlled environment.
- Handle with Care: Handle chickens gently and carefully when unloading them from carriers or crates at their destination. Use calm and quiet voices, and avoid rushing or crowding chickens during the unloading process. Allow chickens to acclimate to their new surroundings gradually to minimize stress.
How do I prevent my chickens from cannibalizing each other?
Answer:
Preventing cannibalism in chickens requires proactive management strategies to address underlying causes and minimize opportunities for aggressive behavior within the flock. Here are some effective ways to prevent chickens from cannibalizing each other:
- Provide Adequate Space: Ensure that your chickens have enough space to move around comfortably in the coop and run. Overcrowding can lead to stress and aggression, increasing the likelihood of cannibalism. Provide at least 4 square feet of indoor space per chicken and ample outdoor space for foraging and exercise.
- Avoid Overcrowding: Avoid overcrowding your flock by keeping the number of chickens within manageable limits for the size of your coop and run. Overcrowding can lead to competition for resources, territorial disputes, and aggressive behavior. Monitor flock dynamics closely and separate aggressive or bullied birds as needed.
- Maintain a Balanced Diet: Provide a balanced and nutritious diet to meet your chickens’ dietary needs and prevent nutritional deficiencies that can contribute to cannibalism. Ensure that chickens have access to high-quality commercial poultry feed formulated for their age, breed, and purpose. Supplement their diet with fresh fruits, vegetables, and protein sources as needed.
- Provide Environmental Enrichment: Offer environmental enrichment and stimulation to keep chickens mentally and physically active. Provide toys, perches, dust bathing areas, and other forms of enrichment to prevent boredom and reduce stress. Rotate enrichment items regularly to maintain interest and prevent aggressive behavior.
- Avoid High-protein Diets: Avoid feeding excessively high-protein diets, as this can contribute to aggressive behavior and cannibalism in chickens. Ensure that feed formulations are appropriate for your chickens’ age, breed, and production goals. Avoid sudden changes in diet, which can disrupt digestive health and lead to behavioral problems.
- Monitor Flock Dynamics: Monitor your flock closely for signs of aggression, bullying, or social hierarchy issues that may contribute to cannibalism. Watch for aggressive behaviors such as pecking, chasing, or feather pulling, and intervene promptly to address conflicts and maintain peace within the flock.
- Address Pecking Order Issues: Chickens establish a social hierarchy within the flock, known as the pecking order, which can lead to aggressive behaviors if not properly managed. Provide multiple feeding and watering stations to reduce competition for resources and allow subordinate chickens to access food and water without fear of aggression from dominant birds.
- Trim Beaks and Claws: Consider trimming the sharp tips of chickens’ beaks and claws to reduce the severity of injuries caused by pecking and scratching. Beak trimming should be done carefully and only as a last resort to prevent injury to the chicken.
- Provide Nesting Boxes and Roosts: Ensure that your coop is equipped with adequate nesting boxes and roosting areas to minimize competition for space and reduce stress within the flock. Provide enough nesting boxes for all hens to lay eggs comfortably, and provide multiple roosts at varying heights to prevent overcrowding.
- Address Health Issues Promptly: Address any health issues or injuries promptly to prevent them from escalating and contributing to aggressive behavior within the flock. Monitor chickens regularly for signs of illness, injury, or parasites, and seek veterinary care as needed.
How do I prevent my chickens from getting worms?
Answer:
Preventing worms in chickens involves implementing a comprehensive approach that includes good management practices, hygiene, and regular parasite control measures. Here are some effective strategies to prevent chickens from getting worms:
- Practice Good Hygiene: Maintain a clean and dry living environment for your chickens by regularly cleaning and disinfecting the coop, nesting boxes, and roosts. Remove soiled bedding, droppings, and spilled feed promptly to minimize exposure to parasite eggs and larvae.
- Practice Pasture Management: Rotate pasture areas regularly to prevent overgrazing and minimize exposure to parasite eggs and larvae in the soil. Avoid keeping chickens in the same area for extended periods and allow pasture areas to rest and regenerate between grazing cycles.
- Provide Clean Water: Ensure that chickens have access to clean, fresh water at all times. Regularly clean and sanitize waterers to prevent contamination with parasite eggs and larvae. Avoid placing waterers directly on the ground where they can become soiled with feces.
- Practice Biosecurity: Implement biosecurity measures to prevent the introduction and spread of parasites to your flock. Quarantine new birds before introducing them to your existing flock, and avoid sharing equipment, feed, or bedding between flocks without proper sanitation procedures.
- Provide Nutritious Diet: Offer a balanced and nutritious diet to support your chickens’ overall health and immune function. Ensure that chickens have access to high-quality commercial poultry feed formulated for their age, breed, and purpose. Supplement their diet with fresh fruits, vegetables, and protein sources as needed to promote optimal health.
- Use Natural Dewormers: Incorporate natural deworming agents into your chickens’ diet or environment to help prevent and control worm infestations. Some natural dewormers, such as garlic, pumpkin seeds, diatomaceous earth, and certain herbs, may help reduce parasite burdens in chickens when used as part of a holistic parasite control program.
- Administer Commercial Dewormers: Administer commercial dewormers to your flock as needed according to the manufacturer’s instructions and veterinary guidance. Rotate deworming products periodically to prevent parasite resistance and ensure effective control of a broad spectrum of parasites.
- Monitor Flock Health: Monitor your flock regularly for signs of parasitic infection, such as weight loss, decreased egg production, diarrhea, lethargy, or poor growth. Conduct fecal examinations or worm egg counts periodically to assess parasite burdens and determine the need for deworming treatment.
- Practice Integrated Pest Management: Implement integrated pest management (IPM) strategies to control parasites in the chicken coop and surrounding environment. Use biological control agents, such as predatory insects or nematodes, to target parasite larvae in the soil, and reduce environmental conditions favorable to parasite development.
- Consult with a Veterinarian: Consult with a poultry veterinarian or parasitologist for guidance on parasite control and prevention strategies tailored to your specific circumstances. A veterinarian can provide advice on deworming protocols, diagnostic testing, and management practices to help keep your flock healthy and free from parasites.
How do I prevent my chickens from getting respiratory infections?
Answer:
Preventing respiratory infections in chickens involves implementing biosecurity measures, maintaining good hygiene practices, and managing environmental conditions to minimize the risk of exposure to respiratory pathogens. Here are some effective strategies to prevent respiratory infections in chickens:
- Practice Biosecurity: Implement biosecurity measures to prevent the introduction and spread of respiratory pathogens to your flock. Control access to your chicken coop and run, limit visitors, and avoid bringing new birds into your flock without proper quarantine procedures. Keep equipment, vehicles, and footwear clean and disinfected to prevent contamination.
- Maintain Cleanliness: Keep the chicken coop, nesting boxes, and roosts clean and dry by regularly removing soiled bedding, droppings, and spilled feed. Ensure proper ventilation to reduce moisture and ammonia levels, which can contribute to respiratory issues. Clean and disinfect waterers and feeders regularly to prevent contamination with pathogens.
- Provide Adequate Ventilation: Ensure proper ventilation in the chicken coop to maintain good air quality and reduce the concentration of airborne pathogens. Install windows, vents, or fans to promote air circulation and exchange, especially during hot and humid weather or when chickens are confined indoors for extended periods.
- Avoid Overcrowding: Prevent overcrowding in the chicken coop by providing enough space for chickens to move around comfortably. Overcrowding can increase stress levels and the transmission of respiratory pathogens among chickens. Provide at least 4 square feet of indoor space per chicken and ample outdoor space for foraging and exercise.
- Monitor Environmental Conditions: Monitor environmental conditions in the chicken coop, such as temperature, humidity, and ammonia levels, to ensure they are within optimal ranges for chicken health. Provide adequate heating and ventilation during cold weather to prevent drafts and temperature fluctuations that can stress chickens and compromise their respiratory health.
- Quarantine Sick Birds: Separate sick or symptomatic birds from the rest of the flock and provide appropriate veterinary care as needed. Quarantine sick birds in a separate isolation area to prevent the spread of respiratory infections to healthy chickens. Monitor sick birds closely and follow veterinary recommendations for treatment and management.
- Provide Nutritious Diet: Offer a balanced and nutritious diet to support your chickens’ overall health and immune function. Ensure that chickens have access to high-quality commercial poultry feed formulated for their age, breed, and purpose. Supplement their diet with fresh fruits, vegetables, and protein sources as needed to promote optimal health and immunity.
- Minimize Stress: Minimize stressors that can weaken chickens’ immune systems and increase their susceptibility to respiratory infections. Handle chickens gently and avoid sudden changes in routine, diet, or environmental conditions. Provide a calm and stable environment with consistent management practices to reduce stress levels in the flock.
- Practice Preventive Health Care: Implement a regular health care routine for your flock, including vaccination against common respiratory pathogens if recommended by a poultry veterinarian. Follow recommended vaccination schedules and maintain accurate vaccination records for your flock. Monitor chickens regularly for signs of respiratory illness and seek veterinary care promptly if symptoms occur.
- Consult with a Veterinarian: Consult with a poultry veterinarian for guidance on respiratory disease prevention and control strategies tailored to your specific circumstances. A veterinarian can provide advice on biosecurity measures, vaccination protocols, and management practices to help keep your flock healthy and free from respiratory infections.
How do I keep my chickens from getting egg binding?
Answer:
Egg binding, also known as dystocia, occurs when a hen is unable to pass an egg normally through the reproductive tract. It can be a serious condition that requires prompt attention. While egg binding cannot always be prevented, there are steps you can take to reduce the risk of this condition in your chickens:
- Provide Proper Nutrition: Ensure that your chickens receive a balanced and nutritious diet that includes adequate calcium levels. Calcium is essential for eggshell formation and muscle function, including the contraction of the oviduct to expel eggs. Offer a complete layer feed supplemented with crushed oyster shells or limestone to provide additional calcium.
- Monitor Calcium Levels: Monitor the calcium intake of your chickens, especially during peak egg production periods. Adjust the calcium supplementation based on the size of your flock and the quality of their eggshells. Avoid excessive calcium supplementation, as this can disrupt mineral balance and contribute to health problems.
- Maintain Optimal Body Condition: Keep your chickens at a healthy body weight and condition to reduce the risk of obesity-related health issues, including egg binding. Avoid overfeeding or underfeeding, and provide opportunities for exercise and free-ranging to promote physical activity and muscle tone.
- Provide Adequate Water: Ensure that your chickens have access to clean, fresh water at all times to prevent dehydration, which can increase the risk of egg binding. Monitor water consumption, especially during hot weather or when chickens are laying eggs regularly, and provide additional water sources if needed.
- Reduce Stress: Minimize stressors in the chicken coop and run that can contribute to egg binding. Handle chickens gently and avoid excessive handling, loud noises, overcrowding, or sudden changes in routine. Provide a calm and stable environment with consistent management practices to reduce stress levels in the flock.
- Monitor Egg Production: Keep track of your chickens’ egg production and monitor for any changes in laying patterns or egg quality. Check for abnormal eggs, such as soft-shelled eggs, shell-less eggs, or double-yolked eggs, which can indicate underlying health issues or nutritional imbalances.
- Provide Nesting Boxes: Offer clean and comfortable nesting boxes for your hens to lay their eggs. Ensure that nesting boxes are lined with soft bedding material, such as straw, shavings, or hay, to provide cushioning and support during egg laying. Monitor nesting box usage and cleanliness regularly to prevent egg contamination and breakage.
- Encourage Natural Behaviors: Encourage natural behaviors such as dust bathing, foraging, and social interaction within the flock. Provide opportunities for chickens to engage in natural behaviors that promote physical activity and muscle tone, which can help prevent egg binding.
- Observe and Handle Promptly: Monitor your chickens closely for signs of egg binding, such as lethargy, reluctance to move, straining, abdominal swelling, or distress vocalizations. If you suspect that a hen is egg-bound, seek veterinary care immediately for prompt diagnosis and treatment. Delayed intervention can lead to serious complications or death.
- Consult with a Veterinarian: Consult with a poultry veterinarian for guidance on egg binding prevention and management strategies tailored to your specific circumstances. A veterinarian can provide advice on nutrition, husbandry practices, and medical interventions to help reduce the risk of egg binding in your flock.
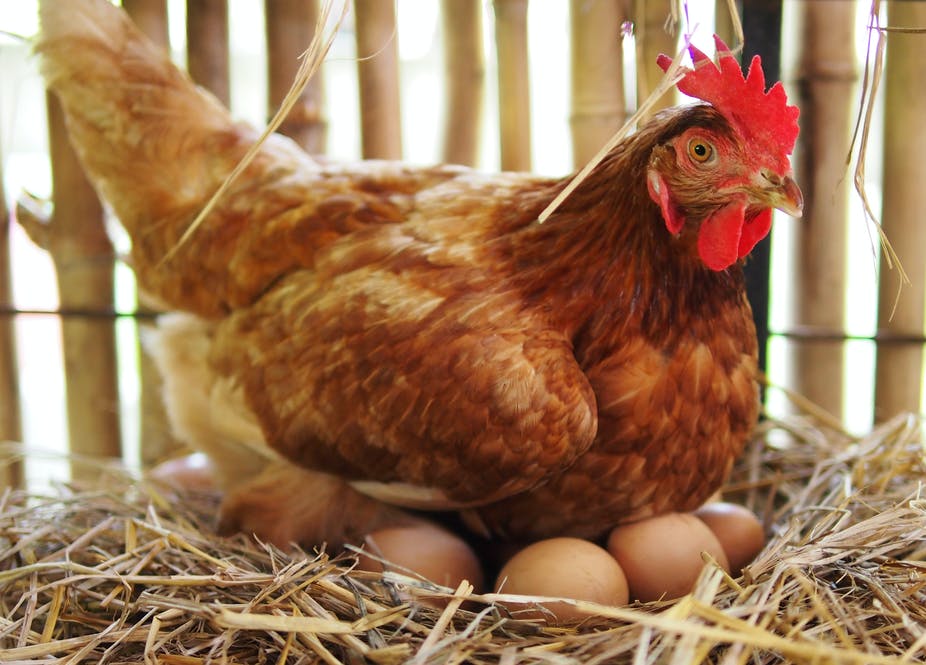
How do I discourage my chickens from roosting on undesirable places?
Answer:
Discouraging chickens from roosting on undesirable places requires redirecting their natural roosting instincts to more suitable locations while making undesirable roosting spots less appealing. Here are some effective strategies to discourage chickens from roosting on undesirable places:
- Provide Suitable Roosting Areas: Ensure that your chicken coop or hen house has designated roosting areas that are comfortable, safe, and appealing to your chickens. Install sturdy roosting bars or perches at a height of at least 2-4 feet above the ground, with enough space for each chicken to perch comfortably.
- Use Roosting Bars with Rounded Edges: Choose roosting bars or perches with rounded edges to provide a comfortable and secure grip for your chickens’ feet. Avoid using narrow or rough surfaces that can cause discomfort or foot injuries.
- Block Access to Undesirable Roosting Spots: Identify and block access to undesirable roosting spots, such as rafters, ledges, or other elevated surfaces where chickens may be tempted to roost. Use physical barriers, such as wire mesh, netting, or boards, to prevent chickens from accessing these areas.
- Remove Roosting Perches: Remove or block off any existing roosting perches or bars in undesirable locations to discourage chickens from returning to these spots. Make sure to eliminate any attractions, such as shelter or food sources, that may be drawing chickens to these areas.
- Provide Deterrents: Use deterrents to discourage chickens from roosting in specific areas. Place physical obstacles, such as upside-down plastic cones, strips of aluminum foil, or prickly branches, on surfaces where chickens are roosting to make them less comfortable and appealing.
- Redirect with Visual Cues: Use visual cues to redirect chickens to designated roosting areas. Hang shiny objects, such as CDs or reflective tape, near preferred roosting spots to deter chickens from roosting there. Alternatively, hang attractive decorations or objects, such as wind chimes or hanging plants, near desired roosting areas to attract chickens to those spots.
- Provide Comfort and Security: Ensure that designated roosting areas are comfortable, clean, and secure for your chickens. Keep bedding material, such as straw or shavings, clean and dry to provide a comfortable roosting surface. Provide adequate ventilation, protection from drafts, and security from predators to make roosting areas inviting to your chickens.
- Establish Routine and Consistency: Establish a routine for your chickens and maintain consistency in roosting practices. Encourage chickens to roost in designated areas by gently guiding them to those spots at dusk and providing treats or rewards for roosting in the desired locations.
- Monitor and Reinforce: Monitor your chickens’ roosting behavior regularly and reinforce desired roosting habits. Redirect chickens to designated roosting areas as needed and provide positive reinforcement, such as praise or treats, when they choose to roost in the desired locations.
- Be Patient and Persistent: Changing roosting habits may take time, so be patient and persistent in your efforts to discourage chickens from roosting on undesirable places. Continue to reinforce desired behaviors and make adjustments as needed to create an environment that meets your chickens’ needs and preferences.
How do I prevent my chickens from developing impacted crop?
Answer:
Discouraging chickens from roosting on undesirable places requires redirecting their natural roosting instincts to more suitable locations while making undesirable roosting spots less appealing. Here are some effective strategies to discourage chickens from roosting on undesirable places:
- Provide Suitable Roosting Areas: Ensure that your chicken coop or hen house has designated roosting areas that are comfortable, safe, and appealing to your chickens. Install sturdy roosting bars or perches at a height of at least 2-4 feet above the ground, with enough space for each chicken to perch comfortably.
- Use Roosting Bars with Rounded Edges: Choose roosting bars or perches with rounded edges to provide a comfortable and secure grip for your chickens’ feet. Avoid using narrow or rough surfaces that can cause discomfort or foot injuries.
- Block Access to Undesirable Roosting Spots: Identify and block access to undesirable roosting spots, such as rafters, ledges, or other elevated surfaces where chickens may be tempted to roost. Use physical barriers, such as wire mesh, netting, or boards, to prevent chickens from accessing these areas.
- Remove Roosting Perches: Remove or block off any existing roosting perches or bars in undesirable locations to discourage chickens from returning to these spots. Make sure to eliminate any attractions, such as shelter or food sources, that may be drawing chickens to these areas.
- Provide Deterrents: Use deterrents to discourage chickens from roosting in specific areas. Place physical obstacles, such as upside-down plastic cones, strips of aluminum foil, or prickly branches, on surfaces where chickens are roosting to make them less comfortable and appealing.
- Redirect with Visual Cues: Use visual cues to redirect chickens to designated roosting areas. Hang shiny objects, such as CDs or reflective tape, near preferred roosting spots to deter chickens from roosting there. Alternatively, hang attractive decorations or objects, such as wind chimes or hanging plants, near desired roosting areas to attract chickens to those spots.
- Provide Comfort and Security: Ensure that designated roosting areas are comfortable, clean, and secure for your chickens. Keep bedding material, such as straw or shavings, clean and dry to provide a comfortable roosting surface. Provide adequate ventilation, protection from drafts, and security from predators to make roosting areas inviting to your chickens.
- Establish Routine and Consistency: Establish a routine for your chickens and maintain consistency in roosting practices. Encourage chickens to roost in designated areas by gently guiding them to those spots at dusk and providing treats or rewards for roosting in the desired locations.
- Monitor and Reinforce: Monitor your chickens’ roosting behavior regularly and reinforce desired roosting habits. Redirect chickens to designated roosting areas as needed and provide positive reinforcement, such as praise or treats, when they choose to roost in the desired locations.
- Be Patient and Persistent: Changing roosting habits may take time, so be patient and persistent in your efforts to discourage chickens from roosting on undesirable places. Continue to reinforce desired behaviors and make adjustments as needed to create an environment that meets your chickens’ needs and preferences.
By implementing these strategies and providing suitable roosting options while discouraging chickens from roosting on undesirable places, you can help ensure the comfort, safety, and well-being of your flock. Consistency, observation, and proactive management are key to establishing positive roosting habits in chickens.
Preventing impacted crop, also known as crop stasis or crop impaction, involves managing your chickens’ diet, providing adequate hydration, promoting proper digestion, and monitoring their overall health. Here are some effective strategies to prevent chickens from developing impacted crop:
- Provide a Balanced Diet: Offer your chickens a balanced diet that includes a variety of foods, such as commercial poultry feed, grains, vegetables, fruits, and occasional treats. Ensure that their diet is nutritionally balanced and appropriate for their age, breed, and purpose. Avoid feeding excessive amounts of high-fiber or low-quality foods that can contribute to crop impaction.
- Limit Access to Long, Fibrous Material: Restrict access to long, fibrous materials such as long grass, straw, or hay, which can become tangled and cause blockages in the crop. Chop or shred fibrous foods into smaller pieces before offering them to your chickens to reduce the risk of impaction.
- Provide Grit and Small Stones: Offer insoluble grit or small stones to your chickens to aid in the mechanical breakdown of food in the crop. Grit helps chickens grind their food in the gizzard, which promotes digestion and prevents the formation of compacted material in the crop.
- Encourage Foraging and Grazing: Allow your chickens to forage and graze on a variety of natural vegetation, insects, and small rocks in outdoor areas to promote natural feeding behaviors and aid in digestion. Provide access to a well-maintained pasture or outdoor space where chickens can roam freely and engage in natural foraging activities.
- Monitor Feed Intake: Monitor your chickens’ feed intake and adjust their diet as needed to prevent overeating or gorging, which can lead to crop impaction. Avoid offering excessive amounts of treats or supplemental foods that may disrupt the balance of their diet and contribute to digestive problems.
- Provide Adequate Hydration: Ensure that your chickens have access to clean, fresh water at all times to prevent dehydration, which can exacerbate digestive issues and increase the risk of crop impaction. Monitor water consumption and provide additional water sources if needed, especially during hot weather or periods of increased activity.
- Promote Proper Digestion: Encourage proper digestion by providing a calm and stress-free environment for your chickens. Minimize stressors such as overcrowding, loud noises, or sudden changes in routine, which can disrupt digestive function and increase the risk of crop impaction.
- Observe and Monitor Health: Monitor your chickens regularly for signs of digestive problems or crop abnormalities, such as swelling, firmness, or sour crop odor. Check your chickens’ crops daily for signs of impaction or irregularities, and seek veterinary care promptly if you suspect a problem.
- Encourage Exercise: Promote physical activity and exercise in your chickens by providing opportunities for them to move around, scratch, and peck at the ground. Allow chickens to roam freely in a safe outdoor area where they can engage in natural behaviors and promote digestive health.
- Practice Good Management: Maintain good management practices in the chicken coop and run, including regular cleaning and sanitation to prevent the buildup of bacteria or mold that can contribute to digestive problems. Provide a clean and dry environment for your chickens to roost, nest, and feed.
How do I manage aggression between chickens of different breeds?
Answer:
- Understand Chicken Behavior: Learn about chicken behavior and social dynamics to better understand the reasons behind aggression within the flock. Recognize that establishing a pecking order is a natural behavior in chickens, but excessive aggression can lead to injuries and stress.
- Provide Sufficient Space: Ensure that your chicken coop and run provide enough space for all chickens to move around comfortably without feeling overcrowded. Overcrowding can lead to increased competition for resources and heightened aggression between chickens.
- Offer Multiple Resources: Provide multiple feeding and watering stations, nesting boxes, and roosting areas to minimize competition and reduce opportunities for aggression. Ensure that resources are distributed evenly throughout the coop to prevent dominant chickens from monopolizing them.
- Integrate New Birds Gradually: Introduce new chickens to the flock gradually and in small groups to minimize stress and aggression. Use a temporary barrier, such as a wire mesh partition, to allow chickens to see and interact with each other without physical contact before fully integrating them.
- Supervise Introductions: Monitor interactions between chickens closely during the integration process and intervene if aggression becomes excessive. Redirect aggressive behaviors using distraction techniques, such as offering treats or providing additional enrichment.
- Mix Breeds Carefully: Consider the temperament and size of different chicken breeds when mixing them within the same flock. Some breeds may be more aggressive or dominant than others, so choose breeds that are compatible in terms of size and temperament to minimize conflicts.
- Provide Environmental Enrichment: Offer environmental enrichment, such as perches, dust bathing areas, and toys, to keep chickens mentally and physically stimulated. Enrichment activities can help reduce boredom and redirect aggressive behaviors.
- Use Diversionary Tactics: Distract aggressive chickens by providing novel objects or treats to redirect their attention away from potential targets. Scatter treats or toss scratch grains in different areas of the coop to encourage chickens to explore and forage.
- Observe and Address Bullying: Watch for signs of bullying, such as excessive pecking, chasing, or feather pulling, and intervene promptly to protect targeted chickens. Remove bullies temporarily or permanently if they continue to exhibit aggressive behaviors despite interventions.
- Ensure Adequate Nutrition and Health: Provide a balanced diet and ensure that all chickens have access to nutritious food and clean water at all times. Address any underlying health issues, such as parasites or injuries, that may contribute to aggressive behaviors.
- Separate Aggressive Chickens: If necessary, separate aggressive chickens from the flock temporarily to give them a chance to calm down and reduce tension within the group. Reintroduce them gradually once they have had time to adjust.
- Seek Professional Advice: Consult with a poultry expert or behaviorist for personalized advice on managing aggression between chickens of different breeds. They can offer guidance based on your specific circumstances and help you develop a plan to promote harmony within your flock.
How do I prevent my chickens from getting sour crop?
Managing aggression between chickens of different breeds requires careful observation, understanding of chicken behavior, and implementation of strategies to promote harmony within the flock. Here are some effective ways to manage aggression between chickens of different breeds:
Answer:
Preventing sour crop in chickens involves maintaining proper husbandry practices, promoting digestive health, and monitoring your flock for signs of illness or digestive issues. Here are some effective strategies to prevent sour crop in chickens:
- Provide a Balanced Diet: Offer your chickens a balanced and nutritionally complete diet that meets their dietary requirements. Ensure that they have access to fresh, clean water at all times and feed them a mixture of commercial poultry feed, grains, vegetables, fruits, and occasional treats. Avoid feeding moldy or spoiled food, as it can contribute to digestive problems.
- Limit Access to Long, Fibrous Materials: Restrict your chickens’ access to long, fibrous materials such as long grass, straw, or hay, which can become impacted in the crop and contribute to sour crop. Chop or shred fibrous foods into smaller pieces before offering them to your chickens to reduce the risk of impaction.
- Provide Grit and Small Stones: Offer insoluble grit or small stones to your chickens to aid in the mechanical breakdown of food in the crop. Grit helps chickens grind their food in the gizzard, which promotes digestion and prevents the formation of compacted material in the crop.
- Encourage Proper Foraging and Grazing: Allow your chickens to forage and graze on a variety of natural vegetation, insects, and small rocks in outdoor areas to promote natural feeding behaviors and aid in digestion. Provide access to a well-maintained pasture or outdoor space where chickens can roam freely and engage in natural foraging activities.
- Promote Hydration: Ensure that your chickens have access to clean, fresh water at all times to prevent dehydration, which can exacerbate digestive issues and increase the risk of sour crop. Monitor water consumption and provide additional water sources if needed, especially during hot weather or periods of increased activity.
- Monitor Crop Health: Check your chickens’ crops regularly for signs of abnormal swelling, firmness, or sour crop odor. Gently palpate the crop to assess its contents and monitor for any changes in size or consistency. Seek veterinary care promptly if you notice any signs of sour crop or other digestive problems.
- Provide a Clean and Dry Environment: Maintain a clean and dry environment in the chicken coop and run to reduce the risk of bacterial or fungal infections that can contribute to sour crop. Remove soiled bedding, droppings, and spilled food regularly, and ensure adequate ventilation to prevent moisture buildup.
- Promote Proper Digestion: Encourage proper digestion by providing a calm and stress-free environment for your chickens. Minimize stressors such as overcrowding, loud noises, or sudden changes in routine, which can disrupt digestive function and increase the risk of digestive problems.
- Avoid Overfeeding or Overeating: Monitor your chickens’ feed intake and avoid overfeeding or allowing chickens to gorge on excessive amounts of food, which can overwhelm the digestive system and increase the risk of sour crop. Provide feed in appropriate quantities and avoid leaving feed out for extended periods.
- Practice Good Management: Implement good management practices in the chicken coop and run, including regular cleaning and sanitation to prevent the buildup of bacteria or mold that can contribute to digestive problems. Provide a clean and dry environment for your chickens to roost, nest, and feed.
How do I prevent my chickens from getting impacted or sour gizzard?
Answer:
Preventing impacted or sour gizzard in chickens involves maintaining proper husbandry practices, promoting digestive health, and providing appropriate nutrition. Here are some effective strategies to prevent impacted or sour gizzard in chickens:
- Provide a Balanced Diet: Offer your chickens a balanced and nutritionally complete diet that meets their dietary requirements. Ensure that they have access to fresh, clean water at all times and feed them a mixture of commercial poultry feed, grains, vegetables, fruits, and occasional treats. Avoid feeding moldy or spoiled food, as it can contribute to digestive problems.
- Offer Grit and Small Stones: Provide insoluble grit or small stones to your chickens to aid in the mechanical breakdown of food in the gizzard. Grit helps chickens grind their food and aids in digestion by breaking down larger food particles into smaller, more digestible pieces. Offer grit free-choice in a separate feeder or mix it with their feed.
- Encourage Foraging and Grazing: Allow your chickens to forage and graze on a variety of natural vegetation, insects, and small rocks in outdoor areas to promote natural feeding behaviors and aid in digestion. Provide access to a well-maintained pasture or outdoor space where chickens can roam freely and engage in natural foraging activities.
- Monitor Feed Intake: Monitor your chickens’ feed intake and avoid overfeeding or allowing chickens to gorge on excessive amounts of food, which can overwhelm the digestive system and increase the risk of impacted or sour gizzard. Provide feed in appropriate quantities and avoid leaving feed out for extended periods.
- Promote Hydration: Ensure that your chickens have access to clean, fresh water at all times to prevent dehydration, which can exacerbate digestive issues and increase the risk of impacted or sour gizzard. Monitor water consumption and provide additional water sources if needed, especially during hot weather or periods of increased activity.
- Avoid Feeding Large, Hard Objects: Avoid feeding chickens large or hard objects that can become lodged in the gizzard and contribute to impaction. Remove any foreign objects, such as rocks, nails, or pieces of wire, from the coop and run to prevent accidental ingestion by chickens.
- Provide Environmental Enrichment: Offer environmental enrichment, such as perches, dust bathing areas, and toys, to keep chickens mentally and physically stimulated. Enrichment activities can help reduce boredom and stress, which can contribute to digestive problems.
- Maintain a Clean Environment: Keep the chicken coop and run clean and dry to reduce the risk of bacterial or fungal infections that can contribute to digestive problems. Remove soiled bedding, droppings, and spilled food regularly, and ensure adequate ventilation to prevent moisture buildup.
- Practice Good Management: Implement good management practices in the chicken coop and run, including regular cleaning and sanitation to prevent the buildup of bacteria or mold that can contribute to digestive problems. Provide a clean and dry environment for your chickens to roost, nest, and feed.
- Monitor Health and Behavior: Monitor your chickens regularly for signs of digestive issues or abnormal behavior, such as decreased appetite, lethargy, or abnormal droppings. Seek veterinary care promptly if you notice any signs of digestive problems or if you suspect your chickens may have ingested foreign objects.
How do I prevent my chickens from developing fatty liver hemorrhagic syndrome (FLHS)?
Answer:
Preventing fatty liver hemorrhagic syndrome (FLHS) in chickens involves several measures aimed at promoting proper nutrition, management, and overall health. Here are some strategies:
- Balanced Nutrition: Ensure your chickens are receiving a balanced diet with appropriate levels of protein, carbohydrates, fats, vitamins, and minerals. Avoid feeding excessive amounts of high-energy, low-protein feeds, which can contribute to fat deposition in the liver.
- Limit High-Energy Treats: While treats like grains and scraps can be given in moderation, avoid overfeeding high-energy treats such as corn or bread, especially to birds that are not actively laying eggs or in colder weather when they need more energy.
- Regular Exercise: Encourage your chickens to be active by providing adequate space for them to roam and forage. Regular exercise helps prevent obesity and promotes overall health.
- Monitor Body Condition: Regularly assess the body condition of your chickens. Birds that are overweight or obese are more prone to FLHS. Adjust their diet and activity level accordingly.
- Control Access to Food: Ensure that feed is not left out excessively, especially in environments where chickens have unlimited access to feed. Controlled feeding can help prevent overeating and obesity.
- Provide Clean Water: Clean, fresh water should always be available to your chickens. Dehydration can exacerbate liver problems, so ensure they have access to water at all times.
- Minimize Stress: Stress can contribute to the development of FLHS. Minimize stressors such as overcrowding, excessive noise, predator threats, or sudden changes in environment.
- Regular Veterinary Check-ups: Schedule regular check-ups with a poultry veterinarian to monitor the health of your flock. They can provide guidance on nutrition, management practices, and early detection of any health issues.
- Genetic Selection: If you’re breeding chickens, consider selecting for traits that are less prone to FLHS. Breeding from stock with a history of good liver health can help reduce the risk of FLHS in future generations.
How do I discourage my chickens from eating their own eggs?
Answer:
Chickens eating their own eggs can be a frustrating and concerning behavior. Here are some strategies to discourage this behavior:
- Collect Eggs Promptly: One of the main reasons chickens start eating their own eggs is out of curiosity or because they accidentally break one and then discover they like the taste. Collecting eggs frequently throughout the day reduces the chances of eggs being left in the nest for chickens to investigate.
- Provide Adequate Nesting Material: Ensure that the nesting boxes are lined with enough soft bedding material such as straw or shavings. Comfortable nesting spaces reduce the likelihood of eggs being accidentally broken.
- Ensure Proper Nutrition: Make sure your chickens are receiving a balanced diet with sufficient nutrients, especially calcium. Calcium deficiencies can lead to weak eggshells, making them more prone to breakage.
- Supplement with Calcium: If you notice thin or fragile eggshells, consider supplementing your chickens’ diet with additional calcium sources such as crushed eggshells or oyster shell grit. Strengthening the eggshells can reduce breakage and the temptation to eat them.
- Provide Distraction: Chickens may develop egg-eating behaviors out of boredom or stress. Providing environmental enrichment such as hanging treats or toys can keep them occupied and less likely to engage in destructive behaviors.
- Use Fake Eggs: Place artificial eggs or golf balls in the nesting boxes to discourage pecking and eating eggs. Chickens may lose interest in pecking at the eggs if they don’t yield any food.
- Adjust Nesting Box Design: Ensure that nesting boxes are designed to minimize the chances of eggs rolling out and breaking. Slanted floors or padded dividers can help prevent eggs from accidentally getting damaged.
- Address Overcrowding and Stress: Overcrowding and stressful environments can contribute to egg-eating behavior. Provide adequate space per chicken and minimize stressors such as loud noises, predator threats, or aggressive behavior from other chickens.
- Isolate Offenders: If you identify specific chickens engaging in egg-eating behavior, consider isolating them temporarily to break the habit. This prevents them from learning the behavior from others and gives you time to address the underlying causes.
How do I manage bullying behavior among chickens?
Answer:
Managing bullying behavior among chickens is important for maintaining the health and well-being of your flock. Here are some strategies to address and mitigate bullying:
- Observe and Identify Bullies: Spend time observing your flock to identify which chickens are exhibiting bullying behaviors. Look for aggressive pecking, chasing, or other aggressive actions.
- Increase Space and Resources: Provide ample space for your chickens to roam and forage. Overcrowding can exacerbate bullying behavior, so ensuring sufficient space and resources such as feeders, waterers, and nesting boxes can help reduce competition.
- Provide Multiple Food and Water Stations: Having multiple feeding and watering stations dispersed throughout the coop or run can help reduce competition and prevent dominant chickens from monopolizing resources.
- Introduce Hiding Places: Provide hiding spots or shelters within the coop or run where bullied chickens can escape from aggressors. This could include structures like branches, platforms, or hiding boxes.
- Add Distractions: Enrich the environment with distractions such as hanging treats, perches, or toys to keep chickens occupied and redirect their focus away from bullying behaviors.
- Reorganize the Flock: If certain chickens are consistently aggressive or dominant, consider reorganizing the flock hierarchy. This can involve removing or isolating particularly aggressive individuals or introducing new chickens to disrupt established social dynamics.
- Separate Bullied Individuals: If specific chickens are being targeted and consistently bullied, consider temporarily separating them from the main flock until they can recover and reintegrate without being harassed.
- Use Visual Barriers: Use barriers such as temporary fencing or mesh partitions to create separate areas within the coop or run, allowing bullied chickens to avoid direct confrontation with aggressors.
- Address Health Issues: Sometimes, bullying behavior can be triggered by underlying health issues such as illness or injury. Regularly monitor the health of your flock and address any health concerns promptly to prevent them from becoming targets for bullying.
- Monitor and Adjust: Continuously monitor the dynamics within your flock and be prepared to adjust your management strategies as needed. What works for one group of chickens may not work for another, so remain flexible in your approach.
How do I keep my chickens from getting heat stress during transportation?
Answer:
Transportation can be stressful for chickens, especially during hot weather, but there are several steps you can take to minimize the risk of heat stress:
- Choose the Right Time: Whenever possible, schedule transportation during the cooler parts of the day, such as early morning or late evening, to avoid the peak heat hours.
- Provide Adequate Ventilation: Ensure that the transportation containers or crates have sufficient ventilation to allow for the exchange of air. Proper airflow helps prevent the buildup of heat and humidity inside the containers.
- Shade: If transporting chickens in open trailers or trucks, provide shade by covering the containers with breathable material such as tarps or mesh. This helps reduce direct exposure to the sun and lowers the ambient temperature inside the containers.
- Avoid Overcrowding: Overcrowding can increase heat stress, so ensure that chickens have enough space to move around comfortably during transportation. Avoid stacking crates too closely together, as this can impede airflow.
- Provide Water: Offer water to the chickens before and during transportation to keep them hydrated. Use spill-proof containers or waterers to prevent spills and wetting of bedding material, which can contribute to heat stress.
- Minimize Handling: Limit handling and movement of the chickens during loading and unloading to reduce stress. Gentle handling and minimal disturbance help keep chickens calm and reduce the risk of heat stress.
- Monitor Temperature: Use a thermometer to monitor the temperature inside the transportation containers. If possible, equip the containers with temperature monitoring devices to track temperature changes during transit.
- Reduce Travel Time: Minimize travel time as much as possible to reduce the duration of exposure to heat stress. Plan the route to avoid traffic congestion and delays, and choose the shortest and most direct route to the destination.
- Emergency Plan: Be prepared to take immediate action in case of emergency. Carry extra water, portable fans, and other cooling devices in case of unexpected delays or breakdowns during transportation.
- Training and Certification: Ensure that personnel involved in transporting chickens are properly trained and certified in handling poultry. They should be knowledgeable about signs of heat stress and know how to respond appropriately in case of emergency.
How do I prevent my chickens from developing footpad dermatitis?
Answer:
Preventing footpad dermatitis in chickens involves implementing good management practices and providing appropriate housing and bedding. Here are some strategies:
- Clean and Dry Bedding: Ensure that the coop floor is covered with clean, dry bedding material such as straw, wood shavings, or sand. Moist bedding can contribute to the development of footpad dermatitis, so regularly clean and replace soiled bedding to maintain a dry environment.
- Provide Proper Flooring: Use flooring materials that are comfortable and supportive for chickens’ feet. Avoid wire flooring or rough surfaces that can cause abrasions and irritate the footpads. Smooth, non-slippery surfaces are ideal for preventing footpad injuries.
- Regular Cleaning: Keep the coop clean by regularly removing droppings, spilled feed, and wet bedding. Dirty and wet conditions create an environment conducive to bacterial growth, increasing the risk of footpad dermatitis.
- Control Moisture Levels: Maintain proper ventilation in the coop to reduce humidity levels and prevent moisture buildup. Adequate airflow helps keep bedding and litter dry, reducing the risk of bacterial contamination and footpad issues.
- Trim Claws: Overgrown claws can cause discomfort and contribute to footpad injuries. Regularly trim your chickens’ claws to prevent them from becoming too long and causing issues with walking and standing.
- Provide Roosting Perches: Install roosting perches at different heights within the coop to allow chickens to rest and sleep off the ground. Ensure that the perches are wide enough to support the chickens’ feet comfortably and prevent them from developing pressure sores.
- Maintain Proper Nutrition: Ensure that your chickens are receiving a balanced diet with adequate levels of vitamins and minerals, particularly vitamin E and selenium, which play a role in skin health. Consult with a poultry nutritionist or veterinarian to formulate a suitable diet for your flock.
- Prevent Overcrowding: Avoid overcrowding in the coop, as it can lead to stress and competition for space. Provide enough space for each chicken to move around comfortably and avoid trampling each other, which can contribute to footpad injuries.
- Monitor for Signs of Dermatitis: Regularly inspect your chickens’ feet for signs of redness, swelling, or lesions, which are early indicators of footpad dermatitis. Promptly treat any affected birds and address underlying causes such as poor bedding or hygiene.
- Consult with a Veterinarian: If footpad dermatitis becomes a recurring issue despite your efforts to prevent it, consult with a poultry veterinarian for further guidance and recommendations tailored to your specific flock and management practices.
How do I prevent my chickens from developing egg yolk peritonitis (EYP)?
Answer:
Preventing egg yolk peritonitis (EYP) in chickens involves several management practices aimed at reducing the risk of reproductive tract infections and egg-related complications. Here are some strategies:
- Maintain Optimal Housing Conditions: Provide clean, dry, and well-ventilated housing for your chickens. Proper ventilation helps reduce humidity levels and minimize the growth of bacteria that can lead to reproductive tract infections.
- Ensure Proper Nutrition: Feed your chickens a balanced diet that meets their nutritional requirements, including adequate levels of calcium and other essential nutrients. Proper nutrition supports reproductive health and helps prevent egg-related complications.
- Monitor Egg Production: Keep track of your chickens’ egg-laying patterns and monitor for any abnormalities such as soft-shelled eggs, misshapen eggs, or egg binding. Abnormal egg production can indicate underlying reproductive issues that may increase the risk of EYP.
- Provide Nesting Boxes: Offer suitable nesting boxes filled with clean bedding material to encourage hens to lay eggs in a designated area. Comfortable nesting boxes help prevent eggs from becoming dirty or damaged, reducing the risk of reproductive tract infections.
- Collect Eggs Promptly: Collect eggs frequently throughout the day to prevent them from accumulating in the nesting boxes. Leaving eggs in the nest for extended periods increases the risk of breakage, bacterial contamination, and subsequent infections.
- Minimize Stress: Reduce stressors in the environment that can negatively impact chickens’ reproductive health. Avoid overcrowding, excessive noise, sudden changes in routine, and other stress-inducing factors that can weaken the immune system and increase susceptibility to infections.
- Practice Good Hygiene: Maintain good hygiene practices in the coop and nesting areas by regularly cleaning and sanitizing equipment, feeders, waterers, and nesting boxes. Remove soiled bedding, droppings, and any other potential sources of contamination to prevent the spread of bacteria.
- Monitor Health Status: Regularly monitor your chickens for signs of illness or reproductive issues, such as lethargy, decreased egg production, abdominal swelling, or difficulty laying eggs. Promptly isolate and treat any affected birds to prevent the spread of infection to other flock members.
- Seek Veterinary Care: Consult with a poultry veterinarian if you suspect any reproductive health issues or notice symptoms of EYP in your chickens. A veterinarian can provide a proper diagnosis, treatment options, and recommendations for preventing future occurrences.
- Practice Selective Breeding: If you breed chickens, consider selecting for traits associated with strong reproductive health and egg quality. Breeding from birds with a history of good reproductive performance and resistance to reproductive tract infections can help improve overall flock health.
How do I prevent my chickens from developing vent prolapse?
Answer:
Preventing vent prolapse in chickens involves several management practices aimed at reducing the risk of reproductive tract injuries and maintaining overall flock health. Here are some strategies:
- Proper Nutrition: Ensure that your chickens are receiving a balanced diet with adequate levels of vitamins, minerals, and protein. Proper nutrition supports reproductive health and helps prevent issues such as obesity or nutritional deficiencies, which can contribute to vent prolapse.
- Monitor Body Condition: Regularly assess the body condition of your chickens and ensure they are neither underweight nor overweight. Obesity can increase the risk of vent prolapse, so adjust feeding practices as needed to maintain a healthy body condition.
- Provide Clean and Dry Bedding: Keep the coop clean and provide dry bedding material to minimize the risk of reproductive tract infections. Moist bedding can promote bacterial growth and increase the likelihood of vent prolapse.
- Prevent Overcrowding: Avoid overcrowding in the coop, as it can lead to stress and aggression among chickens. Provide enough space for each bird to move around comfortably and avoid excessive pecking or trampling, which can injure the vent area.
- Handle Chickens Gently: Minimize handling and avoid rough or forceful handling of chickens, especially during the egg-laying process. Gentle handling helps reduce stress and minimizes the risk of reproductive tract injuries.
- Monitor Egg Production: Keep track of your chickens’ egg-laying patterns and monitor for any abnormalities such as soft-shelled eggs, misshapen eggs, or egg binding. Abnormal egg production can indicate underlying reproductive issues that may increase the risk of vent prolapse.
- Provide Suitable Nesting Boxes: Offer comfortable nesting boxes filled with clean bedding material to encourage hens to lay eggs in a designated area. Properly designed nesting boxes help prevent egg-related injuries and reduce the risk of vent prolapse.
- Avoid Forced Mating: Minimize aggressive mating behaviors by providing enough roosters for your flock and ensuring a balanced rooster-to-hen ratio. Forced mating and excessive mounting can injure hens’ reproductive tracts and increase the risk of vent prolapse.
- Maintain Good Hygiene: Practice good hygiene in the coop and nesting areas by regularly cleaning and sanitizing equipment, feeders, waterers, and nesting boxes. Remove soiled bedding, droppings, and any other potential sources of contamination to prevent reproductive tract infections.
- Seek Veterinary Care: If you notice any signs of vent prolapse or reproductive tract injuries in your chickens, seek prompt veterinary attention. A veterinarian can provide a proper diagnosis, treatment options, and recommendations for preventing recurrence.
How do I discourage my chickens from picking on weaker flock members?
Discouraging bullying behavior among chickens and promoting a harmonious flock dynamic involves several strategies aimed at reducing aggression and establishing a more balanced social hierarchy. Here are some approaches to discourage chickens from picking on weaker flock members:
- Provide Sufficient Space: Ensure that your chickens have enough space to move around comfortably and avoid overcrowding. Overcrowding can exacerbate aggressive behavior and competition for resources, leading to bullying of weaker flock members.
- Multiple Feeding and Watering Stations: Offer multiple feeding and watering stations distributed throughout the coop or run to minimize competition for food and water. This reduces the likelihood of dominant chickens monopolizing resources and bullying others away from them.
- Offer Environmental Enrichment: Provide distractions and environmental enrichment such as perches, toys, hanging treats, and areas for dust bathing. Enrichment activities help alleviate boredom and redirect aggressive tendencies towards more productive behaviors.
- Introduce New Birds Carefully: When introducing new chickens to the flock, do so gradually and in a controlled manner. Use techniques like temporary visual barriers or supervised introductions to allow birds to acclimate to each other without immediate confrontation.
- Balance Rooster-to-Hen Ratio: Maintain a balanced ratio of roosters to hens to prevent overmating and excessive aggression among males. Too few roosters can result in increased aggression towards hens, while too many can lead to aggression between males.
- Identify and Separate Aggressors: If certain chickens consistently exhibit aggressive behavior towards weaker flock members, consider isolating or separating them temporarily. This allows bullied chickens to recover and reintegrate into the flock without continued harassment.
- Provide Hiding Places: Offer hiding spots or shelters within the coop or run where bullied chickens can escape from aggressors. This could include structures like branches, platforms, or hiding boxes where weaker flock members can seek refuge.
- Address Health Issues: Address any underlying health issues that may be contributing to bullying behavior. Sick or injured chickens are often targeted by aggressors, so prompt veterinary care can help alleviate their vulnerability.
- Observe and Intervene: Regularly observe your flock for signs of bullying behavior, such as pecking, chasing, or feather plucking. Intervene immediately to disrupt aggressive interactions and redirect chickens’ attention to more appropriate activities.
- Promote Leadership Rotation: Occasionally introducing new flock members or changing the layout of the coop can disrupt established social hierarchies and reduce aggression. This prevents dominant individuals from becoming too entrenched in their positions of power.
How do I prevent my chickens from developing egg-eating behavior?
Answer:
Preventing egg-eating behavior in chickens involves implementing measures to discourage the behavior and addressing underlying causes that may contribute to it. Here are some strategies to prevent egg-eating:
- Collect Eggs Promptly: Gather eggs frequently throughout the day to minimize the opportunity for chickens to discover and consume them. Collecting eggs promptly reduces the likelihood of accidental breakage and prevents chickens from developing a taste for eggs.
- Provide Suitable Nesting Boxes: Offer comfortable and clean nesting boxes filled with soft bedding material to encourage hens to lay eggs in designated areas. Properly designed nesting boxes help prevent eggs from rolling out and becoming accessible to chickens, reducing the temptation to eat them.
- Fake Eggs or Golf Balls: Place artificial eggs or golf balls in the nesting boxes to mimic the appearance and feel of real eggs. Chickens may lose interest in pecking at eggs if they encounter objects that do not yield any food.
- Optimize Nutrition: Ensure that your chickens are receiving a balanced diet with adequate levels of protein, vitamins, and minerals. Nutritional deficiencies can lead to abnormal egg production or weak eggshells, which may increase the likelihood of egg-eating behavior.
- Calcium Supplementation: Provide supplemental calcium sources such as crushed eggshells or oyster shell grit to support strong eggshell formation. Calcium deficiency can result in fragile eggshells that are more prone to breakage and consumption by chickens.
- Minimize Stress: Reduce stressors in the environment that may trigger egg-eating behavior, such as overcrowding, loud noises, predator threats, or sudden changes in routine. Minimizing stress helps keep chickens calm and reduces the likelihood of undesirable behaviors.
- Maintain Cleanliness: Keep the nesting boxes and coop clean and free of soiled bedding, droppings, and debris. Dirty nesting areas can lead to dirty eggs, which may attract chickens to peck and consume them.
- Monitor Flock Dynamics: Watch for signs of aggression or bullying within the flock, as dominant chickens may target eggs or weaker flock members. Address any aggressive behavior promptly and provide adequate space and resources to reduce competition.
- Offer Environmental Enrichment: Provide distractions and enrichment activities to keep chickens occupied and prevent boredom. Hanging treats, perches, and toys can help redirect their attention away from eggs and discourage egg-eating behavior.
- Address Health Issues: Monitor the health of your flock regularly and address any underlying health issues that may contribute to abnormal egg production or egg-related behaviors. Consult with a poultry veterinarian if necessary for guidance and treatment options.
How do I manage behavioral issues in my flock?
Answer:
Managing behavioral issues in a chicken flock involves understanding the underlying causes of the behavior and implementing appropriate management strategies. Here are some general steps to manage behavioral issues:
- Observe and Identify: Spend time observing your flock to identify any problematic behaviors, such as aggression, bullying, feather pecking, or egg-eating. Understanding the triggers and patterns of these behaviors is crucial for developing effective management strategies.
- Provide Adequate Space: Ensure that your chickens have enough space to move around comfortably and engage in natural behaviors. Overcrowding can lead to stress and aggression, so provide sufficient space both indoors and outdoors.
- Establish a Pecking Order: Chickens naturally establish a pecking order within the flock, but excessive aggression and bullying should be addressed. Introduce new flock members gradually and monitor interactions to prevent excessive dominance or aggression.
- Maintain a Balanced Diet: Ensure that your chickens are receiving a balanced diet with adequate nutrition. Nutritional deficiencies can contribute to behavioral issues, so provide access to quality feed and supplemental nutrients as needed.
- Provide Environmental Enrichment: Offer distractions and enrichment activities to keep chickens mentally stimulated and reduce boredom. Provide perches, dust bathing areas, hanging treats, and toys to encourage natural behaviors.
- Manage Stress: Minimize stressors in the environment that can trigger or exacerbate behavioral issues. Avoid sudden changes in routine, loud noises, overcrowding, predator threats, and other stress-inducing factors.
- Address Health Issues: Monitor the health of your flock regularly and address any underlying health issues promptly. Sick or injured chickens may exhibit abnormal behaviors, so provide appropriate veterinary care and treatment as needed.
- Use Visual Barriers: If aggression or bullying is a problem, consider using visual barriers such as temporary fencing or partitions to separate aggressive individuals from their targets. This allows bullied chickens to avoid direct confrontation and reduces the likelihood of injury.
- Provide Multiple Resources: Offer multiple feeding and watering stations, nesting boxes, and roosting areas to minimize competition and prevent resource guarding. Access to ample resources reduces stress and helps maintain peace within the flock.
- Monitor and Adjust: Continuously monitor your flock’s behavior and be prepared to adjust your management strategies as needed. What works for one flock may not work for another, so remain flexible and adapt your approach based on the specific dynamics of your flock.
How do I prevent my chickens from feather pecking?
Answer:
Preventing feather pecking in chickens involves a combination of management strategies aimed at addressing underlying causes and providing a stimulating environment. Here are some approaches to prevent feather pecking:
- Provide Adequate Space: Ensure that your chickens have enough space to move around comfortably both indoors and outdoors. Overcrowding can lead to stress and boredom, increasing the likelihood of feather pecking behavior.
- Establish a Balanced Diet: Feed your chickens a balanced diet with adequate protein and nutrients. Protein deficiency can contribute to feather pecking, so provide high-quality feed and consider supplementing with protein sources if needed.
- Provide Environmental Enrichment: Offer distractions and enrichment activities to keep chickens mentally stimulated and reduce boredom. Provide perches, dust bathing areas, hanging treats, and toys to encourage natural behaviors and prevent excessive pecking.
- Ensure Proper Nutrition: Ensure that your chickens have access to clean water and appropriate nutrition. Nutritional deficiencies, particularly of essential amino acids and vitamins, can contribute to feather pecking behavior.
- Monitor Lighting Conditions: Ensure that your chickens have access to natural light or provide supplemental lighting to maintain a consistent day-night cycle. Sudden changes in lighting conditions can disrupt the birds’ circadian rhythms and increase stress levels, leading to feather pecking.
- Address Social Dynamics: Monitor the social dynamics within your flock and intervene to prevent bullying or aggressive behaviors. Introduce new flock members gradually and monitor interactions to prevent excessive dominance or aggression.
- Use Visual Barriers: If feather pecking is a problem, consider using visual barriers such as temporary fencing or partitions to separate aggressive individuals from their targets. This allows bullied chickens to avoid direct confrontation and reduces the likelihood of injury.
- Trim Beaks: In severe cases of feather pecking, consider trimming the beaks of aggressive chickens to reduce their ability to injure other birds. Beak trimming should be done by a trained professional and as a last resort after other management strategies have been exhausted.
- Address Underlying Health Issues: Monitor the health of your flock regularly and address any underlying health issues promptly. Sick or injured chickens may exhibit abnormal behaviors, including feather pecking, so provide appropriate veterinary care and treatment as needed.
- Monitor and Adjust: Continuously monitor your flock’s behavior and be prepared to adjust your management strategies as needed. What works for one flock may not work for another, so remain flexible and adapt your approach based on the specific dynamics of your flock.
How do I discourage my chickens from developing vent cannibalism?
Answer:
Vent cannibalism, also known as vent pecking, is a challenging behavior to address but can be managed with careful attention to the underlying causes and appropriate management strategies. Here are some approaches to discourage vent cannibalism in chickens:
- Provide Adequate Space: Ensure that your chickens have enough space to move around comfortably both indoors and outdoors. Overcrowding can increase stress levels and aggression, leading to vent cannibalism.
- Establish a Balanced Diet: Feed your chickens a balanced diet with adequate protein and nutrients. Protein deficiency can contribute to cannibalistic behavior, so ensure that your chickens are receiving high-quality feed and sufficient protein sources.
- Address Nutritional Deficiencies: Monitor your flock’s nutrition and address any deficiencies promptly. Consult with a poultry nutritionist or veterinarian to formulate a diet that meets your chickens’ nutritional needs and helps prevent cannibalistic behavior.
- Provide Environmental Enrichment: Offer distractions and enrichment activities to keep chickens mentally stimulated and reduce boredom. Provide perches, dust bathing areas, hanging treats, and toys to encourage natural behaviors and prevent aggression.
- Monitor Social Dynamics: Pay attention to the social dynamics within your flock and intervene to prevent bullying or aggressive behaviors. Provide multiple feeding and watering stations to reduce competition and prevent resource guarding.
- Address Stressors: Identify and minimize stressors in the environment that may trigger cannibalistic behavior. Avoid sudden changes in routine, overcrowding, loud noises, predator threats, and other stress-inducing factors.
- Use Visual Barriers: If cannibalism is a problem, consider using visual barriers such as temporary fencing or partitions to separate aggressive individuals from their targets. This allows bullied chickens to avoid direct confrontation and reduces the likelihood of injury.
- Provide Proper Lighting: Ensure that your chickens have access to natural light or provide supplemental lighting to maintain a consistent day-night cycle. Sudden changes in lighting conditions can disrupt the birds’ circadian rhythms and increase stress levels.
- Trim Beaks: In severe cases of vent cannibalism, consider trimming the beaks of aggressive chickens to reduce their ability to injure other birds. Beak trimming should be done by a trained professional and as a last resort after other management strategies have been exhausted.
- Monitor and Adjust: Continuously monitor your flock’s behavior and be prepared to adjust your management strategies as needed. What works for one flock may not work for another, so remain flexible and adapt your approach based on the specific dynamics of your flock.
How do I prevent my chickens from developing eggshell abnormalities?
Answer:
Preventing eggshell abnormalities in chickens involves several management practices aimed at ensuring proper nutrition, environmental conditions, and overall flock health. Here are some strategies to prevent eggshell abnormalities:
- Provide a Balanced Diet: Ensure that your chickens are receiving a balanced diet with adequate levels of calcium, phosphorus, vitamin D, and other essential nutrients. Calcium is particularly important for strong eggshell formation, so provide supplemental calcium sources such as crushed eggshells or oyster shell grit if needed.
- Monitor Nutrition: Monitor your flock’s nutrition and adjust their diet as needed to prevent deficiencies or imbalances that can contribute to eggshell abnormalities. Consult with a poultry nutritionist or veterinarian to formulate a diet that meets your chickens’ specific needs.
- Maintain Optimal Body Condition: Ensure that your chickens are neither underweight nor overweight, as extremes in body condition can affect eggshell quality. Monitor their body condition regularly and adjust feeding practices as needed to maintain a healthy weight.
- Provide Clean Water: Ensure that your chickens have access to clean, fresh water at all times. Dehydration can affect egg production and eggshell quality, so ensure that waterers are kept clean and free of contamination.
- Manage Environmental Conditions: Maintain proper environmental conditions in the coop, including temperature, humidity, and ventilation. Sudden fluctuations in temperature or exposure to extreme conditions can impact eggshell quality, so provide adequate insulation and ventilation to keep the coop comfortable.
- Minimize Stress: Minimize stressors in the environment that can affect egg production and quality. Avoid overcrowding, loud noises, predator threats, and other stress-inducing factors that can disrupt egg production and contribute to eggshell abnormalities.
- Prevent Disease: Monitor the health of your flock regularly and implement measures to prevent diseases that can affect egg production and shell quality. Practice good biosecurity measures, maintain a clean coop, and promptly address any signs of illness or infection.
- Provide Suitable Nesting Boxes: Offer clean, comfortable nesting boxes filled with soft bedding material to encourage hens to lay eggs in a designated area. Properly designed nesting boxes help prevent eggs from becoming dirty or damaged, reducing the risk of eggshell abnormalities.
- Regular Egg Collection: Collect eggs frequently throughout the day to prevent them from accumulating in the nesting boxes. Leaving eggs in the nest for extended periods can increase the risk of breakage and contamination, leading to eggshell abnormalities.
- Monitor Egg Quality: Regularly inspect eggs for abnormalities such as thin shells, cracks, or irregularities. Monitor egg production and quality over time to identify any trends or patterns that may indicate underlying issues affecting eggshell quality.
How do I manage bullying among chickens in a free-range setup?
Answer:
Managing bullying among chickens in a free-range setup requires careful observation, intervention, and providing a supportive environment that minimizes stress and competition. Here are some strategies to manage bullying in a free-range setting:
- Provide Sufficient Space: Ensure that your free-range area is large enough to accommodate all chickens comfortably. Overcrowding can exacerbate bullying behavior, so provide ample space for chickens to roam, forage, and establish their territories.
- Multiple Food and Water Stations: Offer multiple feeding and watering stations dispersed throughout the free-range area to minimize competition and prevent aggressive behavior during feeding time. Access to multiple resources reduces the likelihood of bullying over food and water.
- Environmental Enrichment: Provide environmental enrichment such as natural vegetation, hiding spots, perches, and dust bathing areas to keep chickens mentally stimulated and reduce boredom. Enrichment activities can help redirect aggressive tendencies towards more productive behaviors.
- Monitor Social Dynamics: Regularly observe the social interactions within your flock and intervene to prevent bullying or aggressive behaviors. Pay attention to body language, vocalizations, and any signs of distress or injury among chickens.
- Introduce New Birds Gradually: When introducing new chickens to the flock, do so gradually and in a controlled manner. Monitor interactions between new and existing flock members to prevent aggression and establish a pecking order without excessive bullying.
- Provide Escape Routes: Offer hiding spots, shelters, and elevated perches where bullied chickens can escape from aggressors and seek refuge. Providing multiple escape routes allows bullied chickens to avoid direct confrontation and reduces stress.
- Address Underlying Stressors: Identify and minimize stressors in the environment that may trigger or exacerbate bullying behavior. Avoid sudden changes in routine, loud noises, predator threats, and other stress-inducing factors that can disrupt the flock dynamics.
- Implement Visual Barriers: If bullying persists despite other interventions, consider using temporary fencing, barriers, or partitions to separate aggressive individuals from their targets. Visual barriers allow bullied chickens to avoid direct confrontation and reduce the likelihood of injury.
- Practice Selective Breeding: If you breed chickens, consider selecting for traits associated with calm temperament and social compatibility. Breeding from birds with a history of good social behavior can help improve overall flock dynamics and reduce the incidence of bullying.
- Monitor and Intervene: Continuously monitor your free-range flock for signs of bullying behavior and be prepared to intervene as needed. Promptly separate aggressive individuals, provide medical attention to injured birds, and implement additional management strategies as necessary.
How do I prevent my chickens from developing aggressive behavior during feeding?
Answer:
Preventing aggressive behavior during feeding in chickens involves implementing management strategies that reduce competition and promote a more peaceful feeding environment. Here are some approaches to prevent feeding aggression:
- Provide Sufficient Space: Ensure that your chickens have enough space to access food without feeling crowded. Overcrowding can exacerbate feeding aggression, so provide ample space for all chickens to eat comfortably.
- Multiple Feeding Stations: Offer multiple feeding stations dispersed throughout the coop or free-range area to minimize competition and prevent overcrowding at feeding time. Access to multiple food sources reduces the likelihood of aggressive behavior over limited resources.
- Use Larger Feeders: Use larger or multiple feeders to accommodate all chickens simultaneously. Avoid small or narrow feeders that restrict access and encourage competition, as they can lead to aggression and pecking.
- Feed High-Quality Nutrition: Ensure that your chickens are receiving a balanced diet with high-quality nutrition. A diet lacking essential nutrients can lead to increased aggression and competition for food. Provide a balanced feed appropriate for your chickens’ age and stage of development.
- Feed at Regular Intervals: Establish a consistent feeding schedule and stick to it. Regular feeding times help reduce anxiety and anticipation, minimizing the likelihood of aggressive behavior during feeding.
- Feed in Different Locations: Scatter feed or provide multiple feeding stations in different areas of the coop or free-range space. This encourages natural foraging behavior and prevents dominant chickens from monopolizing a single feeding area.
- Provide Environmental Enrichment: Offer distractions and enrichment activities to keep chickens mentally stimulated and reduce boredom. Perches, hanging treats, and other enrichment items can help redirect aggressive tendencies towards more productive behaviors.
- Monitor and Intervene: Regularly observe feeding interactions among your chickens and intervene promptly if aggressive behavior is observed. Redirect aggressive individuals, separate them from the feeding area if necessary, and provide distractions to diffuse tension.
- Address Social Dynamics: Monitor the social dynamics within your flock and address any bullying or dominance issues that may contribute to feeding aggression. Introduce new birds gradually, discourage aggressive behaviors, and promote a balanced pecking order.
- Use Visual Barriers: If feeding aggression persists despite other interventions, consider using temporary fencing or barriers to create visual barriers between chickens during feeding. This allows less dominant individuals to eat in peace and reduces the risk of injury.
How do I manage bullying among chickens during molting?
Answer:
Managing bullying among chickens during molting requires careful observation, intervention, and providing a supportive environment that minimizes stress and competition. Molting is a stressful time for chickens, as they undergo feather loss and regrowth, which can disrupt social dynamics within the flock. Here are some strategies to manage bullying during molting:
- Provide Sufficient Space: Ensure that your chickens have enough space to move around comfortably and avoid overcrowding. Overcrowding can exacerbate bullying behavior, so provide ample space for molting chickens to retreat and recover without being harassed by others.
- Multiple Feeding and Watering Stations: Offer multiple feeding and watering stations dispersed throughout the coop or free-range area to minimize competition and prevent aggressive behavior during feeding time. Molting chickens may have reduced mobility and may need easier access to resources.
- Environmental Enrichment: Provide distractions and enrichment activities to keep molting chickens mentally stimulated and reduce stress. Offer perches, dust bathing areas, hanging treats, and toys to help redirect aggressive tendencies towards more productive behaviors.
- Monitor Social Dynamics: Regularly observe the social interactions within your flock and intervene to prevent bullying or aggressive behaviors. Molting chickens are often more vulnerable to bullying, so pay close attention to their interactions with other flock members.
- Provide Adequate Nutrition: Ensure that molting chickens receive a balanced diet with adequate protein, vitamins, and minerals to support feather regrowth and overall health. Consider offering higher-protein feeds or supplements specifically formulated for molting birds.
- Reduce Handling: Minimize handling and disturbances during molting, as chickens may be more sensitive and stressed during this time. Avoid unnecessary disruptions to allow molting chickens to focus on feather regrowth and recovery.
- Offer Gentle Care: Provide gentle care and attention to molting chickens to help alleviate stress and promote comfort. Check for signs of injury or excessive pecking and provide appropriate medical care if needed.
- Separate Aggressive Birds: If bullying persists despite other interventions, consider separating aggressive individuals from the rest of the flock temporarily. Provide a separate enclosure where bullied chickens can recover and regrow their feathers in peace.
- Maintain a Balanced Flock: Monitor the flock dynamics and address any dominance issues or social hierarchies that may contribute to bullying behavior. Introduce new birds gradually and promote a balanced pecking order within the flock.
- Monitor and Intervene: Continuously monitor your flock during molting and be prepared to intervene promptly if bullying or aggressive behavior is observed. Redirect aggressive individuals, provide distractions, and ensure that molting chickens have access to resources and space to recover.
How do I prevent my chickens from developing feather picking behavior?
Answer:
Preventing feather picking behavior in chickens involves implementing management strategies aimed at addressing underlying causes and promoting a harmonious environment. Feather picking can be triggered by various factors, including boredom, stress, nutritional deficiencies, overcrowding, and social dynamics within the flock. Here are some strategies to prevent feather picking:
- Provide Adequate Space: Ensure that your chickens have enough space to move around comfortably and engage in natural behaviors. Overcrowding can increase stress and aggression, leading to feather picking behavior. Provide ample space both indoors and outdoors to reduce competition and promote a peaceful environment.
- Environmental Enrichment: Offer distractions and enrichment activities to keep chickens mentally stimulated and reduce boredom. Provide perches, dust bathing areas, hanging treats, and toys to encourage natural behaviors and prevent excessive pecking at feathers.
- Provide a Balanced Diet: Ensure that your chickens are receiving a balanced diet with adequate levels of protein, vitamins, and minerals. Nutritional deficiencies can contribute to feather picking behavior, so provide high-quality feed and supplement with vitamins or minerals if needed.
- Monitor Nutrition: Monitor your flock’s nutrition and adjust their diet as needed to prevent deficiencies or imbalances that can contribute to feather picking. Consult with a poultry nutritionist or veterinarian to formulate a diet that meets your chickens’ specific needs.
- Address Stressors: Identify and minimize stressors in the environment that may trigger or exacerbate feather picking behavior. Avoid sudden changes in routine, loud noises, predator threats, overcrowding, and other stress-inducing factors.
- Maintain a Clean Environment: Keep the coop clean and well-maintained to minimize the risk of skin irritation or infection, which can contribute to feather picking. Remove soiled bedding, droppings, and debris regularly, and provide clean water and nesting materials.
- Monitor Social Dynamics: Pay attention to the social interactions within your flock and intervene to prevent bullying or aggressive behaviors. Address dominance issues and promote a balanced pecking order to reduce tension and prevent feather picking.
- Provide Visual Barriers: If feather picking persists despite other interventions, consider using temporary fencing or barriers to create visual barriers between chickens. This allows bullied or picked-on chickens to avoid direct confrontation and reduces stress.
- Address Health Issues: Monitor the health of your flock regularly and address any underlying health issues that may contribute to feather picking. Provide appropriate veterinary care and treatment for injured or sick birds to promote healing and prevent further picking.
- Monitor and Intervene: Continuously monitor your flock for signs of feather picking behavior and be prepared to intervene promptly if needed. Redirect aggressive individuals, separate injured birds for treatment, and implement additional management strategies as necessary.
How do I prevent my chickens from developing egg drop syndrome?
Answer:
Egg Drop Syndrome (EDS) is a viral disease that primarily affects laying hens, leading to decreased egg production, poor shell quality, and other reproductive issues. While there is no specific treatment for EDS, preventive measures can help reduce the risk of the disease spreading within your flock. Here are some strategies to prevent chickens from developing Egg Drop Syndrome:
- Biosecurity Measures: Implement strict biosecurity measures to prevent the introduction and spread of EDS virus into your flock. This includes limiting visitors, quarantining new birds before introducing them to the flock, and practicing good hygiene practices such as disinfecting equipment and wearing clean clothing and footwear when entering the coop.
- Vaccination: Vaccination is an effective method to prevent EDS in commercial poultry flocks. Consult with a poultry veterinarian to determine if vaccination is appropriate for your flock and follow their recommended vaccination schedule.
- Control Mosquitoes: EDS virus is primarily spread by mosquitoes, so controlling mosquito populations around your flock can help reduce the risk of transmission. Implement mosquito control measures such as eliminating standing water where mosquitoes breed, using insecticides, and installing mosquito netting or screens around the coop.
- Monitor Egg Production: Keep track of your hens’ egg production and monitor for any sudden drops or abnormalities in egg quality. Decreased egg production and poor shell quality can be early indicators of EDS or other reproductive issues, so prompt detection and intervention are essential.
- Maintain Optimal Nutrition: Ensure that your chickens are receiving a balanced diet with adequate levels of protein, vitamins, and minerals to support their immune system and reproductive health. Proper nutrition helps strengthen their defenses against diseases like EDS.
- Reduce Stress: Minimize stressors in the environment that can weaken chickens’ immune systems and make them more susceptible to EDS. Avoid overcrowding, sudden changes in routine, temperature extremes, and other stress-inducing factors that can compromise their health.
- Monitor Flock Health: Regularly monitor the health of your flock for any signs of illness or abnormalities. Conduct routine health checks, observe for any symptoms of EDS such as decreased egg production or soft-shelled eggs, and promptly isolate and treat any sick birds to prevent the spread of the disease.
- Practice Good Hygiene: Maintain clean and hygienic conditions in the coop and nesting areas to reduce the risk of disease transmission. Regularly clean and disinfect equipment, feeders, waterers, and nesting boxes, and remove soiled bedding and droppings to minimize the buildup of pathogens.
- Avoid Contact with Wild Birds: Limit contact between your flock and wild birds, as they can carry and transmit EDS virus. Keep feed and water sources covered to prevent contamination by wild birds, and discourage wild birds from roosting or nesting near your coop.
- Seek Veterinary Advice: If you suspect EDS or any other health issues in your flock, seek prompt veterinary advice and assistance. A poultry veterinarian can provide a proper diagnosis, treatment options, and recommendations for disease prevention and control.
How do I manage bullying among chickens during roosting?
Answer:
Managing bullying among chickens during roosting involves implementing strategies to promote a peaceful and harmonious environment in the coop. Roosting time is important for chickens as it allows them to rest and recharge for the next day. Here are some approaches to manage bullying during roosting:
- Provide Sufficient Roosting Space: Ensure that there is enough space on the roosting bars for all chickens to comfortably perch without overcrowding. Overcrowding can lead to competition for space and bullying behavior, so provide ample room for each bird to roost comfortably.
- Offer Multiple Roosting Bars: Provide multiple roosting bars at different heights and locations within the coop to prevent dominant chickens from monopolizing one area. Having multiple options allows submissive chickens to find a safe space away from bullies.
- Monitor Roosting Dynamics: Regularly observe the roosting behavior of your flock to identify any signs of bullying or aggression. Pay attention to interactions between chickens and intervene if necessary to prevent bullying behavior.
- Address Social Dynamics: Monitor the social dynamics within your flock and address any dominance issues or aggression that may occur during roosting. Introduce new birds gradually and promote a balanced pecking order to reduce tension and prevent bullying.
- Use Visual Barriers: If bullying persists despite other interventions, consider using temporary fencing or partitions to create visual barriers between chickens on the roosting bars. This allows bullied chickens to avoid direct confrontation and reduces stress.
- Provide Perches of Different Sizes: Offer perches of varying widths and diameters to accommodate chickens of different sizes and ages. This prevents larger or more dominant birds from excluding smaller or younger birds from the roosting bars.
- Implement Distraction Techniques: Provide distractions such as hanging treats or toys near the roosting area to redirect chickens’ attention and reduce boredom. Distraction techniques can help alleviate tension and prevent bullying behavior.
- Address Health Issues: Monitor the health of your flock regularly and address any underlying health issues that may contribute to bullying behavior. Sick or injured chickens are more vulnerable to bullying, so provide appropriate veterinary care and treatment as needed.
- Promote a Calm Environment: Minimize stressors in the coop during roosting time by keeping noise levels low and maintaining a calm environment. Avoid sudden changes in lighting or temperature that may disrupt chickens’ sleep patterns and increase stress levels.
- Monitor and Intervene: Continuously monitor your flock during roosting time and be prepared to intervene promptly if bullying or aggressive behavior is observed. Separate aggressive individuals, provide distractions, and ensure that all chickens have access to a safe and comfortable roosting space.
How do I prevent my chickens from developing cage layer fatigue?
Answer:
Cage layer fatigue, also known as cage layer osteoporosis, is a condition that commonly affects hens kept in battery cages, characterized by brittle bones and skeletal deformities due to calcium depletion. Preventing cage layer fatigue involves providing proper nutrition, environmental enrichment, and management practices to support bone health and prevent calcium depletion. Here are some strategies to prevent cage layer fatigue:
- Provide a Balanced Diet: Ensure that your chickens receive a balanced diet with adequate levels of calcium, phosphorus, vitamin D, and other essential nutrients. Calcium is crucial for bone health and eggshell formation, so offer high-quality layer feed supplemented with calcium sources such as crushed eggshells or oyster shell grit.
- Calcium Supplementation: Provide free-choice access to calcium supplements such as crushed eggshells or oyster shell grit in a separate feeder. This allows hens to consume additional calcium as needed to support egg production and maintain bone health.
- Limit Protein Levels: Excessive dietary protein can increase calcium excretion and contribute to calcium depletion in laying hens. Feed a layer diet with moderate protein levels appropriate for your chickens’ stage of production to minimize calcium loss.
- Encourage Exercise: Allow your chickens to engage in natural behaviors such as scratching, pecking, and foraging by providing ample space for exercise and environmental enrichment. Physical activity promotes bone strength and density, reducing the risk of skeletal problems associated with cage layer fatigue.
- Provide Environmental Enrichment: Offer distractions and enrichment activities to keep chickens mentally stimulated and physically active. Provide perches, dust bathing areas, hanging treats, and toys to encourage natural behaviors and reduce stress.
- Maintain Optimal Lighting: Ensure that your chickens receive appropriate lighting conditions to support calcium metabolism and egg production. Provide a consistent day-night cycle with access to natural light or supplemental lighting to maintain hormonal balance and bone health.
- Monitor Body Condition: Regularly monitor your chickens’ body condition and adjust their diet as needed to prevent obesity or excessive weight loss, both of which can affect bone health and egg production. Maintain a healthy body weight to support overall skeletal health.
- Promote Proper Hydration: Ensure that your chickens have access to clean, fresh water at all times to support egg production and maintain hydration. Dehydration can exacerbate calcium depletion and increase the risk of cage layer fatigue.
- Provide Adequate Nesting Material: Offer clean and comfortable nesting material in nesting boxes to encourage hens to lay eggs in a designated area. Proper nesting material reduces the risk of egg breakage and prevents calcium loss associated with reabsorbing broken eggs.
- Consider Alternative Housing Systems: Consider transitioning your chickens to alternative housing systems such as free-range or pasture-based systems that allow for natural behaviors and provide opportunities for exercise, reducing the risk of cage layer fatigue associated with confinement in battery cages.
How do I prevent my chickens from developing ascites?
Answer:
Preventing ascites, also known as pulmonary hypertension syndrome (PHS), in chickens involves implementing management practices aimed at reducing stress, improving cardiovascular health, and promoting overall well-being. Ascites is a condition characterized by the accumulation of fluid in the abdominal cavity, often associated with heart and lung problems. Here are some strategies to prevent ascites in chickens:
- Maintain Optimal Environmental Conditions: Ensure that your chicken coop or housing facility provides appropriate ventilation, temperature control, and humidity levels. Poor ventilation and extreme temperatures can contribute to respiratory stress and increase the risk of ascites.
- Provide Proper Nutrition: Feed your chickens a balanced diet with appropriate levels of protein, energy, vitamins, and minerals. Avoid feeding excessive amounts of high-energy diets that can lead to obesity and metabolic imbalances, contributing to ascites.
- Limit Energy-Dense Diets: Restrict access to high-energy diets, particularly those high in fat and carbohydrates, which can increase metabolic demand and strain the cardiovascular system. Provide a balanced diet appropriate for your chickens’ age, breed, and production stage to prevent metabolic stress.
- Control Feed Intake: Monitor feed intake and avoid overfeeding, which can lead to excessive weight gain and strain on the heart and lungs. Implement feeding management practices such as controlled feeding schedules or use of feeders with limited access to prevent excessive consumption.
- Promote Exercise and Activity: Encourage physical activity and exercise by providing ample space for chickens to move around, engage in natural behaviors, and forage for food. Regular exercise promotes cardiovascular health and reduces the risk of ascites associated with inactivity and obesity.
- Reduce Stocking Density: Avoid overcrowding in the chicken coop or housing facility to minimize stress and competition among chickens. Maintain appropriate stocking densities to allow adequate space for movement, ventilation, and social interactions.
- Minimize Stress: Minimize stressors in the environment that can contribute to cardiovascular strain and increase the risk of ascites. Avoid sudden changes in routine, loud noises, predator threats, and other stress-inducing factors that can disrupt the chickens’ health and well-being.
- Monitor and Manage Flock Health: Regularly monitor the health of your flock for any signs of respiratory distress, lethargy, or abnormal behavior that may indicate underlying health issues. Implement preventive health measures such as vaccination, parasite control, and routine health checks to maintain flock health and prevent diseases that can predispose chickens to ascites.
- Provide Clean Water: Ensure that chickens have access to clean, fresh water at all times to support hydration, proper kidney function, and cardiovascular health. Dehydration can exacerbate cardiovascular strain and increase the risk of ascites.
- Seek Veterinary Advice: If you suspect ascites or any other health issues in your flock, seek prompt veterinary advice and assistance. A poultry veterinarian can provide a proper diagnosis, treatment options, and recommendations for disease prevention and control.
How do I manage bullying among chickens during dust bathing?
Answer:
Managing bullying among chickens during dust bathing involves creating a conducive environment where all chickens can engage in this natural behavior without fear of harassment. Dust bathing is an essential behavior for chickens to maintain their hygiene and health, and bullying during this activity can lead to stress and other behavioral issues. Here are some strategies to manage bullying during dust bathing:
- Provide Adequate Dust Bathing Areas: Ensure that you have enough dust bathing areas for all chickens to access comfortably. Provide multiple dust bathing spots distributed throughout the coop or free-range area to prevent overcrowding and competition.
- Use Fine Dust Material: Use fine dust or sand as the bedding material for dust bathing areas. Chickens prefer fine particles that can effectively clean their feathers and skin. Avoid using coarse or abrasive materials that may cause discomfort or irritation.
- Monitor Social Dynamics: Observe the social interactions among your flock during dust bathing and intervene if bullying or aggressive behavior is observed. Pay attention to body language, vocalizations, and any signs of distress among chickens.
- Provide Environmental Enrichment: Offer distractions and enrichment activities near dust bathing areas to keep chickens mentally stimulated and reduce boredom. Perches, hanging treats, and toys can help redirect aggressive tendencies towards more productive behaviors.
- Ensure Adequate Space: Ensure that there is enough space around dust bathing areas for chickens to move freely and avoid confrontation. Overcrowding can lead to stress and competition, increasing the likelihood of bullying during dust bathing.
- Address Social Hierarchies: Monitor the social hierarchy within your flock and address any dominance issues that may contribute to bullying behavior. Introduce new chickens gradually and promote a balanced pecking order to reduce tension during dust bathing.
- Use Visual Barriers: If bullying persists despite other interventions, consider using temporary fencing or partitions to create visual barriers between chickens during dust bathing. This allows bullied chickens to avoid direct confrontation and reduces stress.
- Provide Distractions: Offer distractions such as hanging treats or toys near dust bathing areas to redirect chickens’ attention and reduce tension. Distraction techniques can help alleviate aggression and promote peaceful interactions during dust bathing.
- Promote a Calm Environment: Minimize stressors in the coop or free-range area during dust bathing time by keeping noise levels low and maintaining a calm environment. Avoid sudden changes in routine or environmental conditions that may disrupt chickens’ behavior.
- Monitor and Intervene: Continuously monitor your flock during dust bathing and be prepared to intervene promptly if bullying or aggressive behavior is observed. Separate aggressive individuals, provide distractions, and ensure that all chickens have access to a safe and comfortable dust bathing area.
How do I prevent my chickens from developing foot injuries?
Answer:
Preventing foot injuries in chickens involves implementing management practices aimed at providing a safe and comfortable environment that minimizes the risk of injury. Here are some strategies to prevent foot injuries in chickens:
- Provide Proper Flooring: Use appropriate flooring materials in the coop and run to prevent foot injuries. Avoid wire flooring or rough surfaces that can cause abrasions or foot sores. Opt for solid flooring with nonslip surfaces such as rubber mats, straw, or wood shavings.
- Maintain Cleanliness: Keep the coop and run clean and free of debris, sharp objects, and wet bedding that can cause foot injuries. Regularly remove soiled bedding, droppings, and any foreign objects that could potentially injure the chickens’ feet.
- Trim Overgrown Claws: Monitor your chickens’ claw length regularly and trim overgrown claws as needed to prevent discomfort and reduce the risk of injury. Use appropriate tools such as poultry nail clippers or scissors and be careful not to cut into the quick (blood vessel) of the claw.
- Provide Proper Perches: Offer perches of varying diameters and materials to promote foot health and exercise. Provide both wide and narrow perches at different heights to allow chickens to exercise their feet and prevent muscle fatigue or injury.
- Promote Exercise: Encourage chickens to engage in natural behaviors such as scratching, foraging, and dust bathing, which promote foot health and exercise. Provide ample space for chickens to move around and access to outdoor areas for free-ranging.
- Monitor for Bumblefoot: Regularly inspect your chickens’ feet for signs of bumblefoot, a common bacterial infection that affects the feet. Look for swollen, red, or scabbed areas on the bottom of the feet and treat any signs of infection promptly to prevent further complications.
- Prevent Overcrowding: Avoid overcrowding in the coop or run, as crowded conditions can lead to increased competition and aggression, resulting in foot injuries. Provide enough space for all chickens to move around comfortably and avoid stepping on each other.
- Maintain Optimal Nutrition: Ensure that your chickens receive a balanced diet with adequate levels of vitamins, minerals, and protein to support overall health, including foot health. Nutritional deficiencies can weaken the immune system and make chickens more susceptible to foot injuries and infections.
- Provide Proper Bedding: Use clean and dry bedding material in the coop and nesting boxes to provide cushioning and support for chickens’ feet. Avoid using materials that retain moisture, as damp bedding can increase the risk of foot infections and fungal growth.
- Seek Veterinary Care: If you notice any signs of foot injury or lameness in your chickens, seek prompt veterinary care. A veterinarian can assess the extent of the injury and recommend appropriate treatment to prevent further complications.
How do I discourage my chickens from eating contaminated food?
Answer:
Discouraging chickens from eating contaminated food involves implementing management practices aimed at ensuring food safety and minimizing the risk of exposure to harmful substances or pathogens. Here are some strategies to discourage chickens from eating contaminated food:
- Provide Fresh Feed: Offer fresh, clean feed to your chickens daily to reduce the risk of contamination. Avoid leaving feed out for extended periods, especially in hot or humid conditions where spoilage and bacterial growth can occur.
- Store Feed Properly: Store chicken feed in a cool, dry, and well-ventilated area to prevent mold growth and contamination by pests or rodents. Use sealed containers to protect feed from moisture, insects, and other contaminants.
- Monitor Feed Quality: Regularly inspect your chicken feed for signs of spoilage, mold, or contamination. Discard any feed that appears moldy, discolored, or has an unusual odor, as it may contain harmful toxins or pathogens.
- Use Clean Feeders: Clean feeders regularly to remove any accumulated debris, mold, or contaminants. Use mild detergent and water to wash feeders, and rinse thoroughly before refilling with fresh feed.
- Offer Feed in Controlled Portions: Provide feed to your chickens in controlled portions to minimize waste and reduce the risk of contamination. Avoid overfilling feeders, as excess feed can become soiled and attract pests or rodents.
- Avoid Feeding Spoiled or Contaminated Food: Do not feed your chickens spoiled or contaminated food, including kitchen scraps or leftovers that may contain harmful substances or pathogens. Stick to commercially prepared chicken feed or feed ingredients that are safe and appropriate for poultry consumption.
- Keep Feeders Elevated: Place feeders in elevated locations to prevent contamination from droppings, dirt, or other debris on the ground. Use raised platforms or hang feeders from a height to discourage chickens from scratching or soiling the feed.
- Rotate Feeding Locations: Rotate feeding locations regularly to prevent the buildup of droppings and contaminants in one area. Move feeders to clean, dry spots to reduce the risk of contamination and promote cleanliness.
- Provide Access to Clean Water: Ensure that your chickens have access to clean, fresh water at all times to support digestion and overall health. Contaminated water can also contribute to the spread of diseases, so regularly clean and refill waterers to prevent contamination.
- Monitor Chicken Health: Keep an eye on your chickens’ health and behavior for any signs of illness or digestive problems. If you suspect that your chickens have ingested contaminated food, monitor them closely and seek veterinary care if necessary.
How do I prevent my chickens from developing cannibalistic behavior during confinement?
Answer:
Preventing cannibalistic behavior in confined chickens involves implementing management practices aimed at reducing stress, promoting social harmony, and providing a safe and enriched environment. Cannibalism often occurs due to stress, overcrowding, boredom, or nutritional deficiencies. Here are some strategies to prevent cannibalism in confined chickens:
- Provide Sufficient Space: Ensure that your chickens have enough space to move around comfortably and engage in natural behaviors. Overcrowding can increase stress and aggression, leading to cannibalistic behavior. Provide ample space both indoors and outdoors, and avoid overcrowding in the coop or run.
- Monitor Social Dynamics: Regularly observe the social interactions within your flock and intervene to prevent bullying or aggressive behaviors. Cannibalism can be triggered by social stress, so pay close attention to the behavior of individual chickens and address any conflicts or dominance issues.
- Limit Aggressive Breeds: Avoid keeping aggressive chicken breeds or individuals known for cannibalistic tendencies, especially in confined spaces. Choose breeds known for their docile temperament and compatibility with confinement conditions.
- Provide Environmental Enrichment: Offer distractions and enrichment activities to keep chickens mentally stimulated and reduce boredom. Provide perches, dust bathing areas, hanging treats, and toys to encourage natural behaviors and prevent aggression.
- Provide Proper Nutrition: Ensure that your chickens receive a balanced diet with adequate levels of protein, vitamins, and minerals. Nutritional deficiencies can contribute to cannibalistic behavior, so provide high-quality feed appropriate for your chickens’ age and stage of development.
- Minimize Stressors: Identify and minimize stressors in the environment that may trigger or exacerbate cannibalism. Avoid sudden changes in routine, loud noises, predator threats, and other stress-inducing factors that can disrupt the flock dynamics.
- Trim Beaks: Consider beak trimming as a last resort to prevent severe cannibalism. Beak trimming reduces the severity of injuries caused by pecking but should only be performed by experienced individuals using appropriate equipment and techniques.
- Provide Access to Clean Water: Ensure that your chickens have access to clean, fresh water at all times to support hydration and overall health. Dehydration can exacerbate stress and increase the risk of cannibalistic behavior.
- Practice Controlled Lighting: Use controlled lighting to simulate natural day-night cycles and promote healthy sleep patterns. Avoid extended periods of artificial light, as this can disrupt chickens’ circadian rhythms and increase stress levels.
- Seek Veterinary Advice: If you observe cannibalistic behavior in your flock despite implementing preventive measures, seek veterinary advice and assistance. A veterinarian can help diagnose underlying health issues or behavioral problems and recommend appropriate treatment or management strategies.
How do I prevent my chickens from developing aggressive behavior during mating?
Answer:
Preventing aggressive behavior during mating in chickens involves creating a conducive environment that minimizes stress, reduces competition, and promotes social harmony within the flock. Aggressive mating behavior can occur due to dominance struggles, overcrowding, hormonal imbalances, or inadequate mating opportunities. Here are some strategies to prevent aggression during mating:
- Provide Sufficient Space: Ensure that your chickens have enough space to move around comfortably and engage in natural behaviors, including mating. Overcrowding can increase stress and aggression, so provide ample space both indoors and outdoors.
- Maintain a Balanced Flock: Monitor the social dynamics within your flock and address any dominance issues or hierarchy disputes. Introduce new chickens gradually and promote a balanced pecking order to reduce tension and aggression during mating.
- Offer Multiple Roosters: If you keep multiple roosters, provide enough hens for each rooster to mate with to reduce competition and aggression. Avoid keeping too many roosters in relation to the number of hens, as this can lead to heightened aggression and mating-related conflicts.
- Monitor Mating Behavior: Regularly observe mating behavior within your flock and intervene if aggressive or excessive mating occurs. Watch for signs of distress or injury in hens, such as feather loss, wounds, or stress-related behaviors.
- Provide Hiding Places: Offer hiding places or shelters within the coop or run where hens can escape from aggressive roosters if needed. Provide hiding spots such as bushes, tall grass, or coop furniture to give hens a refuge from aggressive advances.
- Use Larger Flocks: Consider keeping larger flocks of chickens to dilute aggression and provide more mating opportunities for roosters. In larger flocks, mating behavior is often distributed more evenly, reducing the likelihood of aggression directed towards individual hens.
- Provide Environmental Enrichment: Offer distractions and enrichment activities to keep chickens mentally stimulated and reduce boredom. Provide perches, dust bathing areas, hanging treats, and toys to encourage natural behaviors and reduce stress-related aggression.
- Controlled Lighting: Use controlled lighting to simulate natural day-night cycles and regulate mating behavior. Avoid prolonged periods of artificial light, as this can disrupt chickens’ hormonal balance and increase aggression.
- Seek Veterinary Advice: If you observe persistent aggression during mating or signs of injury in your flock, seek veterinary advice and assistance. A veterinarian can help diagnose underlying health issues or behavioral problems and recommend appropriate treatment or management strategies.
- Consider Alternative Breeding Methods: If aggression during mating becomes a persistent issue, consider alternative breeding methods such as artificial insemination or keeping only one rooster with the flock. These methods can help reduce competition and aggression among roosters while still allowing for breeding.
How do I manage bullying among chickens during foraging?
Answer:
Managing bullying among chickens during foraging involves creating a harmonious environment where all chickens can engage in natural behaviors without fear of harassment or aggression. Foraging is an essential behavior for chickens to obtain food and engage in natural activities, and bullying during foraging can lead to stress and other behavioral issues. Here are some strategies to manage bullying during foraging:
- Provide Multiple Foraging Areas: Ensure that you have enough foraging areas for all chickens to access comfortably. Scatter food and treats in multiple locations throughout the coop or free-range area to prevent overcrowding and competition.
- Use Distraction Techniques: Offer distractions such as hanging treats or toys near foraging areas to redirect chickens’ attention and reduce tension. Distraction techniques can help alleviate aggression and promote peaceful interactions during foraging.
- Monitor Social Dynamics: Regularly observe the social interactions within your flock during foraging and intervene if bullying or aggressive behavior is observed. Pay attention to body language, vocalizations, and any signs of distress among chickens.
- Provide Environmental Enrichment: Offer distractions and enrichment activities near foraging areas to keep chickens mentally stimulated and physically active. Perches, dust bathing areas, hanging treats, and toys can help prevent boredom and reduce stress-related aggression.
- Ensure Adequate Resources: Ensure that there is enough food, water, and space for all chickens to meet their needs during foraging. Competition for resources can lead to bullying behavior, so provide ample supplies to prevent conflicts.
- Promote a Balanced Flock: Monitor the social hierarchy within your flock and address any dominance issues that may contribute to bullying behavior. Introduce new chickens gradually and promote a balanced pecking order to reduce tension during foraging.
- Use Visual Barriers: If bullying persists despite other interventions, consider using temporary fencing or partitions to create visual barriers between chickens during foraging. This allows bullied chickens to avoid direct confrontation and reduces stress.
- Maintain Optimal Nutrition: Ensure that your chickens receive a balanced diet with adequate levels of protein, vitamins, and minerals to support overall health and reduce stress. Proper nutrition helps strengthen the immune system and promotes social harmony within the flock.
- Minimize Stressors: Identify and minimize stressors in the environment that may trigger or exacerbate bullying behavior. Avoid sudden changes in routine, loud noises, predator threats, and other stress-inducing factors that can disrupt the flock dynamics.
- Seek Veterinary Advice: If you observe persistent bullying behavior during foraging or signs of injury in your flock, seek veterinary advice and assistance. A veterinarian can help diagnose underlying health issues or behavioral problems and recommend appropriate treatment or management strategies.
How do I discourage my chickens from eating toxic insects?
Answer:
Discouraging chickens from eating toxic insects involves implementing management practices aimed at preventing access to harmful insects and promoting alternative food sources. Here are some strategies to discourage chickens from eating toxic insects:
- Identify and Remove Toxic Insects: Familiarize yourself with common toxic insects in your area and take steps to eliminate them from your chicken’s environment. Remove or treat areas where toxic insects may be found, such as spraying insecticides or removing potential breeding sites.
- Provide Nutritious Feed: Ensure that your chickens have access to a balanced diet with a variety of grains, seeds, fruits, and vegetables. Providing a diverse range of nutritious foods can help satisfy their appetite and reduce the likelihood of seeking out toxic insects.
- Offer Commercial Feed: Supplement your chicken’s diet with commercial poultry feed formulated to meet their nutritional needs. High-quality feed provides essential nutrients and reduces the likelihood of chickens seeking out alternative food sources like toxic insects.
- Monitor Free-Range Areas: If your chickens are free-range, monitor their access to outdoor areas and remove or fence off areas where toxic insects are present. Regularly inspect free-range areas for signs of toxic insects and take steps to eliminate them from the environment.
- Provide Alternative Foraging Options: Offer alternative foraging options such as grass, weeds, and leafy greens that are safe for chickens to consume. Creating a diverse foraging environment can help satisfy their natural instincts and reduce the temptation to eat toxic insects.
- Supervise Chickens: Keep a close eye on your chickens when they are foraging and intervene if you observe them eating toxic insects. Redirect their attention to safer food sources and discourage them from consuming harmful insects.
- Use Natural Deterrents: Consider using natural deterrents such as aromatic herbs or plants that repel insects to discourage toxic insects from entering your chicken’s environment. Planting herbs such as mint, lavender, or marigold around the chicken coop or free-range area may help deter insects.
- Provide Clean Water: Ensure that your chickens have access to clean, fresh water at all times to encourage proper hydration and reduce the likelihood of seeking out alternative sources of moisture, such as toxic insects.
- Educate Yourself: Educate yourself about the types of toxic insects in your area and their appearance to better identify and remove them from your chicken’s environment. Consult with local experts or extension offices for guidance on managing toxic insects safely.
- Seek Veterinary Advice: If you suspect that your chickens have ingested toxic insects or are exhibiting signs of illness after consuming insects, seek veterinary advice and assistance. A veterinarian can help diagnose and treat any health issues and provide guidance on preventing future exposure to toxic insects.
How do I prevent my chickens from developing feather loss?
Answer:
Preventing feather loss in chickens involves implementing management practices aimed at promoting overall health, minimizing stress, and addressing underlying causes of feather loss. Here are some strategies to prevent feather loss in chickens:
- Provide a Balanced Diet: Ensure that your chickens receive a balanced diet with adequate levels of protein, vitamins, and minerals to support feather growth and maintenance. Protein is particularly important for feather development, so offer high-quality poultry feed supplemented with protein sources such as mealworms, fish meal, or soybean meal.
- Reduce Stress: Minimize stressors in the chicken’s environment that can contribute to feather loss. Avoid overcrowding, excessive noise, predator threats, and sudden changes in routine. Provide a safe and comfortable environment where chickens can exhibit natural behaviors without fear or anxiety.
- Manage Social Dynamics: Monitor the social interactions within your flock and address any bullying or aggression that may lead to feather loss. Introduce new chickens gradually, provide enough space and resources for all chickens, and promote a balanced pecking order to reduce tension and aggression.
- Provide Dust Bathing Areas: Offer dust bathing areas filled with fine dust or sand where chickens can engage in natural grooming behaviors to maintain healthy feathers and skin. Dust bathing helps remove excess oils and debris from feathers and prevents feather loss caused by poor hygiene.
- Control Parasites: Implement a regular parasite control program to prevent infestations of external parasites such as mites and lice, which can contribute to feather loss and skin irritation. Use poultry-friendly parasite treatments and follow manufacturer instructions carefully.
- Maintain Cleanliness: Keep the chicken coop and nesting areas clean and dry to prevent bacterial and fungal infections that can affect feather health. Remove soiled bedding regularly, provide clean nesting material, and ensure adequate ventilation to reduce moisture buildup.
- Provide Enrichment: Offer environmental enrichment such as perches, hanging toys, and foraging opportunities to keep chickens mentally stimulated and physically active. Boredom and lack of stimulation can lead to feather picking and self-mutilation behaviors.
- Monitor Health: Regularly monitor your chickens’ overall health and behavior for any signs of illness or distress that may contribute to feather loss. Address any underlying health issues promptly and seek veterinary advice if necessary.
- Protect Against Weather Elements: Provide shelter from extreme weather conditions such as cold temperatures, wind, and rain, which can stress chickens and compromise feather health. Ensure that the coop is insulated, dry, and draft-free to protect chickens from environmental stressors.
- Seek Veterinary Advice: If feather loss persists despite preventive measures or is accompanied by other symptoms of illness, seek veterinary advice and assistance. A veterinarian can help diagnose underlying health issues or behavioral problems and recommend appropriate treatment or management strategies.
How do I discourage my chickens from developing abnormal behaviors?
Answer:
Discouraging abnormal behaviors in chickens involves implementing management practices aimed at promoting a healthy and enriching environment that meets their physical, social, and behavioral needs. Here are some strategies to discourage abnormal behaviors in chickens:
- Provide Adequate Space: Ensure that your chickens have enough space to move around comfortably, engage in natural behaviors, and establish social hierarchies. Overcrowding can lead to stress and abnormal behaviors, so provide ample space both indoors and outdoors.
- Promote Social Interaction: Encourage social interactions among chickens by providing opportunities for flock bonding and group activities. Avoid isolating chickens or keeping them in small groups, as social isolation can lead to abnormal behaviors such as feather picking and aggression.
- Offer Environmental Enrichment: Provide environmental enrichment such as perches, dust bathing areas, hanging toys, and foraging opportunities to keep chickens mentally stimulated and physically active. Enrichment activities help prevent boredom and reduce the likelihood of abnormal behaviors.
- Ensure Proper Nutrition: Offer a balanced diet with adequate levels of protein, vitamins, and minerals to support overall health and prevent nutritional deficiencies. Ensure access to fresh water, high-quality poultry feed, and supplemental treats to meet your chickens’ dietary needs.
- Monitor Health: Regularly monitor your chickens’ overall health and behavior for any signs of illness, injury, or distress that may contribute to abnormal behaviors. Address any underlying health issues promptly and seek veterinary advice if necessary.
- Manage Stress: Minimize stressors in the chicken’s environment that can contribute to abnormal behaviors. Avoid sudden changes in routine, loud noises, predator threats, and overcrowding. Provide a safe and comfortable environment where chickens can feel secure and relaxed.
- Control Parasites and Diseases: Implement a regular parasite control program and vaccination schedule to prevent infestations of external parasites and diseases that can affect chicken health and behavior. Use poultry-friendly parasite treatments and follow veterinary recommendations for disease prevention.
- Promote Natural Behaviors: Encourage chickens to engage in natural behaviors such as foraging, dust bathing, preening, and socializing. Provide opportunities for these activities through environmental enrichment and access to outdoor areas.
- Address Behavioral Issues Promptly: If you observe abnormal behaviors such as feather picking, aggression, or repetitive movements, intervene promptly to address the underlying causes. Identify triggers and implement strategies to prevent recurrence, such as environmental modifications or behavioral training.
- Seek Veterinary Advice: If abnormal behaviors persist despite preventive measures or are accompanied by other symptoms of illness or distress, seek veterinary advice and assistance. A veterinarian can help diagnose underlying health issues or behavioral problems and recommend appropriate treatment or management strategies.
YouTube Channel: Farming South Africa
Facebook Page: Farming Life
Back To Home Page: Farming South Africa
Post by Malcolm Heyns – Editror Farming South Africa