
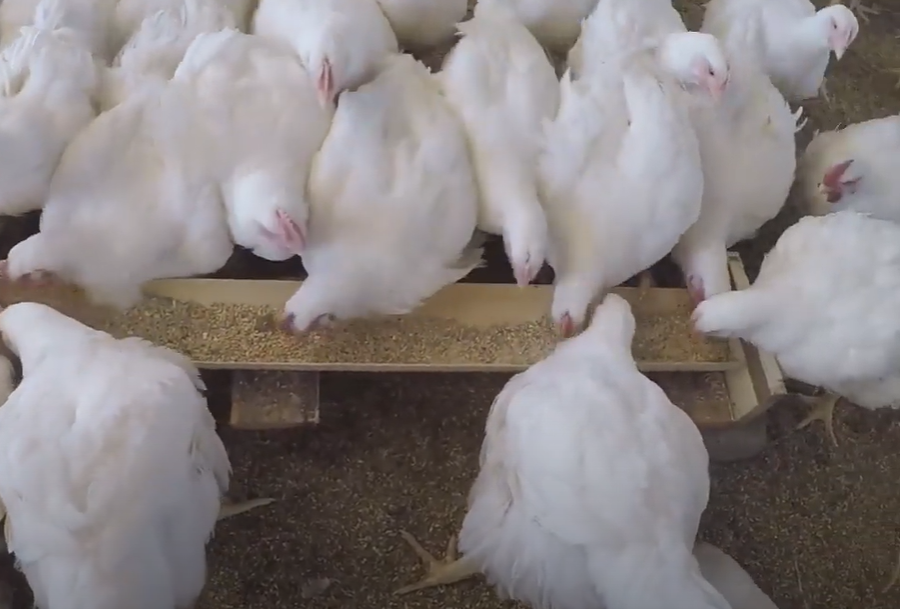
How to make a Chicken Feeder including video
How to Make a Chicken Feeder: A Complete Guide
If you’re raising chickens—whether a small backyard flock or a larger commercial operation—you already know that feeding is one of your biggest tasks. A well-designed chicken feeder does more than just hold feed: it reduces waste, protects feed from moisture and pests, and ensures your flock always has access to food.
On Farming South Africa, you can find a video demonstration (embedded on this page) showing exactly how to build a durable, low-waste feeder. Below is a detailed, step-by-step written guide with extra tips and reasoning behind each decision.
Let’s get started on How to make a Chicken Feeder
Farming can be very expensive especially when you start out as a beginner. In this article I will show you how I made my own chicken feeder and it works well. So I decided to share my idea on How to make a Chicken Feeder and truly hope that you will benefit from this video.
I did not plan this project and made it up as I went along. I got the idea when I saw an old drain pipe laying around. Then I started to look for old planks and was fortunate enough to get all the parts that I needed from a previous project.
You can off-course go out and buy the materials I used in this video to make a chicken feeder and it will still end up being cheaper, but if you are fortunate enough to recycle and use that material, why not?
Chicken feeders come in many different types, including no-waste, automatic, and trough feeders. Chicken feeders can be expensive, but you can save money by making your own chicken feeder. Make a simple feeder using buckets and PVC pipes, or create a trough feeder with different length pipes and an elbow pipe join
In this video I will guide you through on how I made my own chicken feeder. You do not have to follow it step by step, but the concept is good enough and you can feed a lot of chickens at the same time.

This project got me motivated to make more DIY projects including a chicken waterer that works with gravity. You will find that video on this website.
Please subscribe to my YouTube channel Farming South Africa
Why Build Your Own Chicken Feeder? The Benefits
Before jumping into how to build one, it’s worth understanding why a self-made feeder is valuable.
1. Cost savings
Commercial poultry feeders—even simple ones—can be pricey, especially if you need several. Building your own from locally available materials can reduce costs considerably.
2. Custom sizing & flexibility
You can size the feeder according to your flock size, design it to fit your coop or run layout, and make adjustments for growth or change in breed.
3. Less feed waste
A good feeder design minimizes spillage, scattering, and contamination by dust, litter or pests. That means more of your feed is consumed by your birds, not wasted.
4. Protection from moisture, pests, and spoilage
By covering feed or directing it downward from a hopper, you reduce exposure to rain, dampness, mould, rodents, and insects — all of which degrade feed quality.
5. Better feed hygiene
Feed stays cleaner and fresher when it’s stored in a closed or semi-closed feeding channel, reducing illness or spoilage.
6. Consistent feeding access
A well-made feeder ensures continuous, controlled access to feed, especially important in commercial flocks or automated systems.
7. Learning & self-reliance
Building your own fosters a deeper understanding of chicken behaviour, maintenance, and problem prevention — and you can repair or upgrade easily.
Because these advantages translate directly into better productivity, lower losses, and higher profit margins, building a high-quality feeder is one of the best investments you can make in your poultry setup.
Key Design Principles & Considerations
Before cutting wood or PVC, consider these principles:
- Capacity vs. access: The feeder must hold enough feed for your flock over a certain period (e.g. overnight or a few days), but not so much that feed at the bottom goes stale or stale feed remains too long.
- Feed flow: Gravity-fed hoppers, tubes, or channels help replenishing feed without manual refilling every few hours.
- Spill reduction: Use lips, ledges, slatted trays, or PVC elbows to prevent birds from scratching feed out.
- Height & access: The feed area should be at the correct height for your birds (so they can reach comfortably but not step in it). Adjustable height is ideal.
- Material durability: Use weather-resistant, non-toxic, easy-to-clean materials like food-grade plastic, treated wood (safe for poultry), PVC, or metal.
- Ease of cleaning & refill: Design it so you can open it easily, wash or disinfect, and refill without disturbing birds too much.
- Ventilation & drainage: Prevent condensation and moisture buildup that causes mould.
- Protection from pests: Use covers, screens, or barriers to keep out rodents, wild birds, insects.
Materials & Tools
Here’s a sample list (customize based on your design):
Materials:
- PVC pipes or food-safe plastic tubing
- PVC elbows, tees or connectors
- A plastic tub, metal sheet or wooden box for the hopper
- Slotted or perforated tray / slats
- Wooden boards or treated timber
- Screws, bolts, nails
- Mesh or hardware cloth (for screens)
- Hinges and latches (if you want a lid)
- Silicone sealant (non-toxic)
- Paint (optional, non-toxic)
- Rubber or plastic feet (optional)
Tools:
- Saw (hand or power saw)
- Drill & bits
- Screwdriver / driver
- Measuring tape / square
- Pencil / marker
- Sandpaper or file
- Clamps (helpful)
- Utility knife
Step-by-Step: Building a Basic Gravity-Fed Feeder
Below is a general method. You may adapt dimensions to suit your flock size.
Step 1: Plan & measure
Decide how many birds you have, how many days you want feed to last, and what daily feed consumption is. Calculate required hopper volume. Sketch the feeder with dimensions and angles (e.g. 45° feeder walls to help flow).
Step 2: Cut hopper walls & base
Cut the plastic tub, wood, or sheet pieces for the hopper’s sides and base. You’ll want sloping walls so feed naturally funnels downward.
Step 3: Assemble hopper
Join the walls and base using screws, bolts, or adhesive, ensuring joints are sealed enough to prevent feed leaking through. Use brackets if needed.
Step 4: Outlet / feed channel
Create the feed outlet at the base of the hopper. This might be a slot or a narrower opening. Attach a PVC pipe, chute, or a slotted trough to guide feed to where the birds access it.
Step 5: Spill guard / lip
Add a lip or edge in front of the feeding trough to prevent birds from pecking feed sideways and spilling it. You may also add a slatted floor or grill over the trough to limit scratching.
Step 6: Support & legs
Mount the feeder on legs or stand so it’s off the ground. Ensuring some clearance reduces vermin access and contamination. Make the height adjustable if possible so birds of different sizes can feed comfortably.
Step 7: Lid / cover
Add a hinged or removable cover to the hopper to keep rain, pests, and debris out. Make sure it can open easily for refills.
Step 8: Finishing touches
Sand rough edges, install mesh screens or covers over openings, seal joints, and optionally paint with non-toxic paint. Test that feed flows smoothly and doesn’t get stuck.
Step 9: Initial trial & adjustment
Fill with feed, observe how the birds feed, monitor for clogging or excessive spillage, and adjust lip height, slope angle, or tray width accordingly.
Variations & Advanced Options
Here are a few popular alternative designs and enhancements you might consider:
1. Tub feeder with PVC elbows
This design uses a large plastic tub or container, with PVC elbows at the base to control feed outflow. The result is less wastage and cleaner feed delivery. YouTube
2. Automatic / timed feeders
You can incorporate a motor, timer, or an automatic dispensing mechanism to deliver feed at scheduled intervals. This is especially useful if you can’t be there at every feeding time. YouTube+1
3. Multi-port / long troughs
For larger flocks, build a long base trough and feed from one central hopper. Use angled walls or flow aids to keep feed evenly distributed.
4. Elevated gravity feeders
Mount feeders above a slatted floor so feed drops through onto mesh and birds access underneath. This reduces contamination from droppings and litter.
5. Modular / expandable feeders
Design with interchangeable panels so you can expand capacity or change outlet type later.
Tips for Best Results
- Slope angle matters: Walls that are too shallow may cause bridging (feed clogs), while overly steep walls may dump too quickly. A 45° angle is a good starting point.
- Smooth interior surfaces: Rough surfaces slow feed flow; sand or round edges to help feed slide.
- Avoid static charge / sticking feed: Some fine feed may cling to plastic; using anti-static or a slightly textured surface can help.
- Regular cleaning: Empty and scrub periodically to prevent mould or pests.
- Watch bird behaviour: If they scatter feed, reduce feeding lip length or adjust height.
- Use mesh or bars over outlet: Prevent chicks or pests from clogging feed or crawling in.
- Drainage & ventilation: In humid or wet climates, ensure vents or small drainage holes so moisture doesn’t build up.
- Test before large fill: Try with a small load first to see how feed flows and adjust before filling full capacity.
How This Feeder Adds Value to Your Poultry Project
When you implement a properly designed feeder:
- Reduced feed losses → more feed consumed yields better feed conversion ratios.
- Lower repair & replacement costs → because you built it, you understand it and can fix or upgrade.
- Better bird health → cleaner feed and less spoilage means fewer health issues.
- Time savings → less time spent refilling, cleaning or picking up spilled feed.
- Enhanced scalability → once you master one design, you can multiply or tweak it for larger flocks.
These benefits compound over time to improve your bottom line and reduce risk.
Related Post: How to make a Gravity Fed Chicken Waterer
Farming South Africa
YouTube Channel: Farming South Africa
Facebook Page: Farming Life
Back To Home Page: Farming South Africa
Keywords related to this post:
Chicken Farming South Africa
Farming South Africa
DIY Farming Projects
Chicken Projects
Great idea, will definitely implement it. Just curious about the chicken breeds that appear in the video. Are they broilers? If they are they seem to have their bodies covered nicely with feathers. If not, what breed are they? and are they mix purpose?
They are broilers. We add barley to their feed to reduce cost and to get them to grow healthier. We have been using this method for two years and they are still tender and grow at the same paste as chickens without getting extra barley
Like!! I blog frequently and I really thank you for your content. The article has truly peaked my interest.